
Installation
Download
Downloading Moonte Theme Files From ThemeForest
There are two ways you can install the Moonte theme. You can choose to install it via FTP, which is what will be outlined in this article, or via WordPress. Before you can install Moonte, please download the necessary theme files from ThemeForest first.
If this is your first time downloading the theme from ThemeForest, we recommend downloading the Full Theme Package to receive additional files such as exported sliders, child theme, documentation. If you’ve already downloaded the Full Packages, then you can just use the WordPress Installable File.
Step 1 – Login to your ThemeForest account and navigate to your Downloads tab and then locate your Moonte theme purchase.
Step 2 – Click the Download button and choose to either download the Installable WordPress file only, which is just the WordPress installable file, or choose to download All Files & Documentation which is the full Moonte theme package.
Install Moonte Theme
1. Install via WordPress
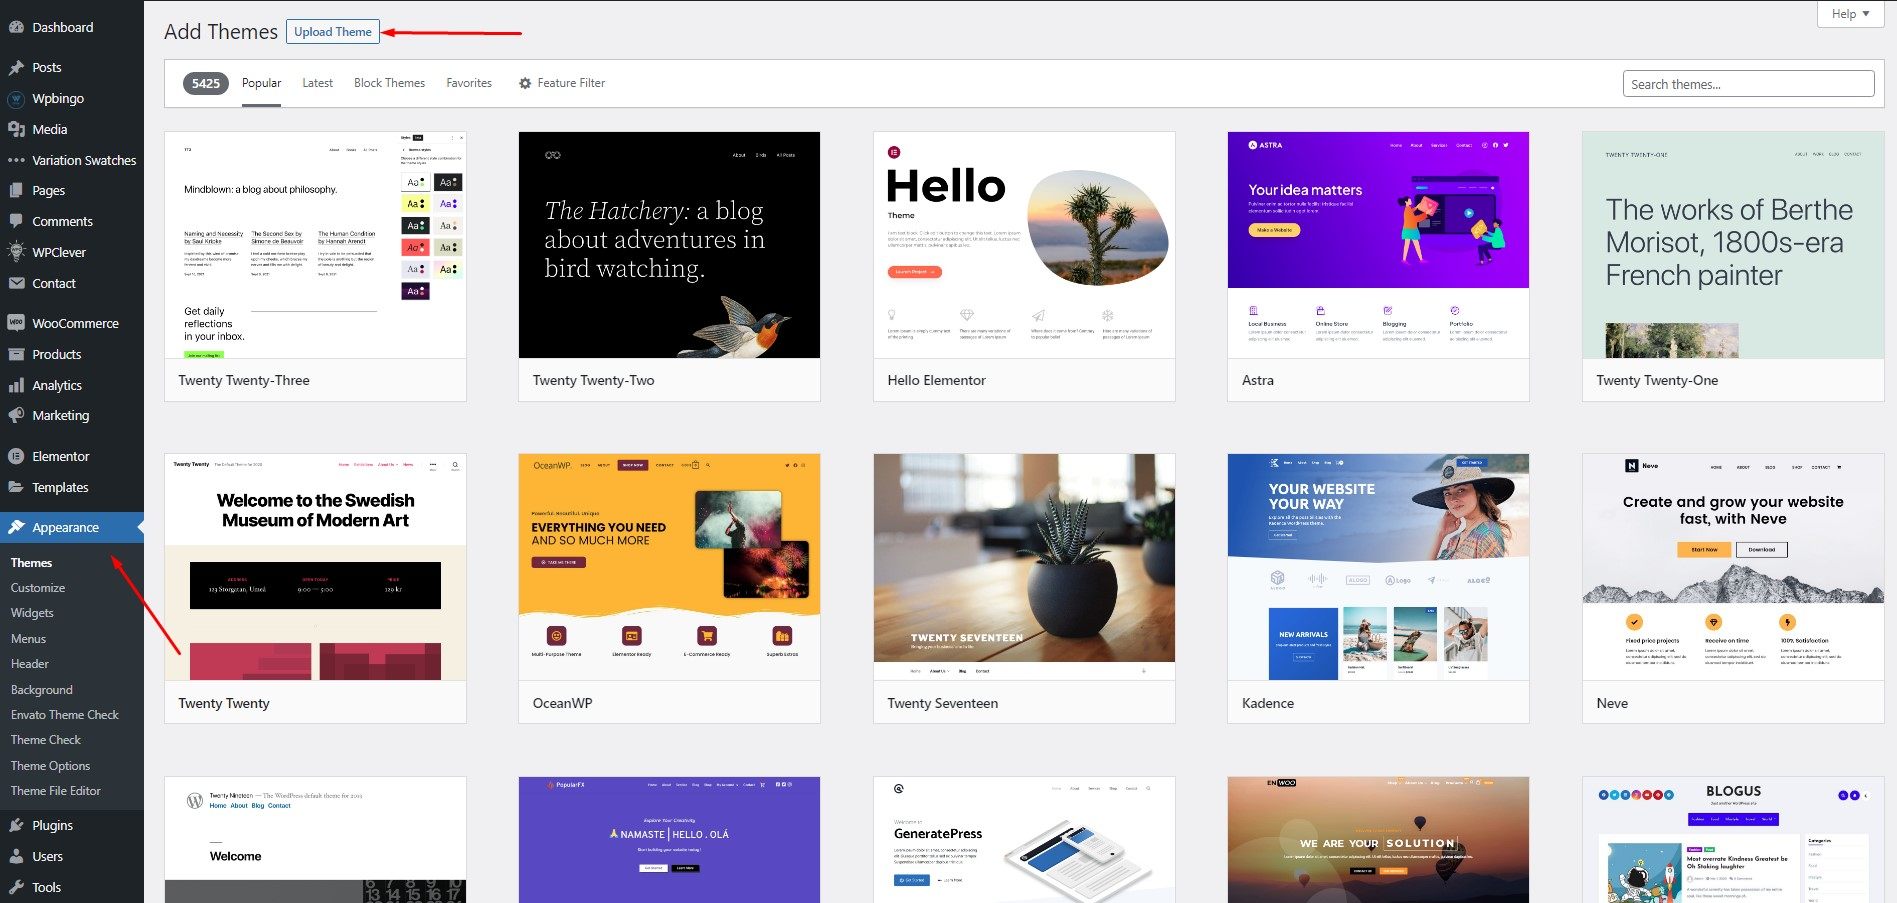
Log in into the admin area, navigate through Appearance > Themes > Add New > Upload Theme and select the .zip file you downloaded and finally click on Install Now
2. Install via FTP
If you get any fail when install theme by Wordpress install function, we recommend to use FTP.
Step 1 - If you have downloaded the Full Theme Package from ThemeForest, please unzip the package file to get the theme file moonte.zip. Unzip the moonte.zip file, you'll get a folder Moonte.
Step 2 - Use a FTP client like FileZilla and upload the extracted folder to wp-content/themes folder on your host
Step 3 - Log in to your WordPress Dashboard and navigate to Appearance > Themes and clicking the Activate button of the Moonte theme.
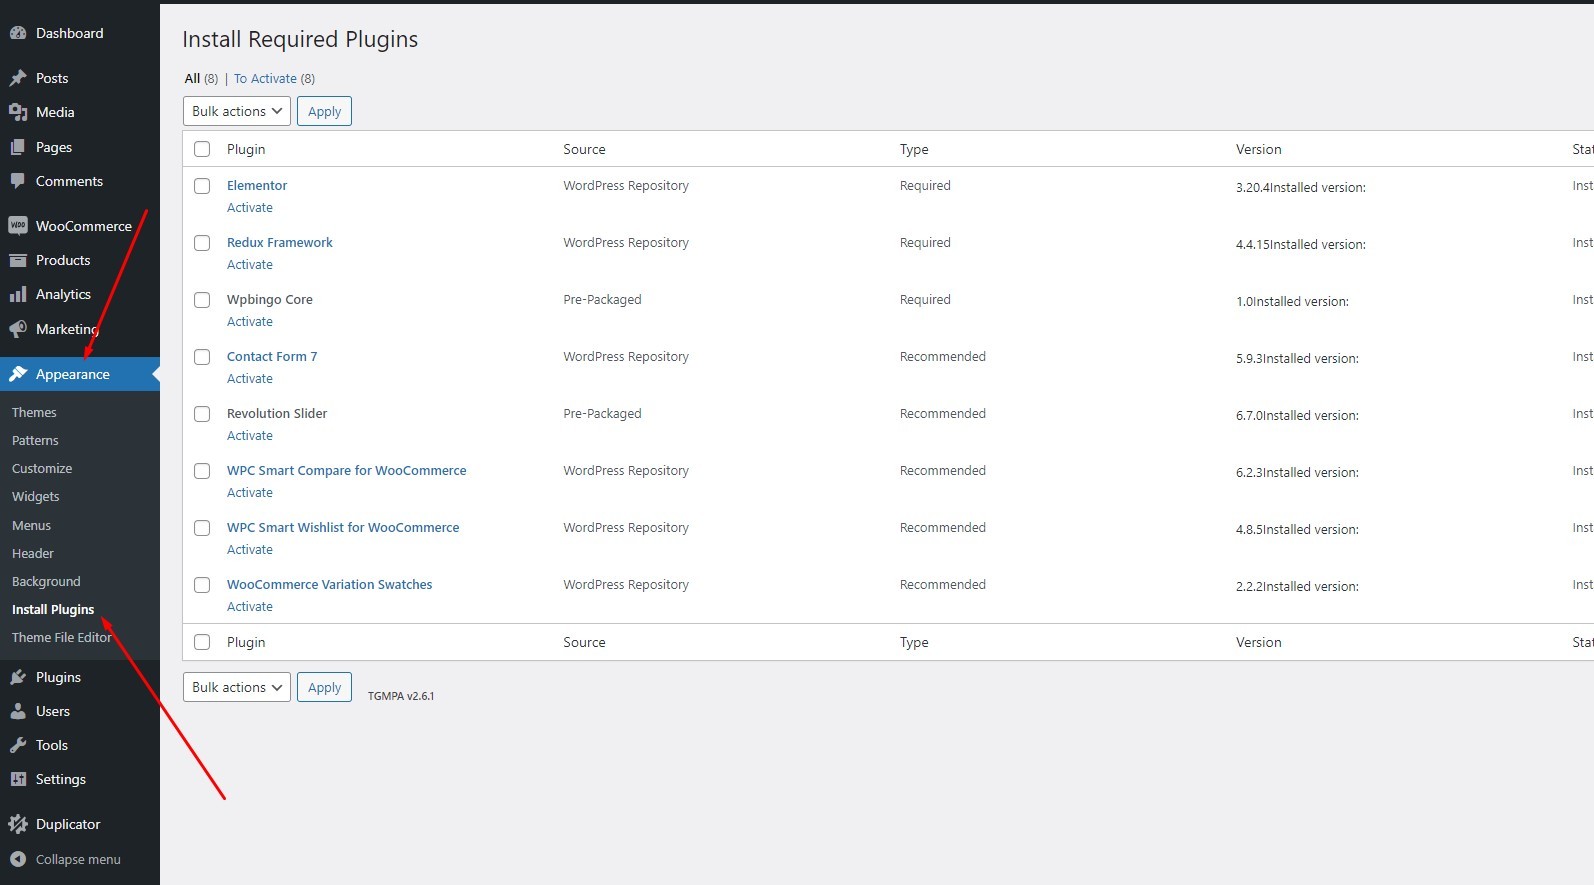
Install Plugins
Go to Appearance > Install Plugins
You will see the plugins that need to be installed
Import Demo Content
Before installing Demo Content, please install all required plugins, see the list of plugins on: Appearance > Install Plugins (if its not visible, then you have all the required plugins installed). There are 2 ways to import the demo content:
Theme Requirements
Minimum server configuration
- PHP version - 7.4 and higher
- MySQL version - 5.6 or higher
- memory_limit – 512M
- max_execution_time – 40000
- max_input_time – 6000
- upload_max_filesize – 40M
Recommended server configuration
- PHP version - 7.4 and higher
- MySQL version - 5.6 or higher
- memory_limit – 512M
- max_execution_time – 40000
- max_input_time – 6000
- upload_max_filesize – 40M
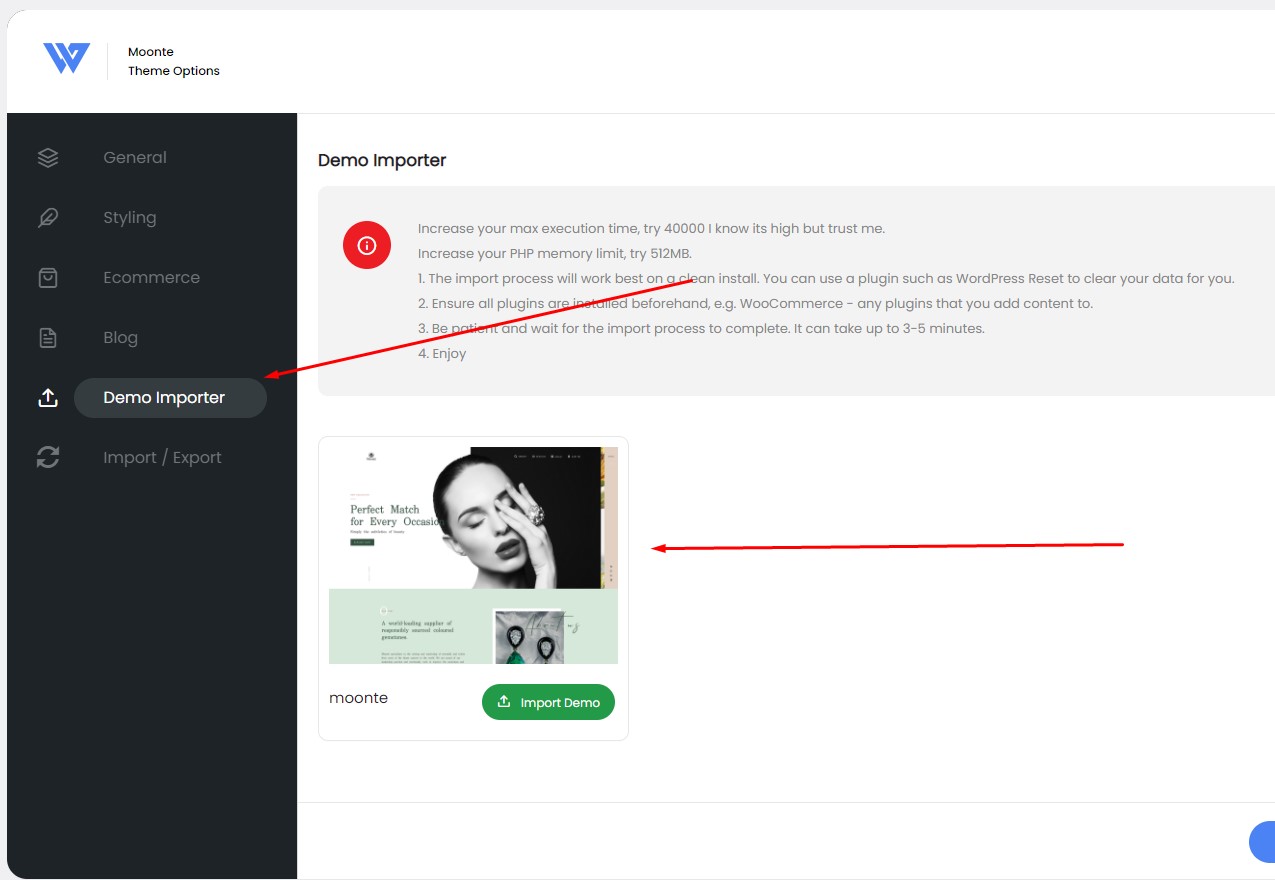
I. One-click Demo Import
You can quickly import all sample data in Wpbingo Framework > Import Demo Data.
When you access the Moonte Demo Content Importer, you’ll be presented with the option of 2 example sites to choose from. We provide options if you don't want to import full demo Choose the one you like and click 'import' button. It may take a few minutes to finish the process
II. Using WordPress Tool
1. Login to your WordPress admin (/wp-admin) and go to Tools > Import and choose the WordPress system from the list to import.
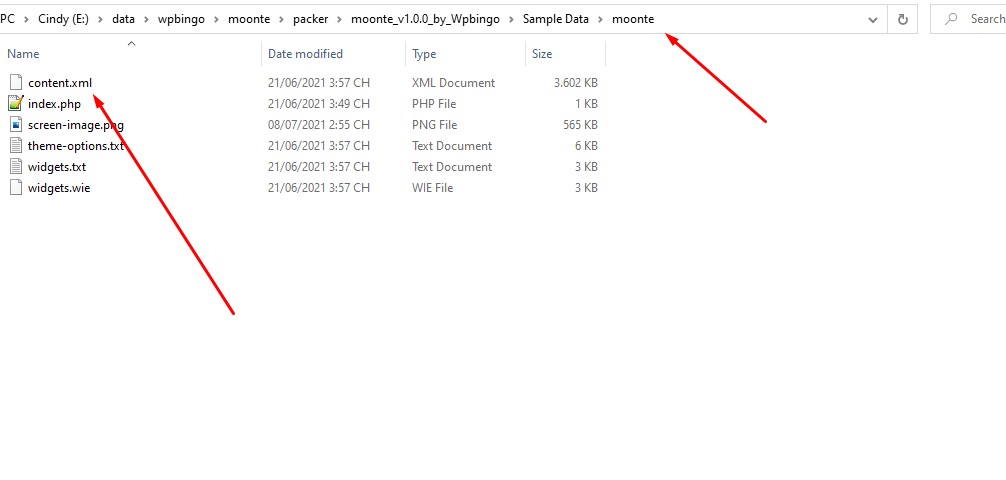
2. You will see a file chooser input, there you upload the latest version XML file that can be found on Sample Data/sample
3. Click Run & Import
Import Widgets
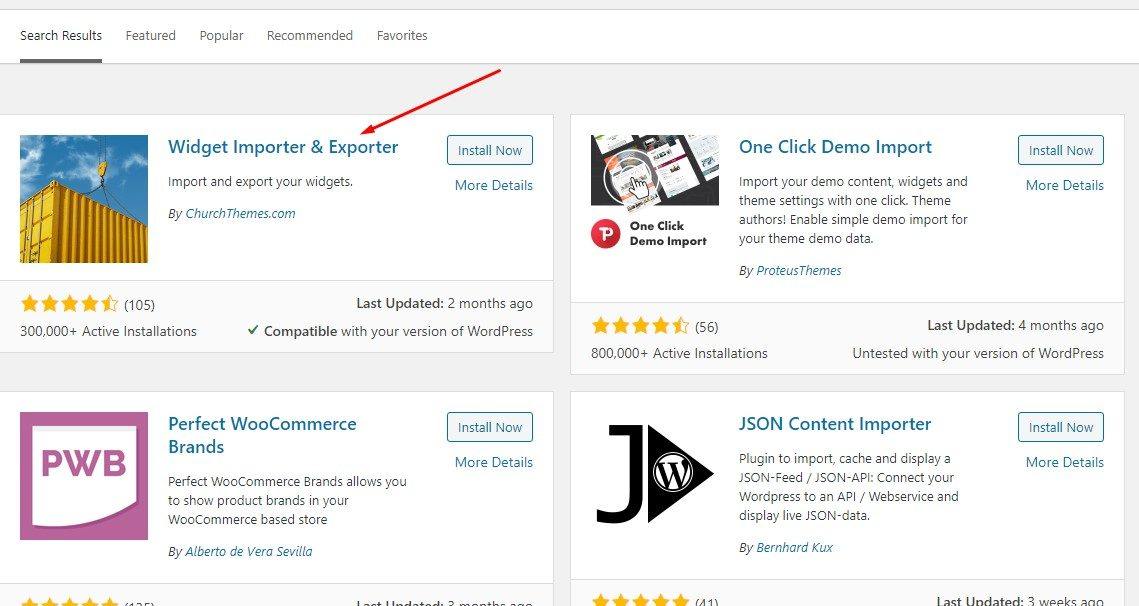
1. Please install the Widgets Importer & Exporter plugin
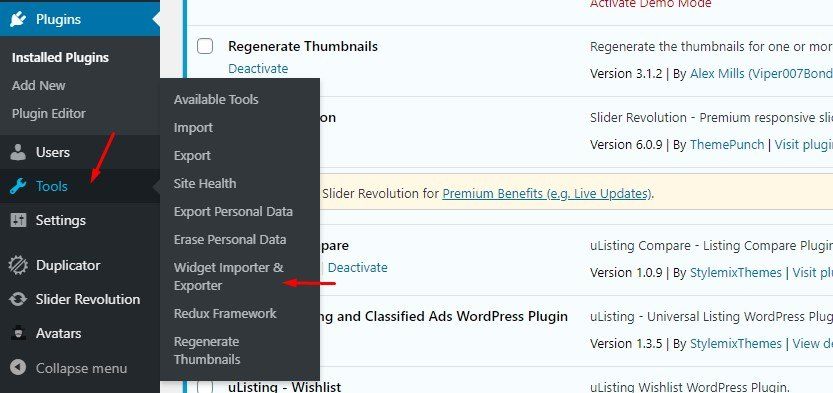
2. Access to the management of import & export widgets
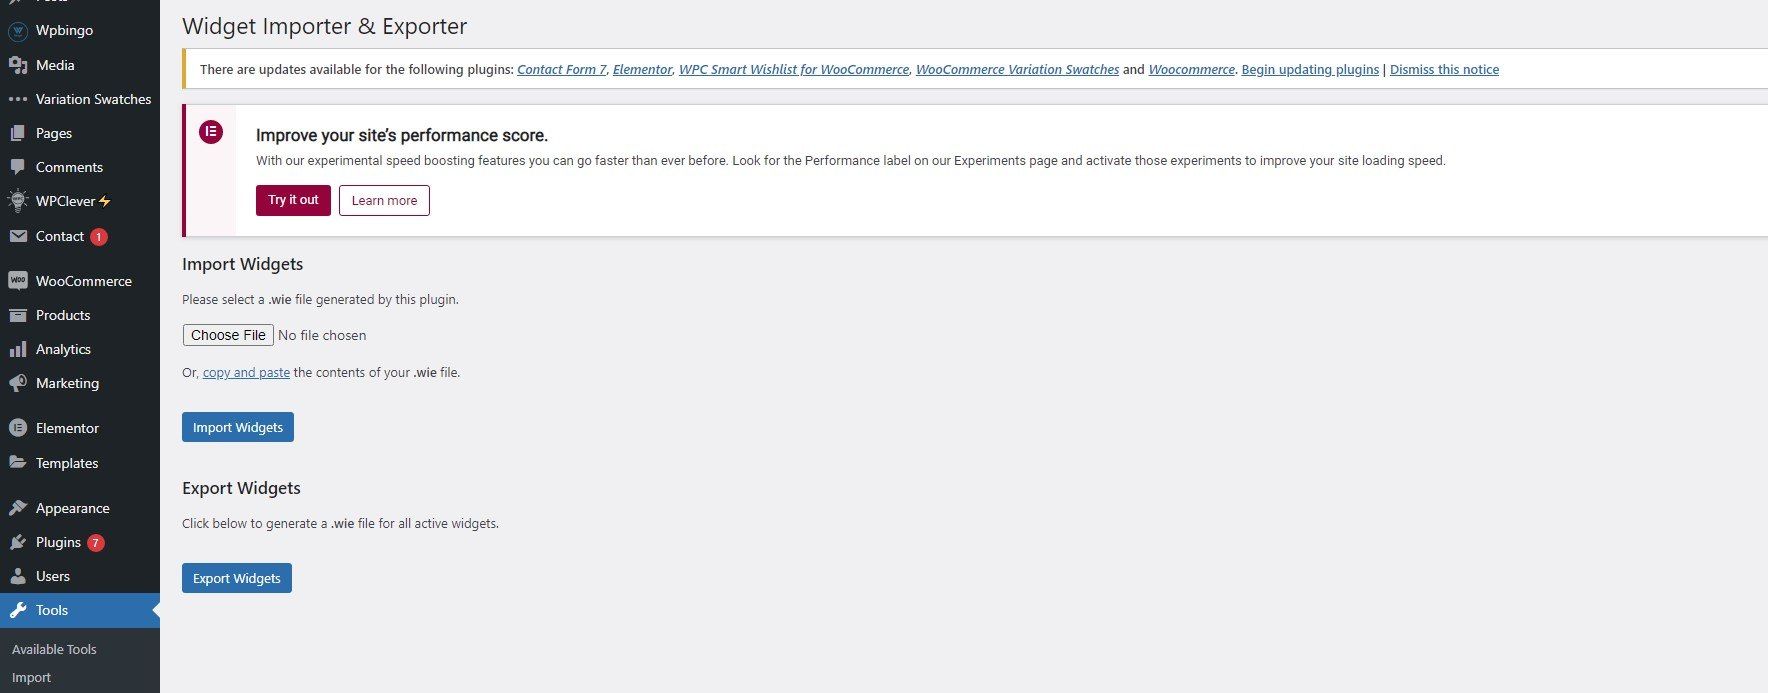
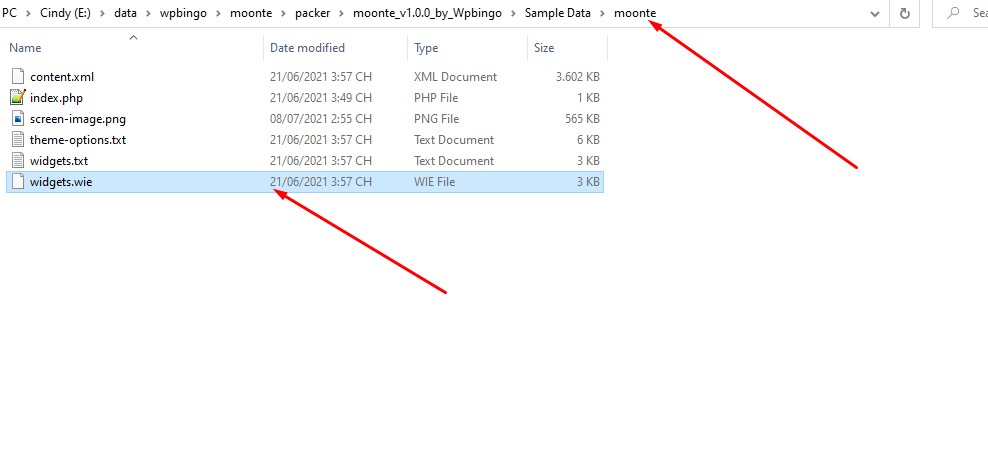
3. Select the widget.wie file from the sample directory
4. Click Import Widgets
Import Theme Options
1. Access to the management of import & export Theme Options

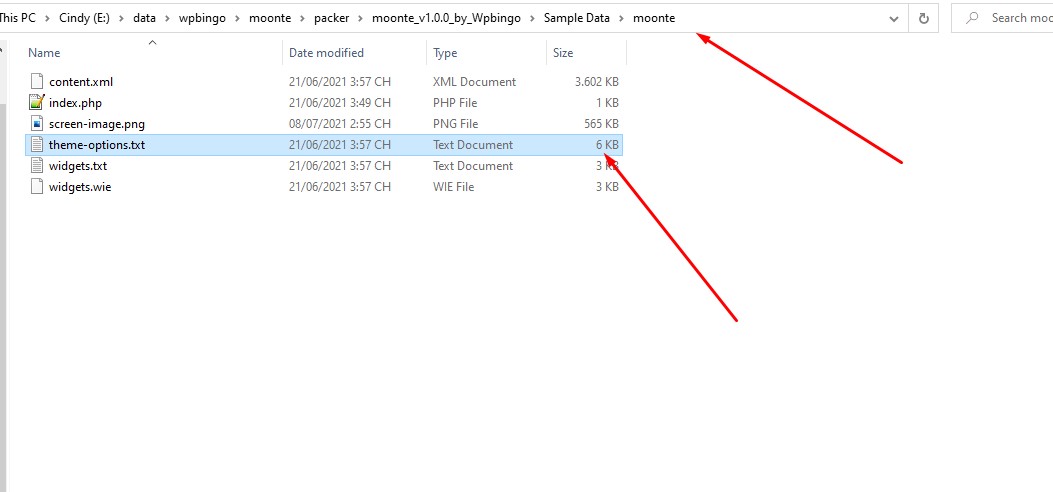
2. Select the theme-options.txt file from the sample directory
3. Click Import
Import Elementor Settings
1. Go to Elementor > tools. Then select Import a Template Kit
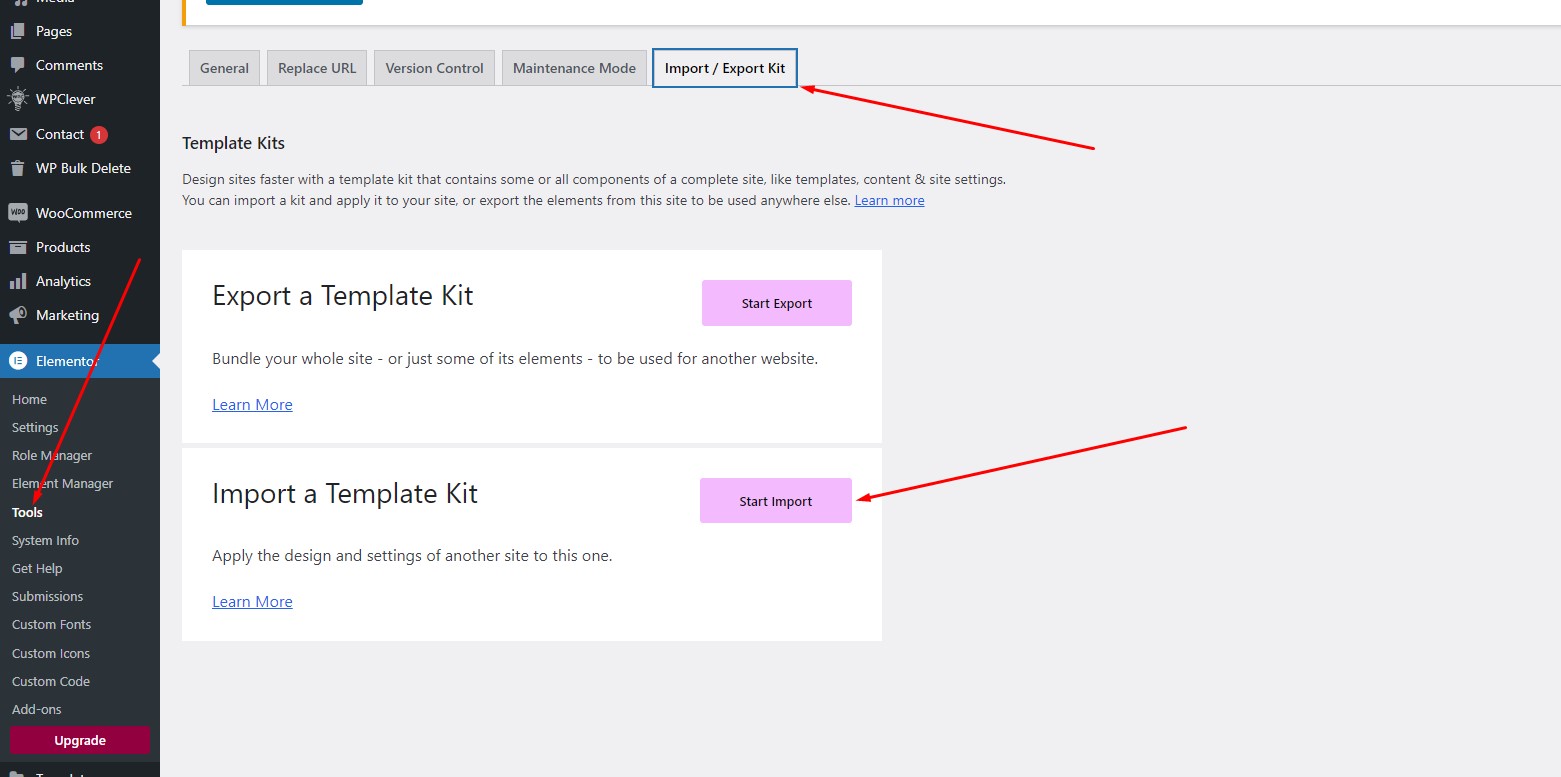
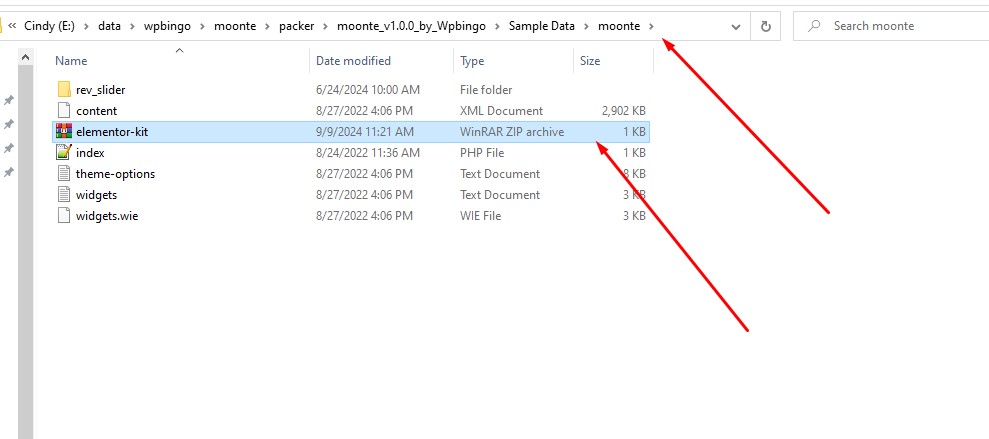
2. Select the elementor-kit.zip file from the sample directory
3. Click Import
Config Image Sizes
After finish installing required plugins, there some options of product image sizes you must config before importing the demo content.
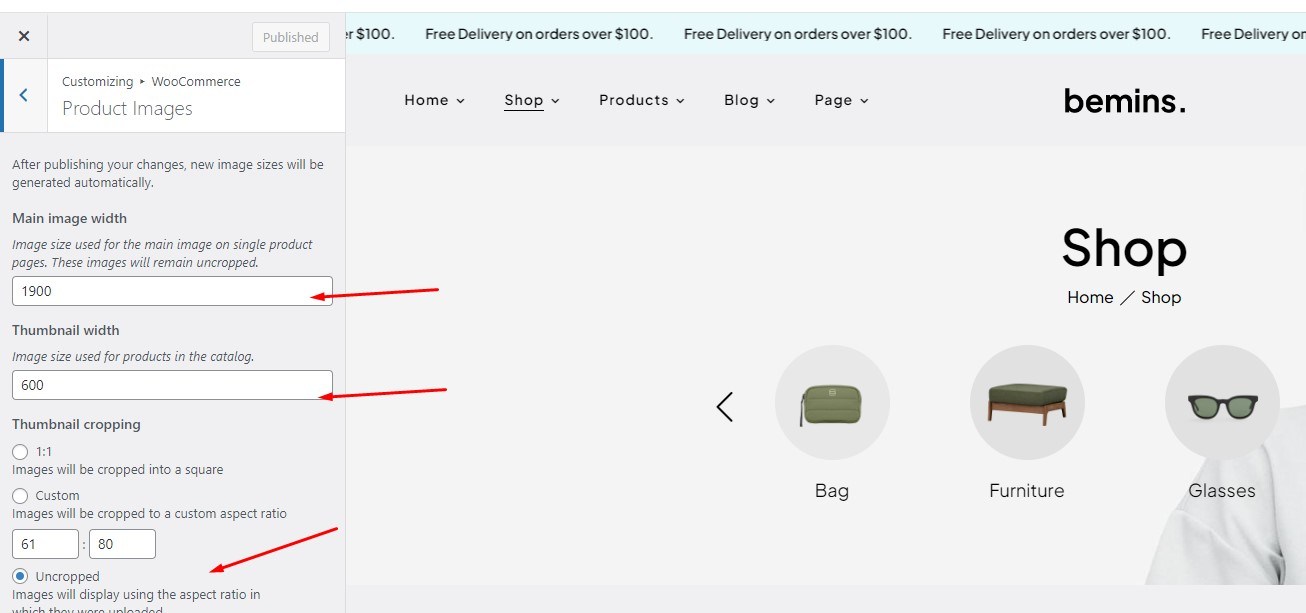
WooCommerce has settings for image sizes in Appearance > Customize > WooCommerce > Product Images.
- Main image width: 1000
- Thumbnail width: 600
- Thumbnail cropping: Uncropped
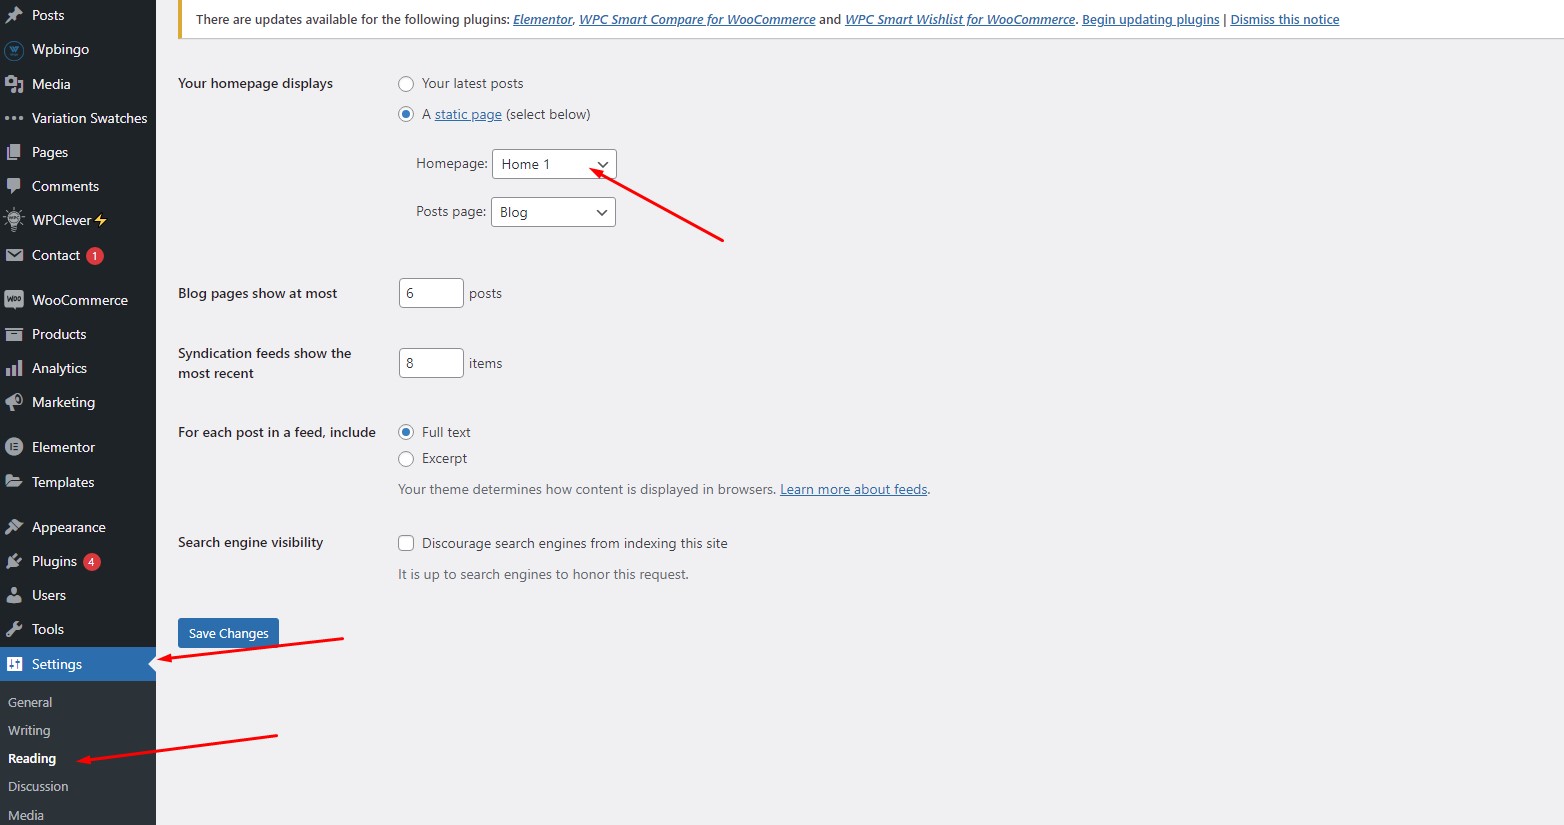
Config Home Page
Please visit Settings > Reading
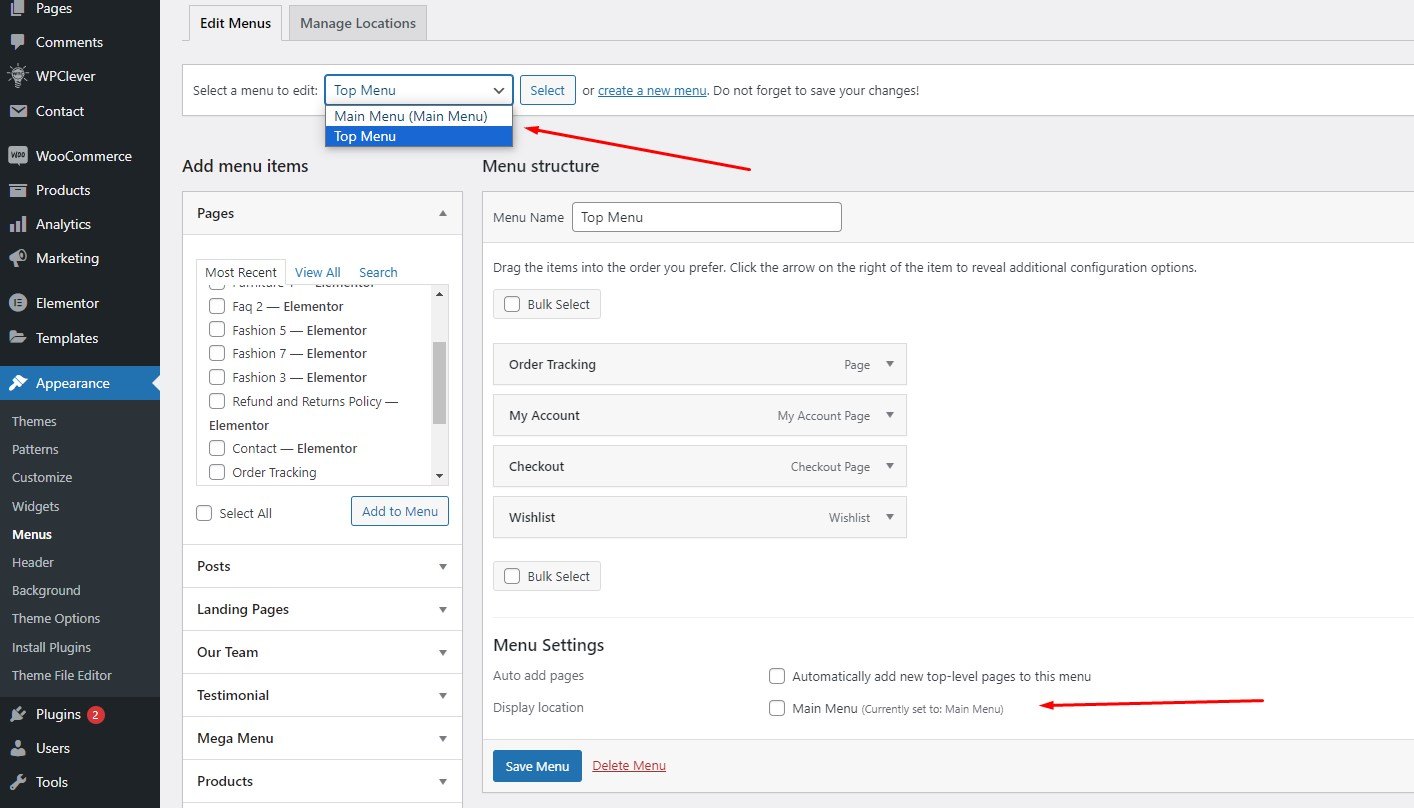
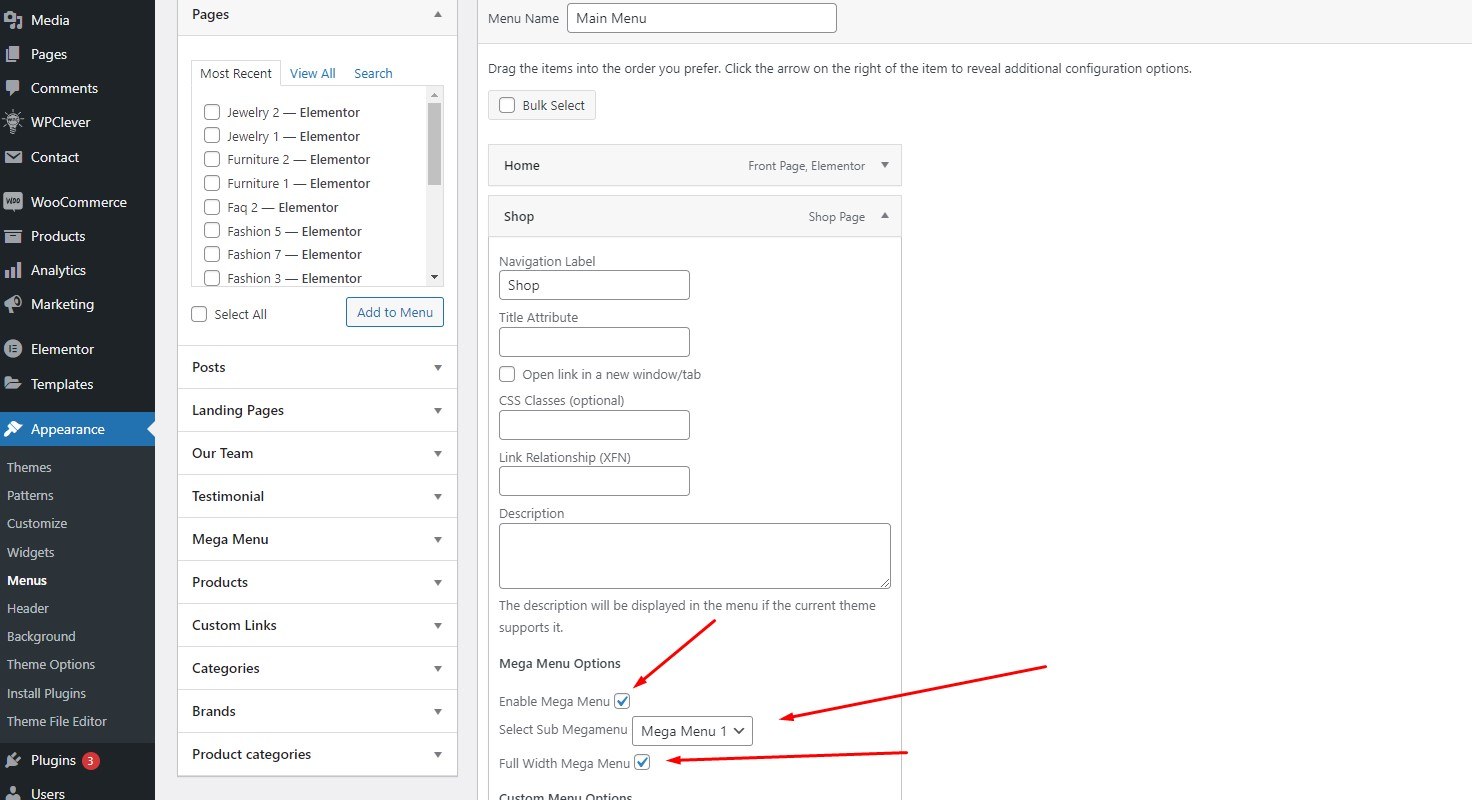
Config Menu
Please visit Appearance > Menu
You need to configure the menu with its respective functions
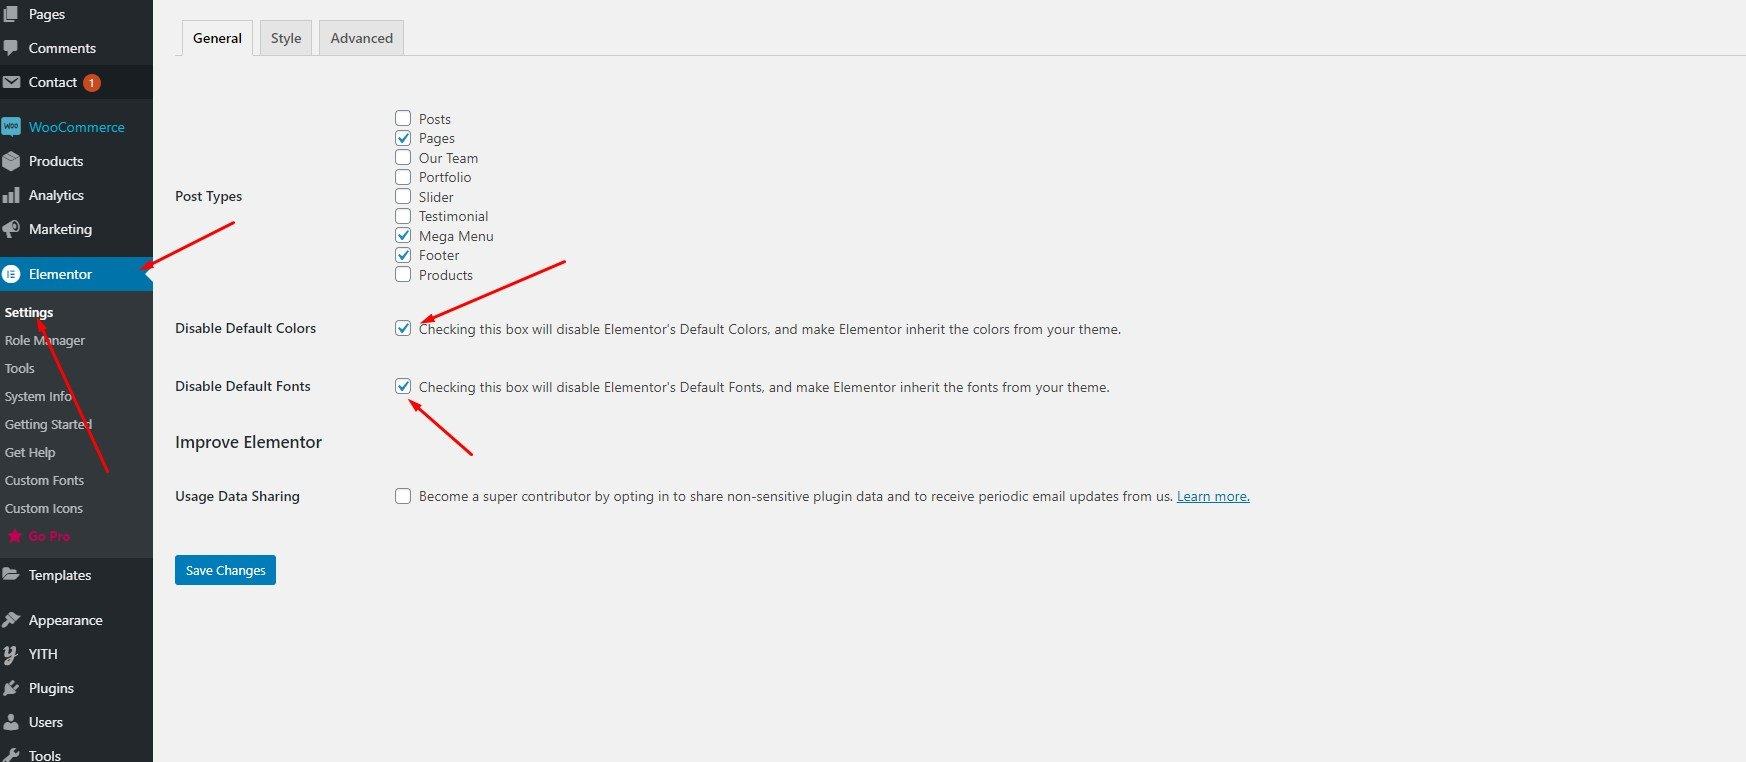
Elementor Config
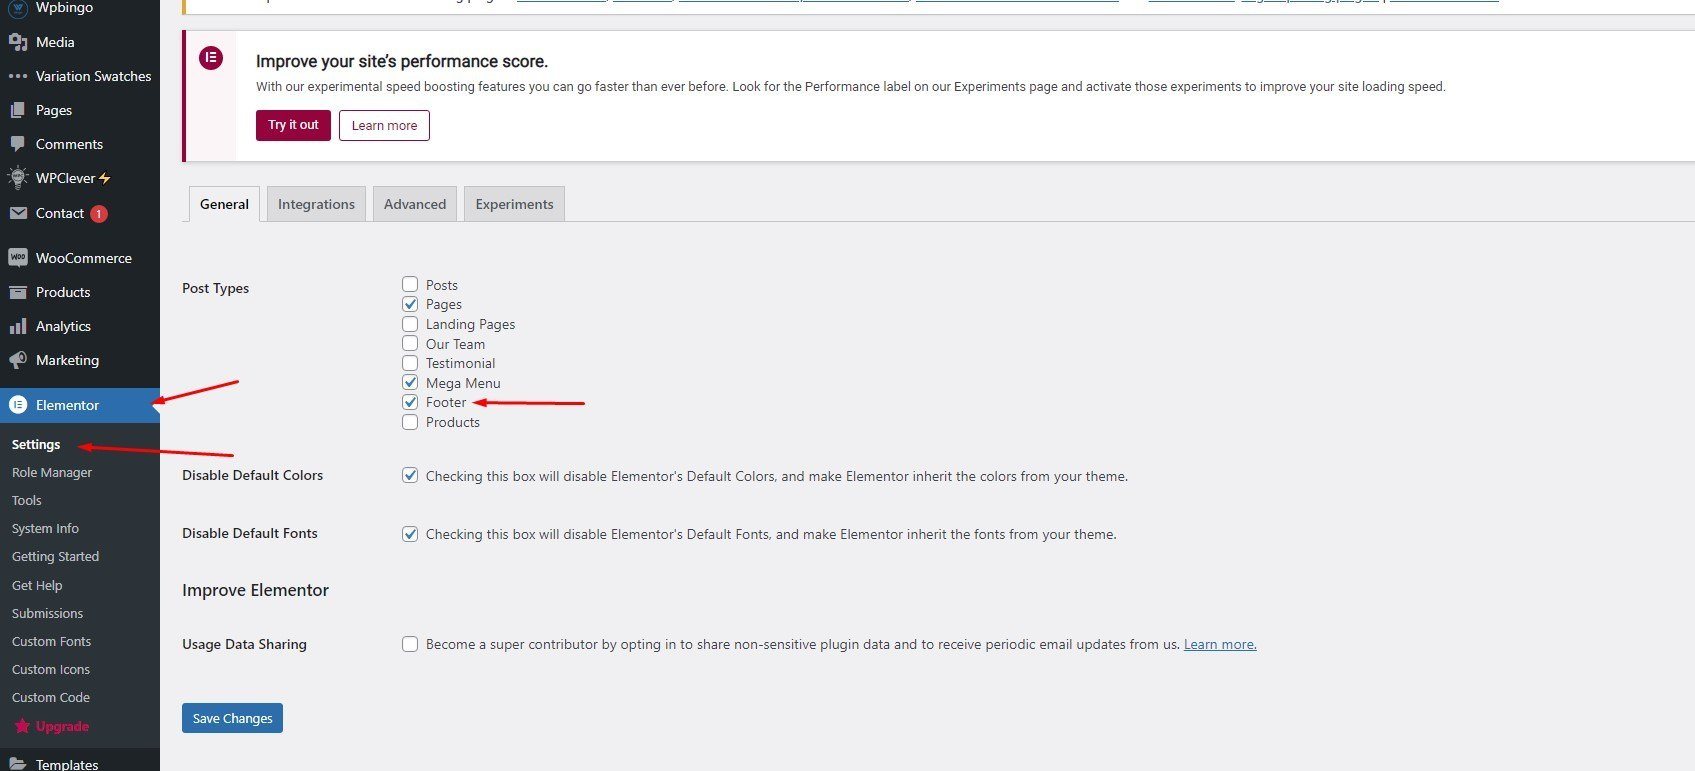
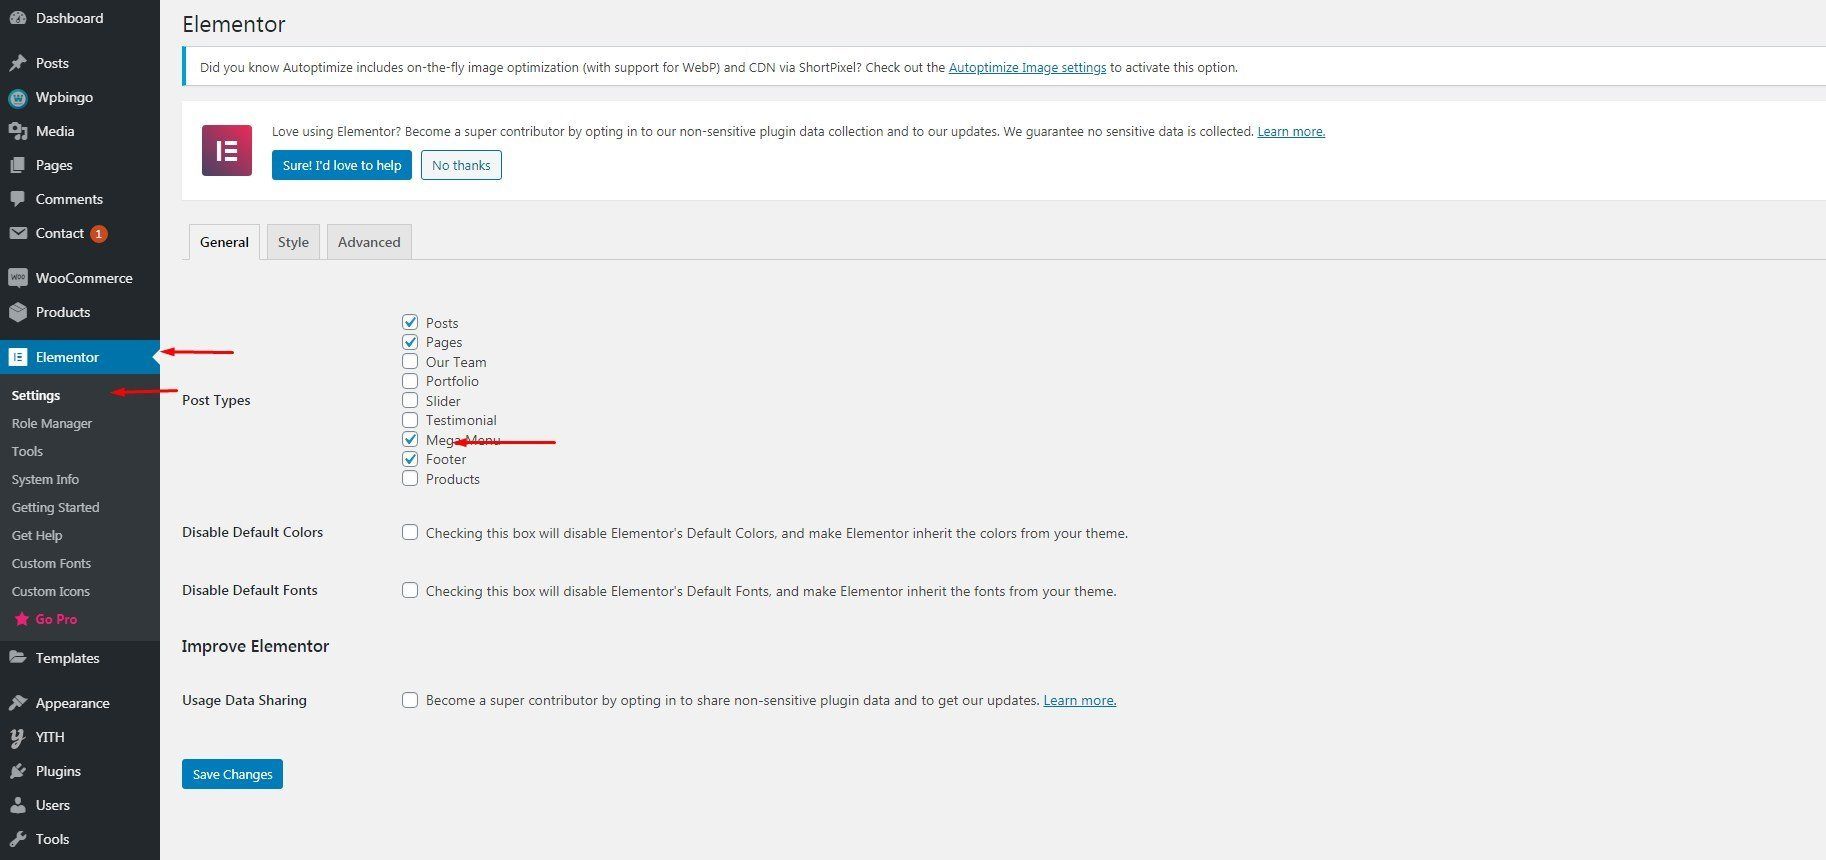
1. Disable Default Colors and Disable Default FontsDisable default colors and default fonts by going to Elementor > Settings and placing a check in the boxes next to Disable Default Colors and Disable Default Fonts.
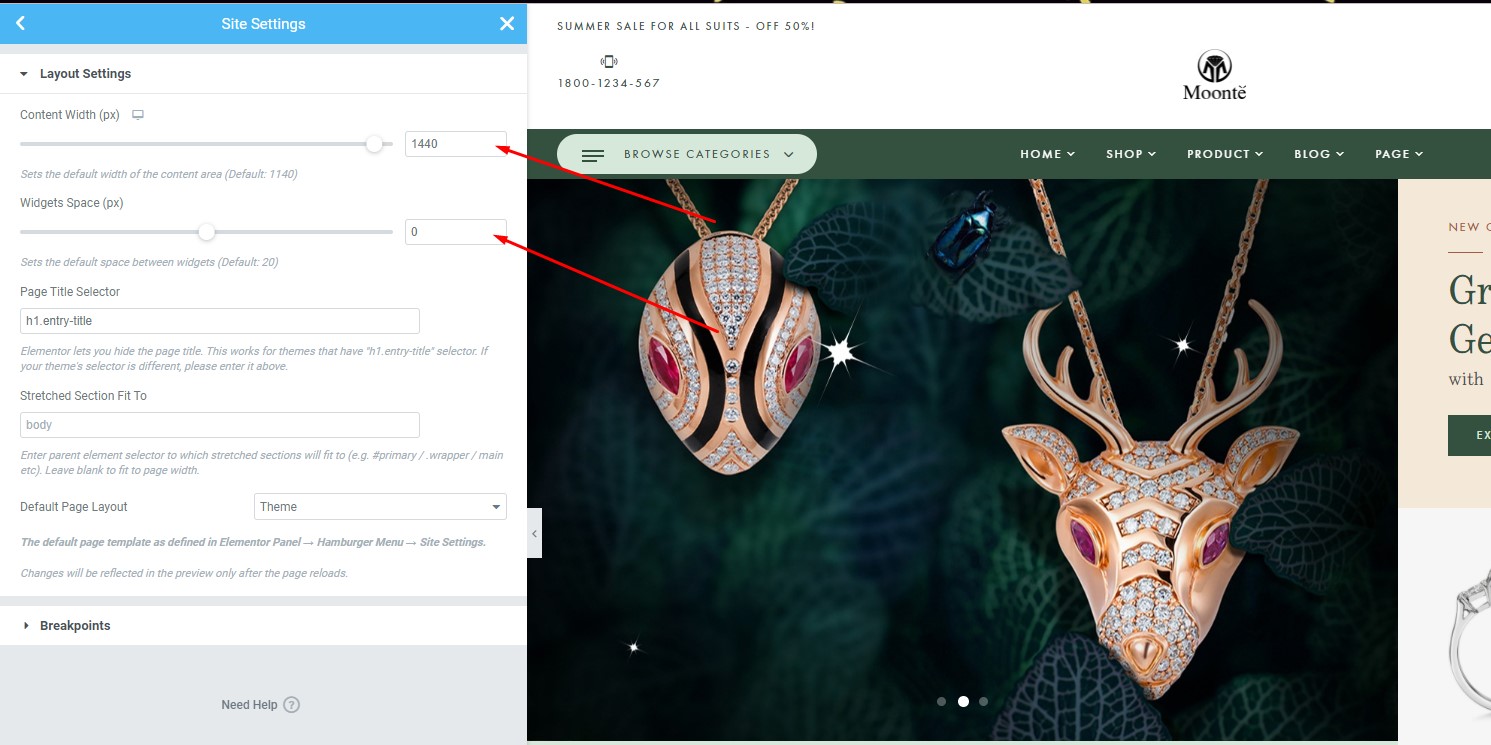
From any Elementor page or post editor, click the hamburger menu in the upper left corner of the Widget Panel, then navigate to Site Settings > Settings > Layout.
Wpbingo Framework
Please install the 3 plugin Elementor, WooCommerce and Redux Framework before installing wpbingo.
I. Page
You can separately configure the header, footer, logo for the Page.The configuration here will take precedence over the configuration in the theme options.If you want to use the default value in theme options: You can choose the "default" value for the header, vertical, footer and remove logo.
1. Edit Page you want to configure.

And the configuration is here:

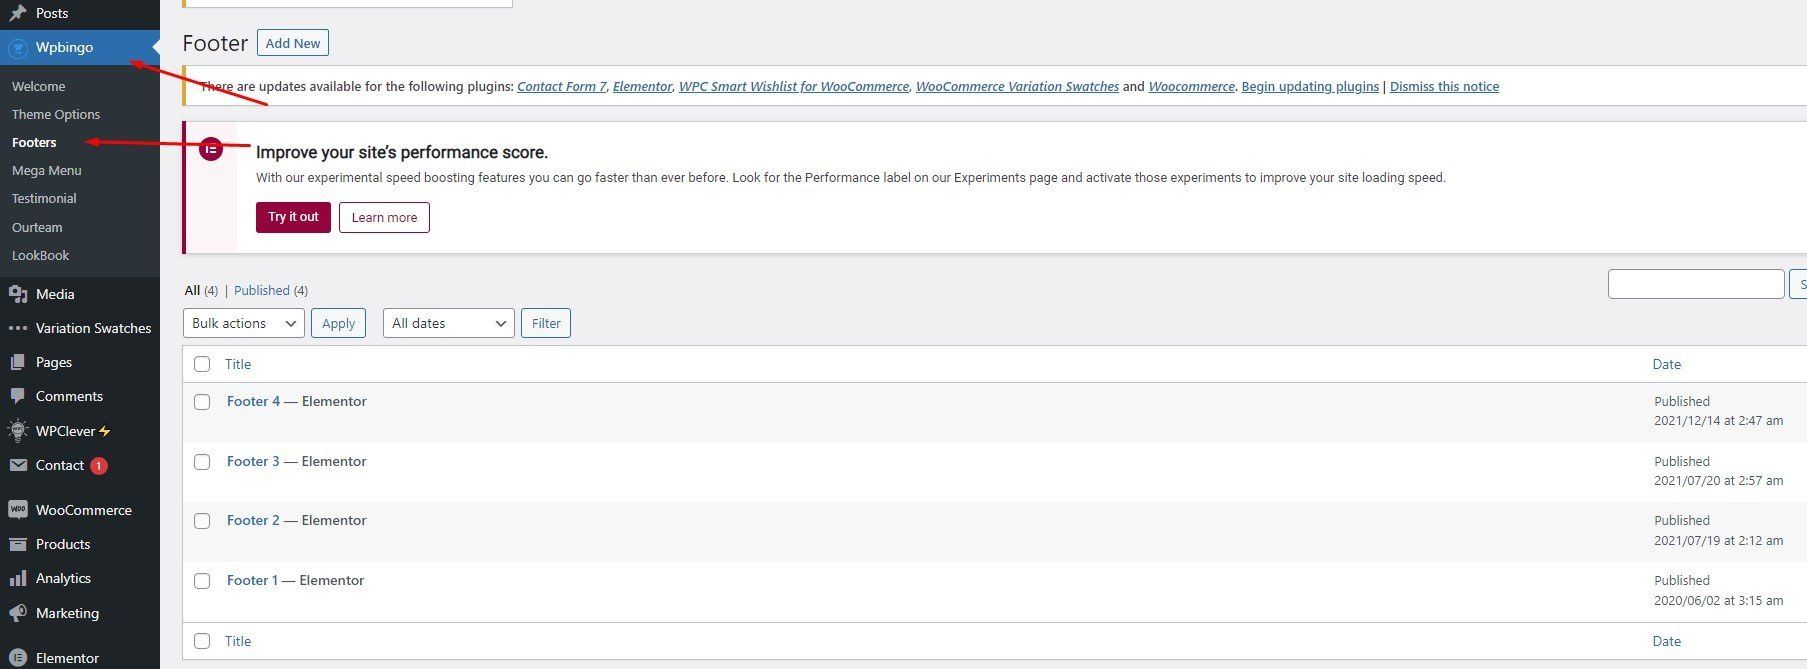
II. Footer
1. Allows editing footer with elementor
2. Wpbingo > Footers
III. Testimonial
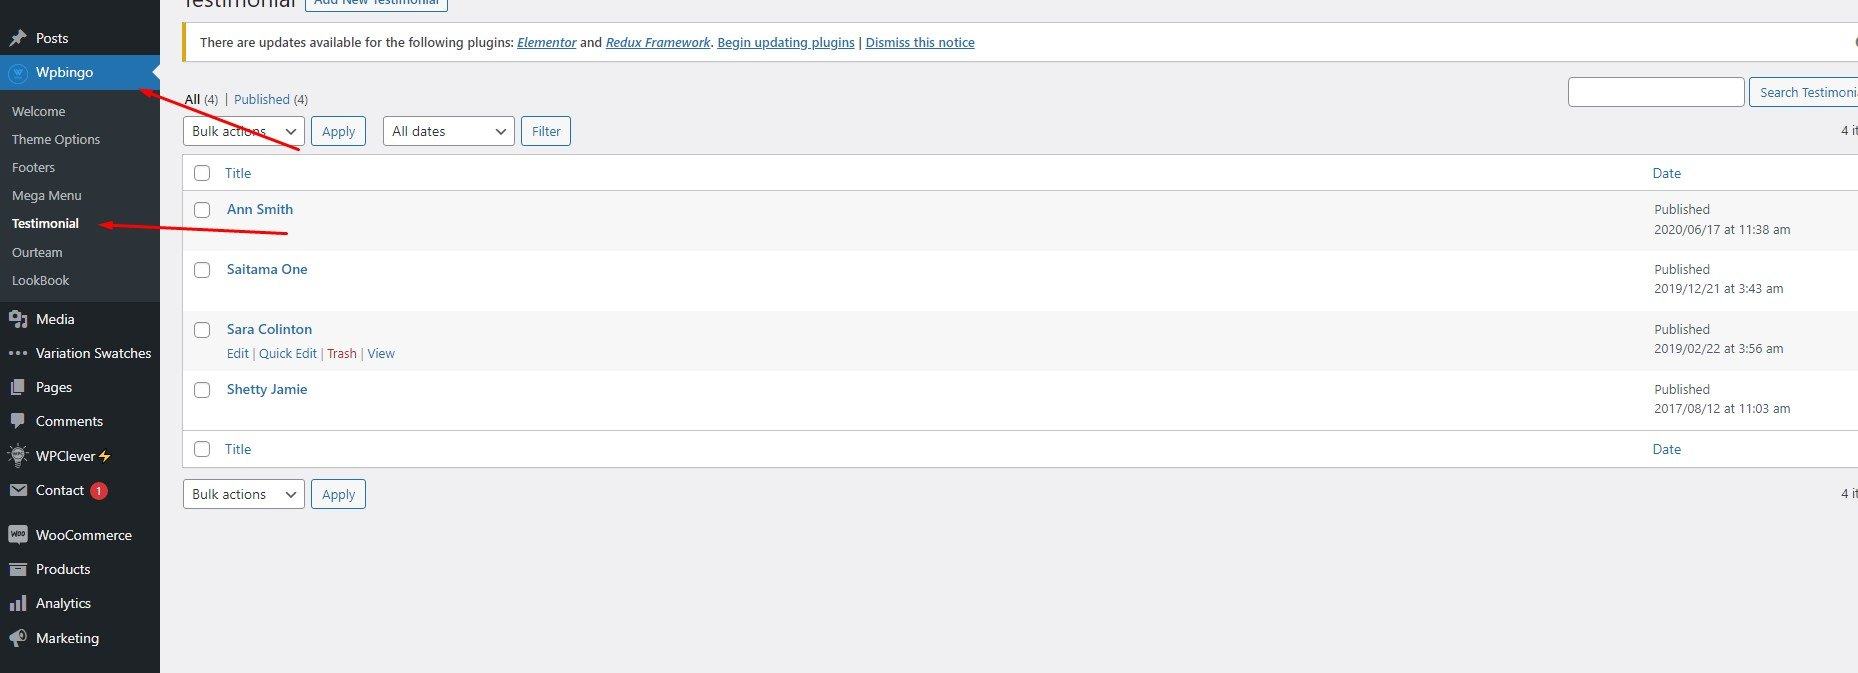
You can manage and create new and select testimonial in Page
Wpbingo > Testimonial
IV. Mega Menu
1. Allows editing mega menu by elementor
2. Wpbingo > Mega Menu
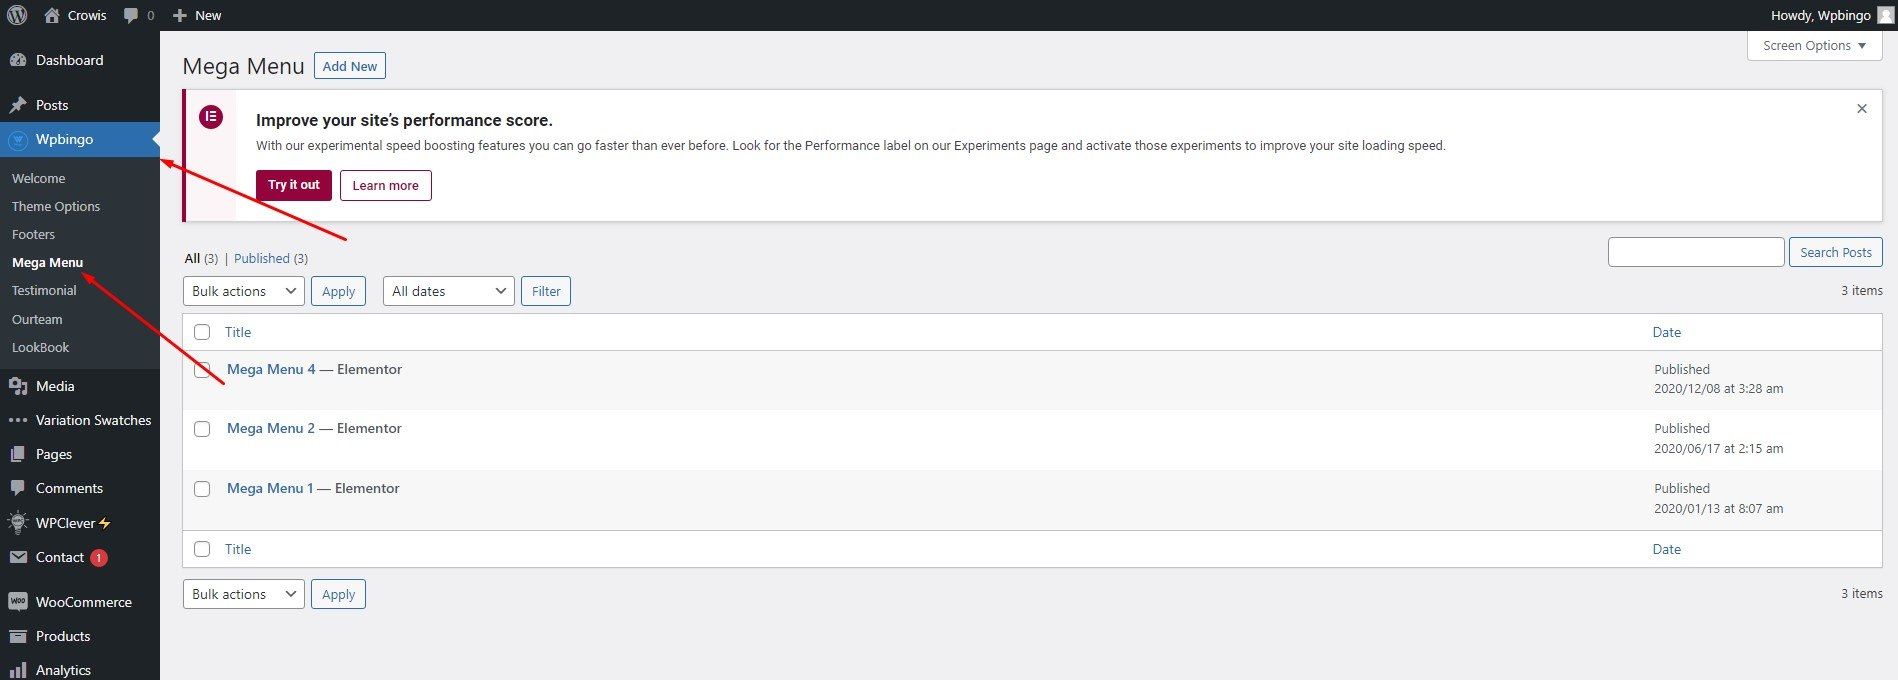
3. Wpbingo > Mega Menu > Edit with elementor
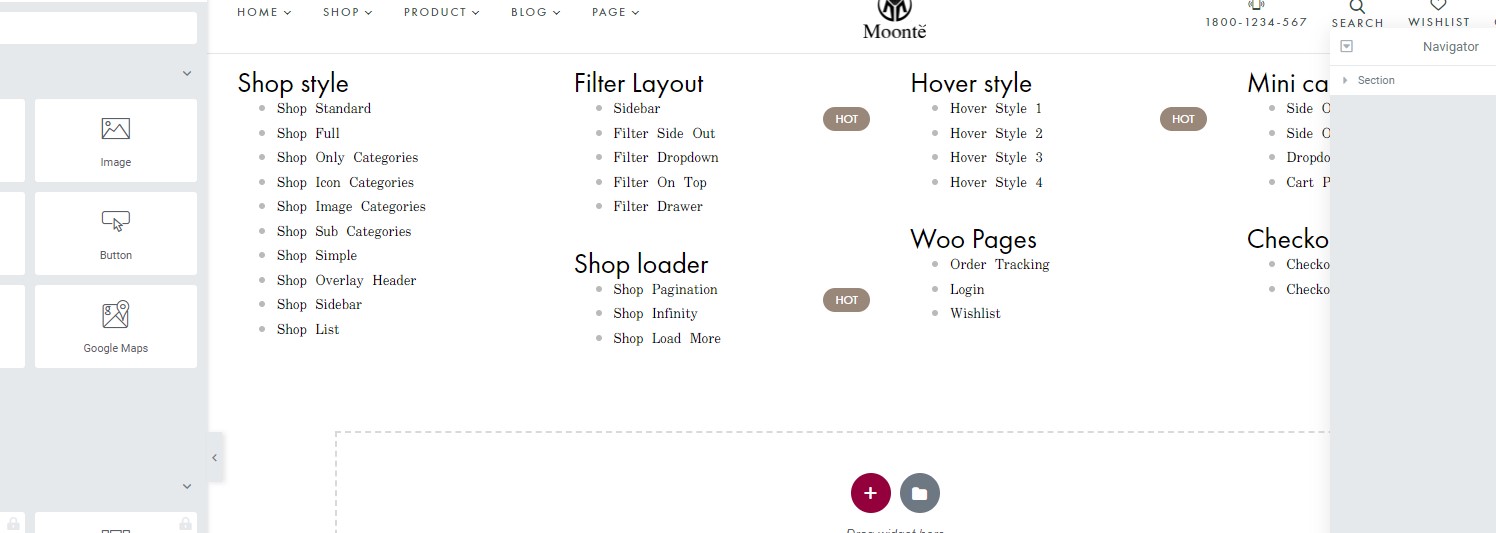
4. Select megamenu to display here
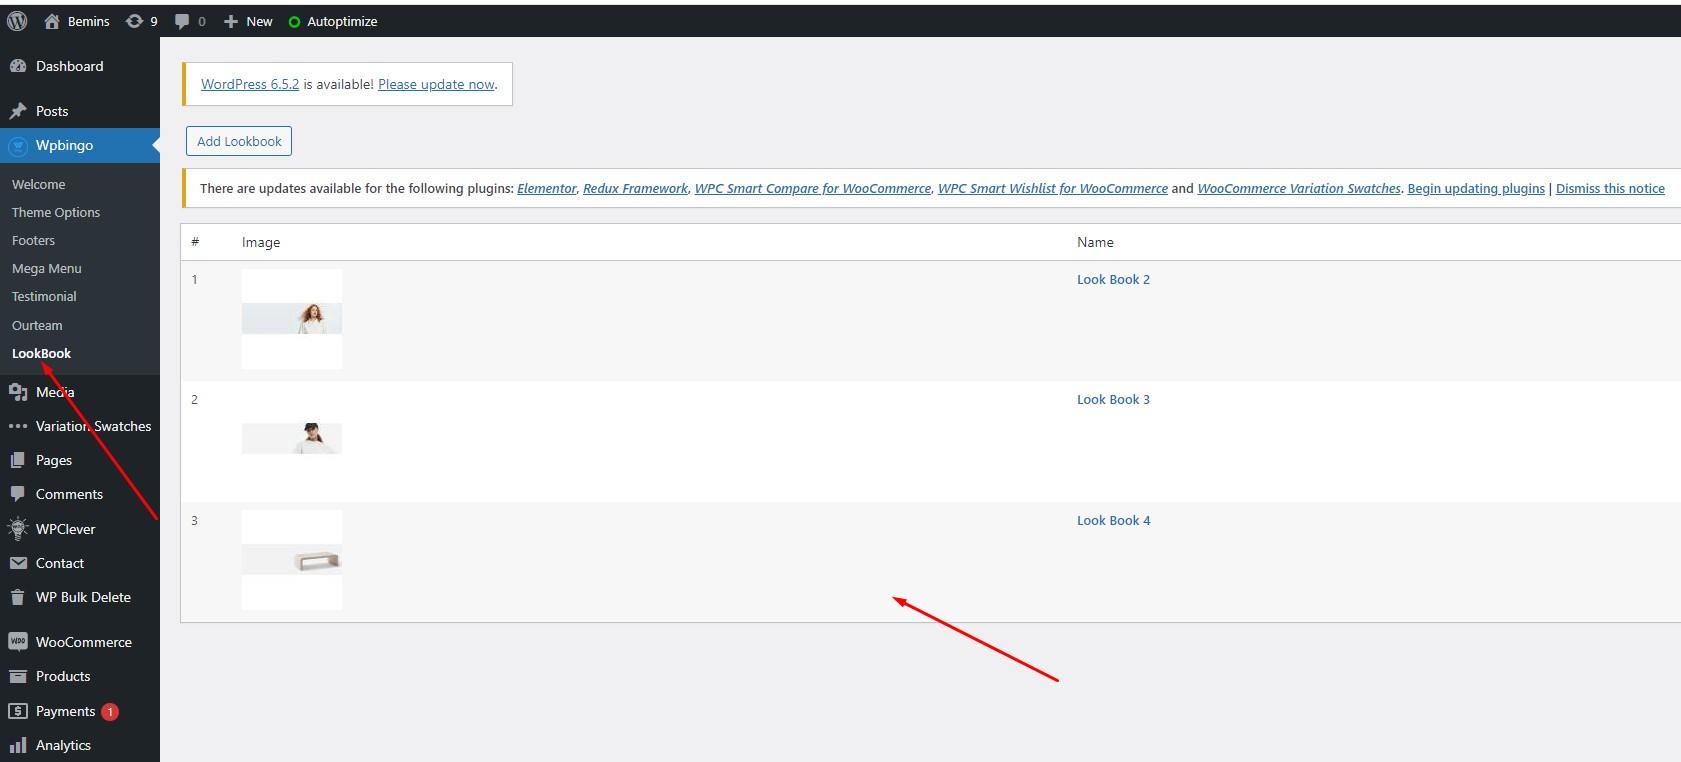
V. LookBook
You can manage and create new and select lookbook in Page
Wpbingo > LookBook
Theme Options
After the installation is completed, you can customize your store.
Customizing your store lets you add functionality or change your store's appearance without switching themes.
General
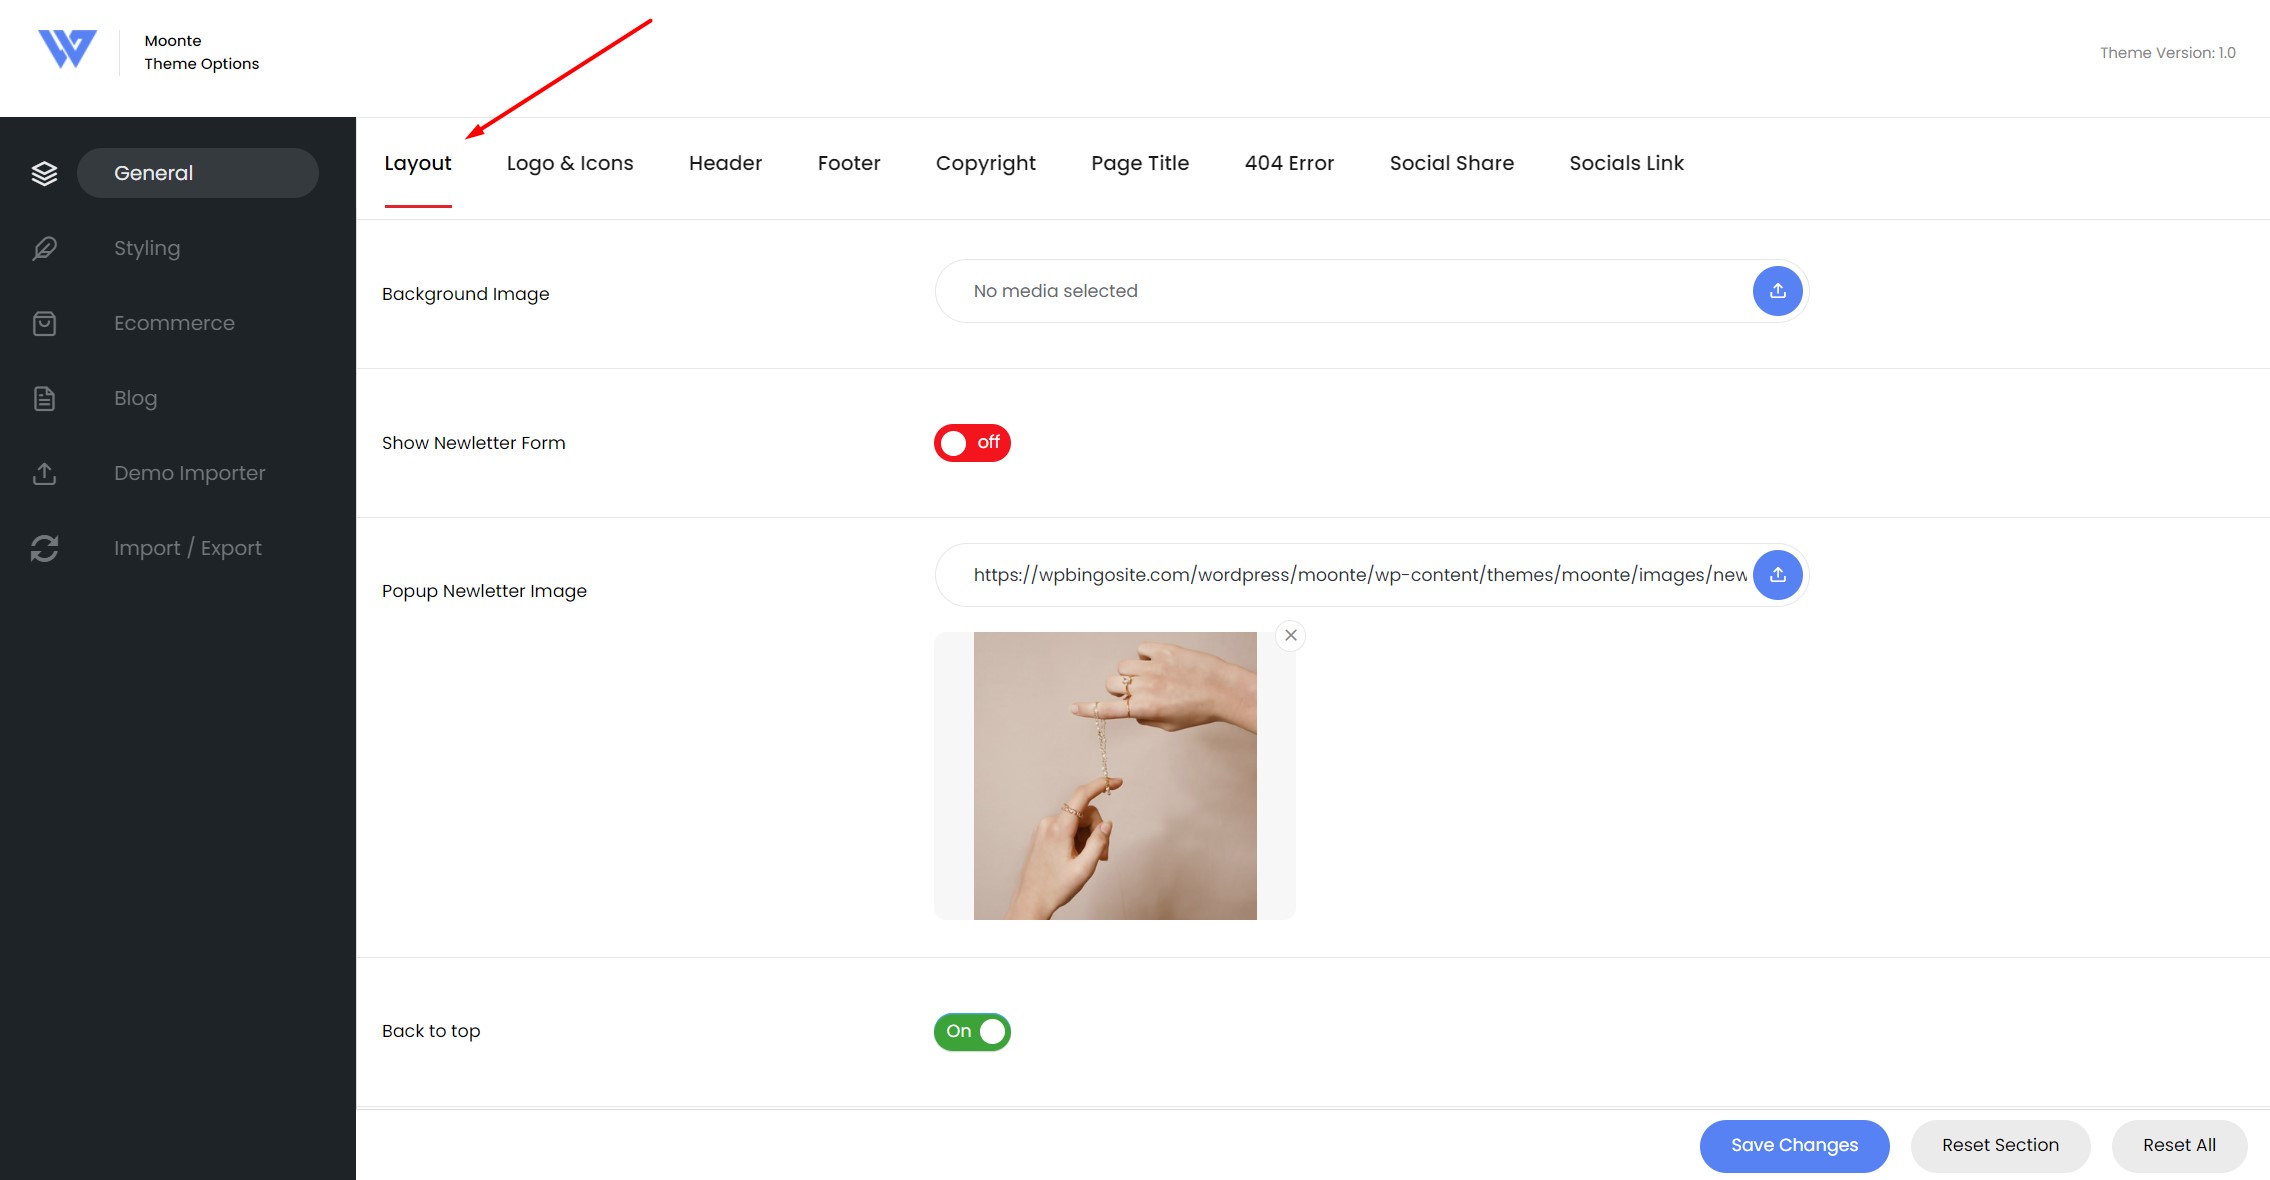
I. Layout
You can toggle and configure Newsletter Form, Sign In Image, Back to top, Come Back Alert, Right to Left, Time Nofication here
Wpbingo > Theme Options > Layout
II. Logo
You can change the theme’s logo by accessing the Theme Options and uploading your logo with the uploader under the “Logo, Icons” section:
Wpbingo > Theme Options > Logo, Icons
![]()
If the page does not change as configured here, then the page is being configured separately.
You can separately configure the header, footer, logo for the Page.The configuration here will take precedence over the configuration in the theme options.If you want to use the default value in theme options: You can choose the "default" value for the header, vertical, footer and remove logo.
1. Edit Page you want to configure.
And the configuration is here:
III. Header
1. Access to theme options Wpbingo>Theme Options>Header
2. Click the section Header Types
3. Clicking on any of the header to choose and hit Save Changes
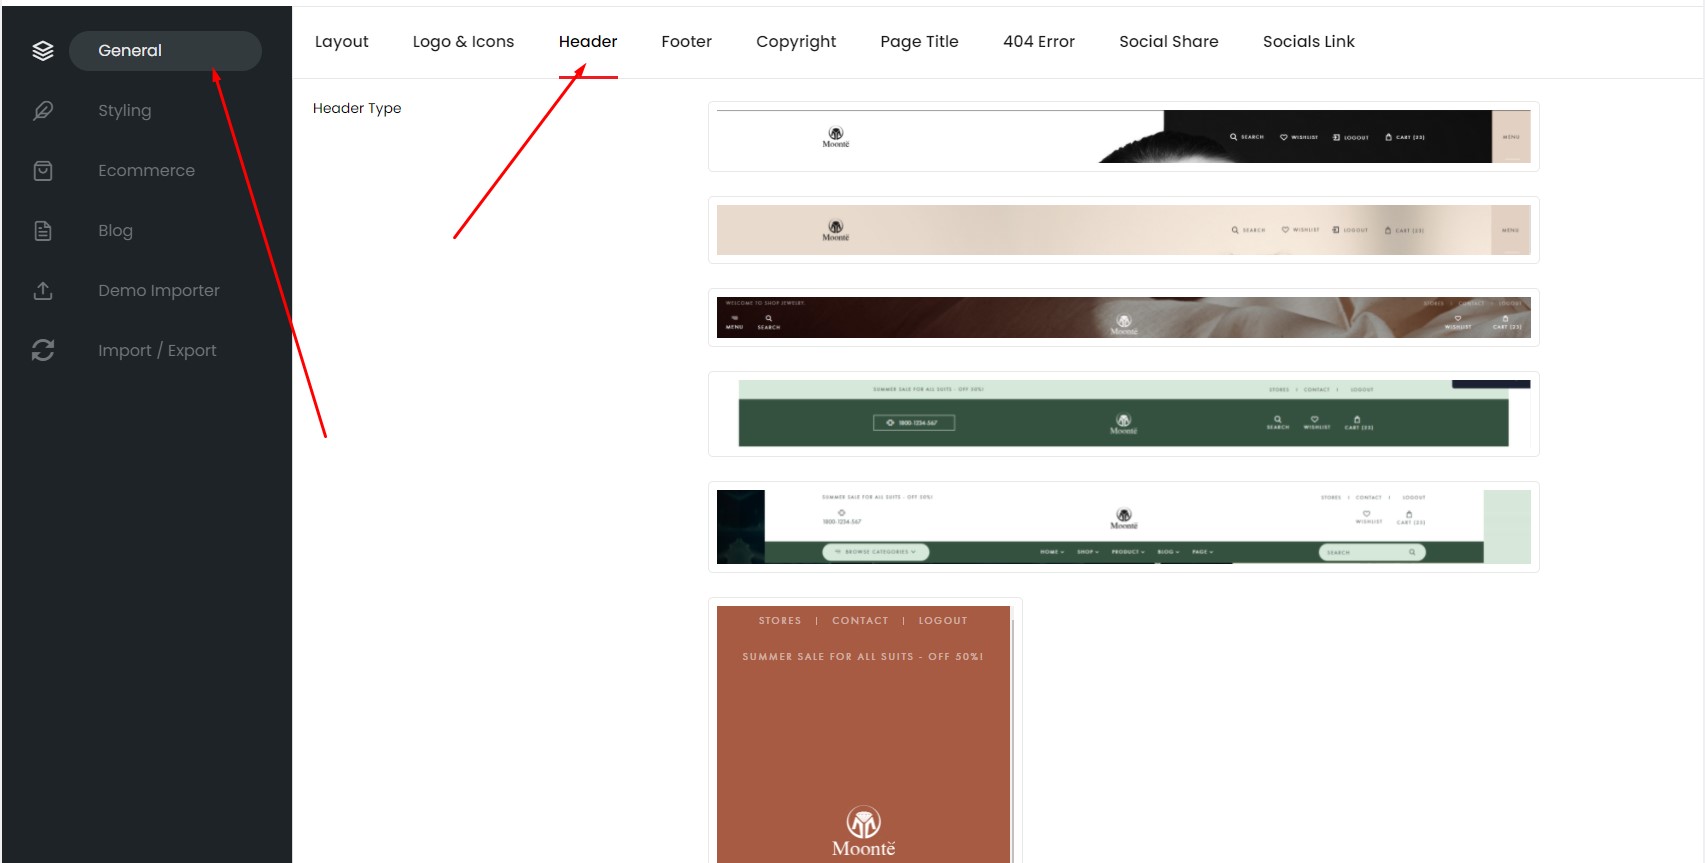
If the page does not change as configured here, then the page is being configured separately.
You can separately configure the header, footer, logo for the Page.The configuration here will take precedence over the configuration in the theme options.If you want to use the default value in theme options: You can choose the "default" value for the header, vertical, footer and remove logo.
1. Edit Page you want to configure.
And the configuration is here:
IV. Footer
To change the footer:
1. Access to theme options Wpbingo>Theme Options>Footer
2. Click the section Footer Style
3. Clicking on any of the footer to choose and hit Save Changes

If the page does not change as configured here, then the page is being configured separately.
You can separately configure the header, footer, logo for the Page.The configuration here will take precedence over the configuration in the theme options.If you want to use the default value in theme options: You can choose the "default" value for the header, vertical, footer and remove logo.
1. Edit Page you want to configure.
And the configuration is here:
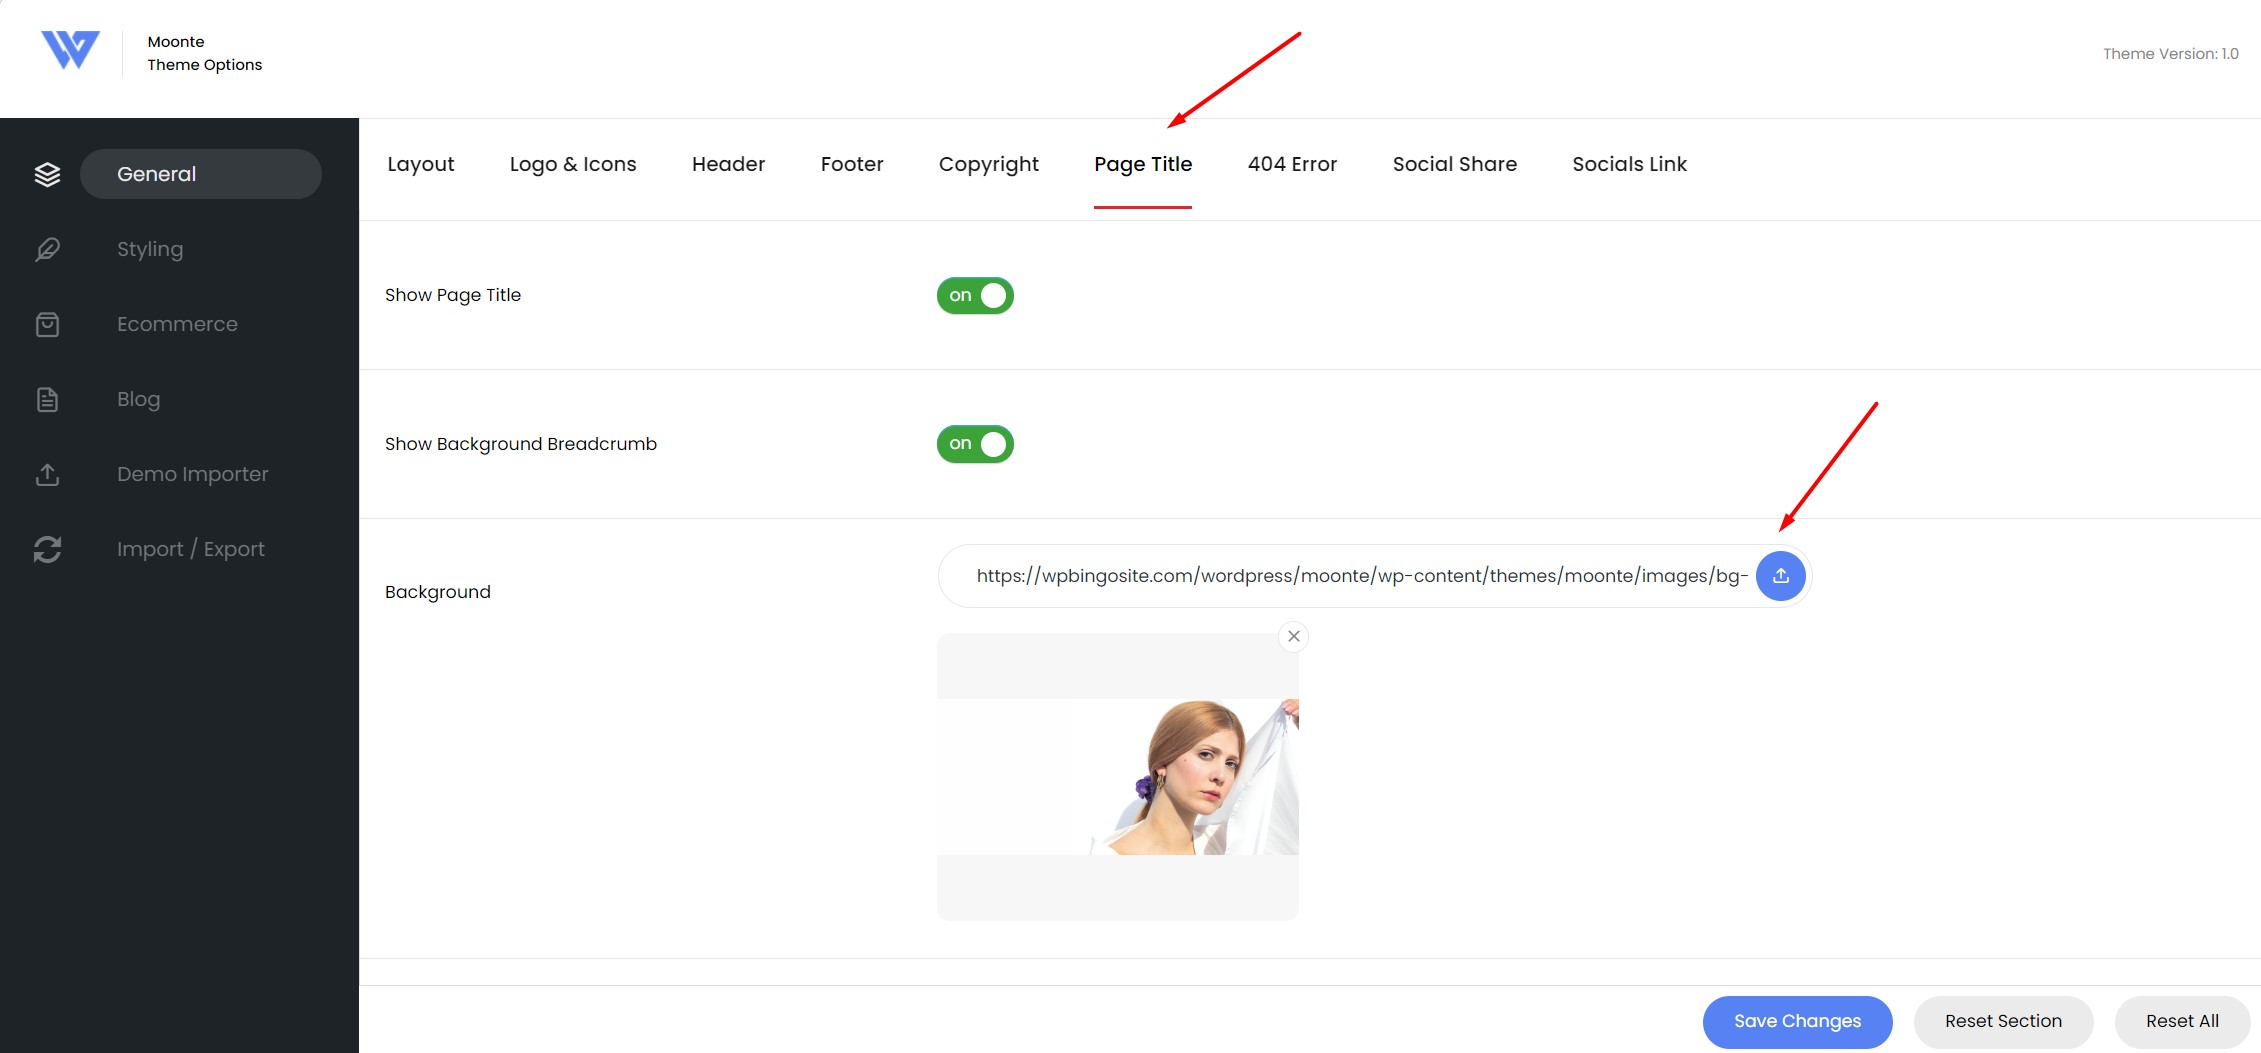
V. Page Title
To change Background Breadcrumb
VI. Page 404
You can change the information of the 404 page here

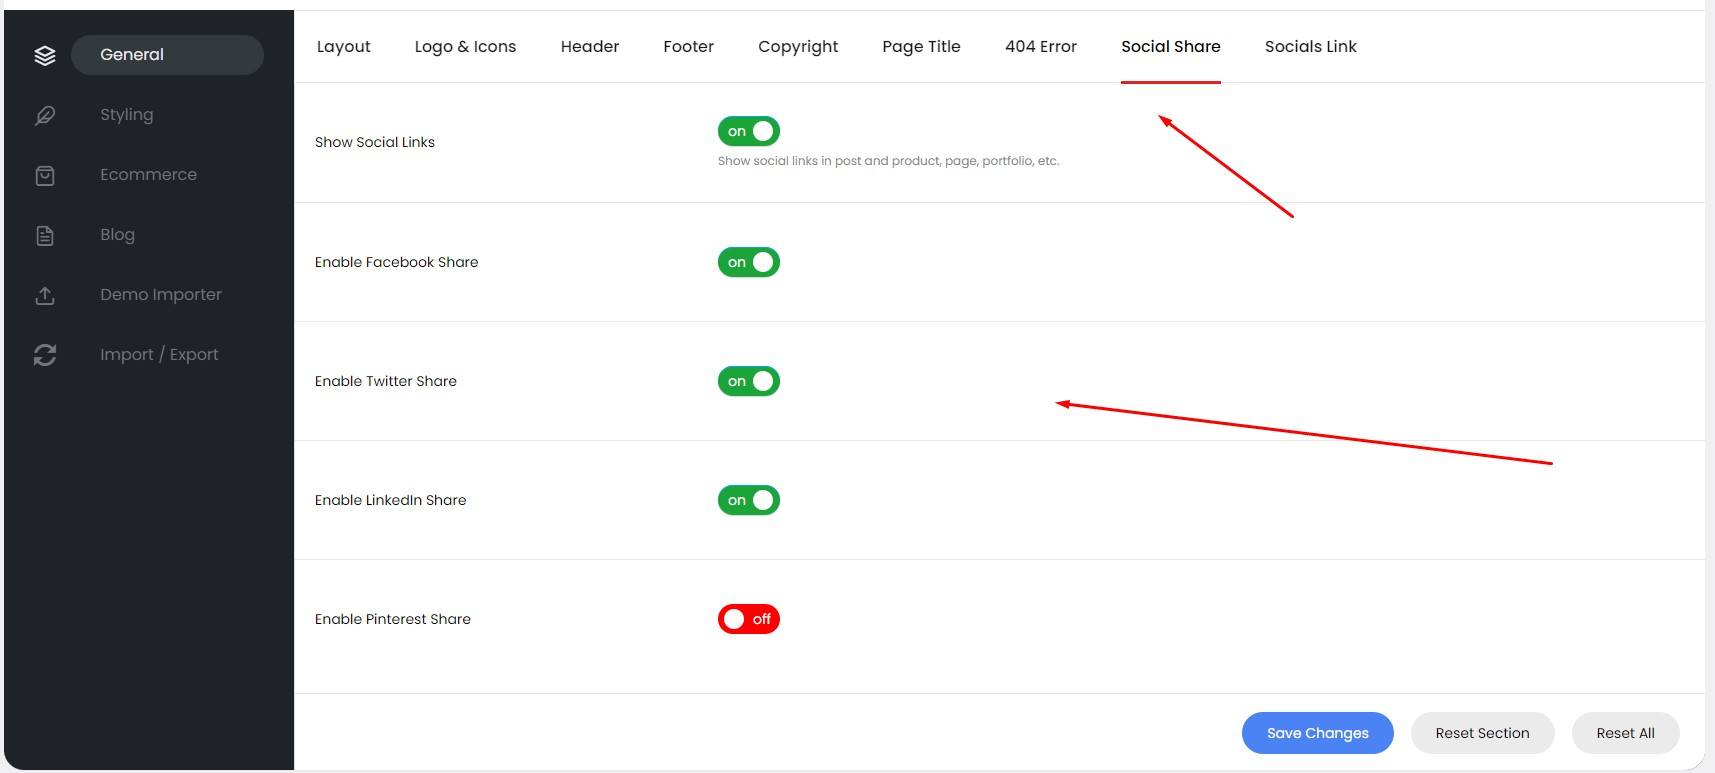
VII. Social Share
You can manage your shareable social networks from the website here
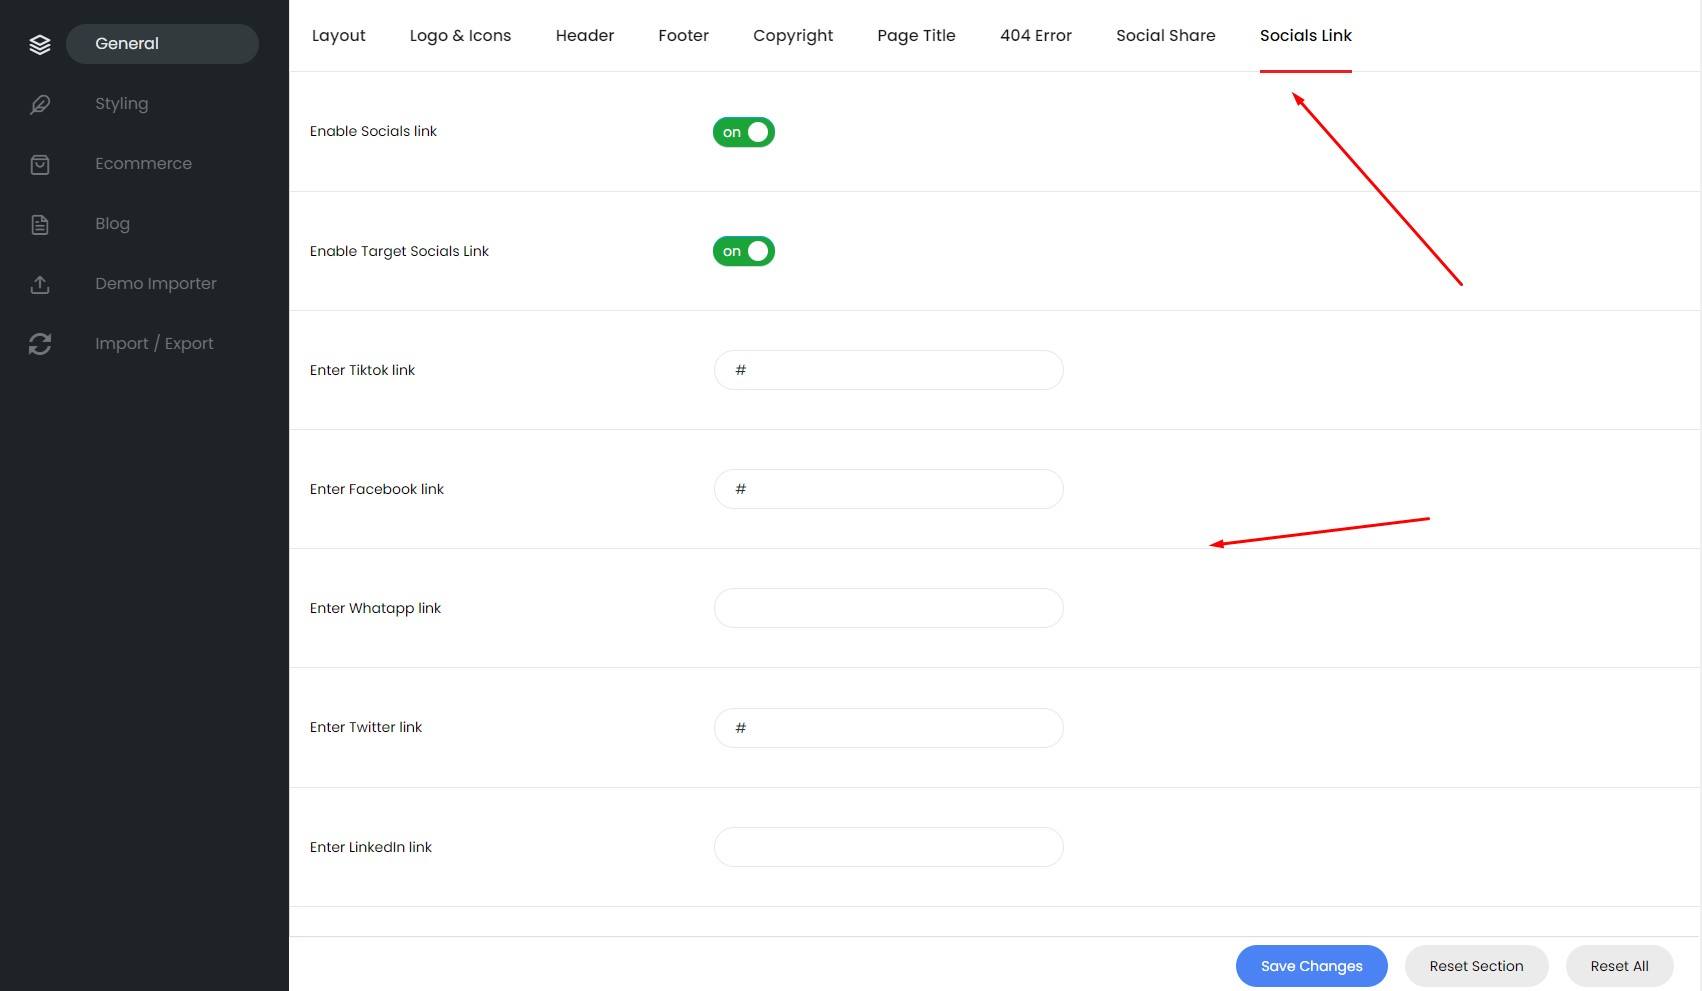
VIII. Social Link
You can manage your website's social media links here
Styling
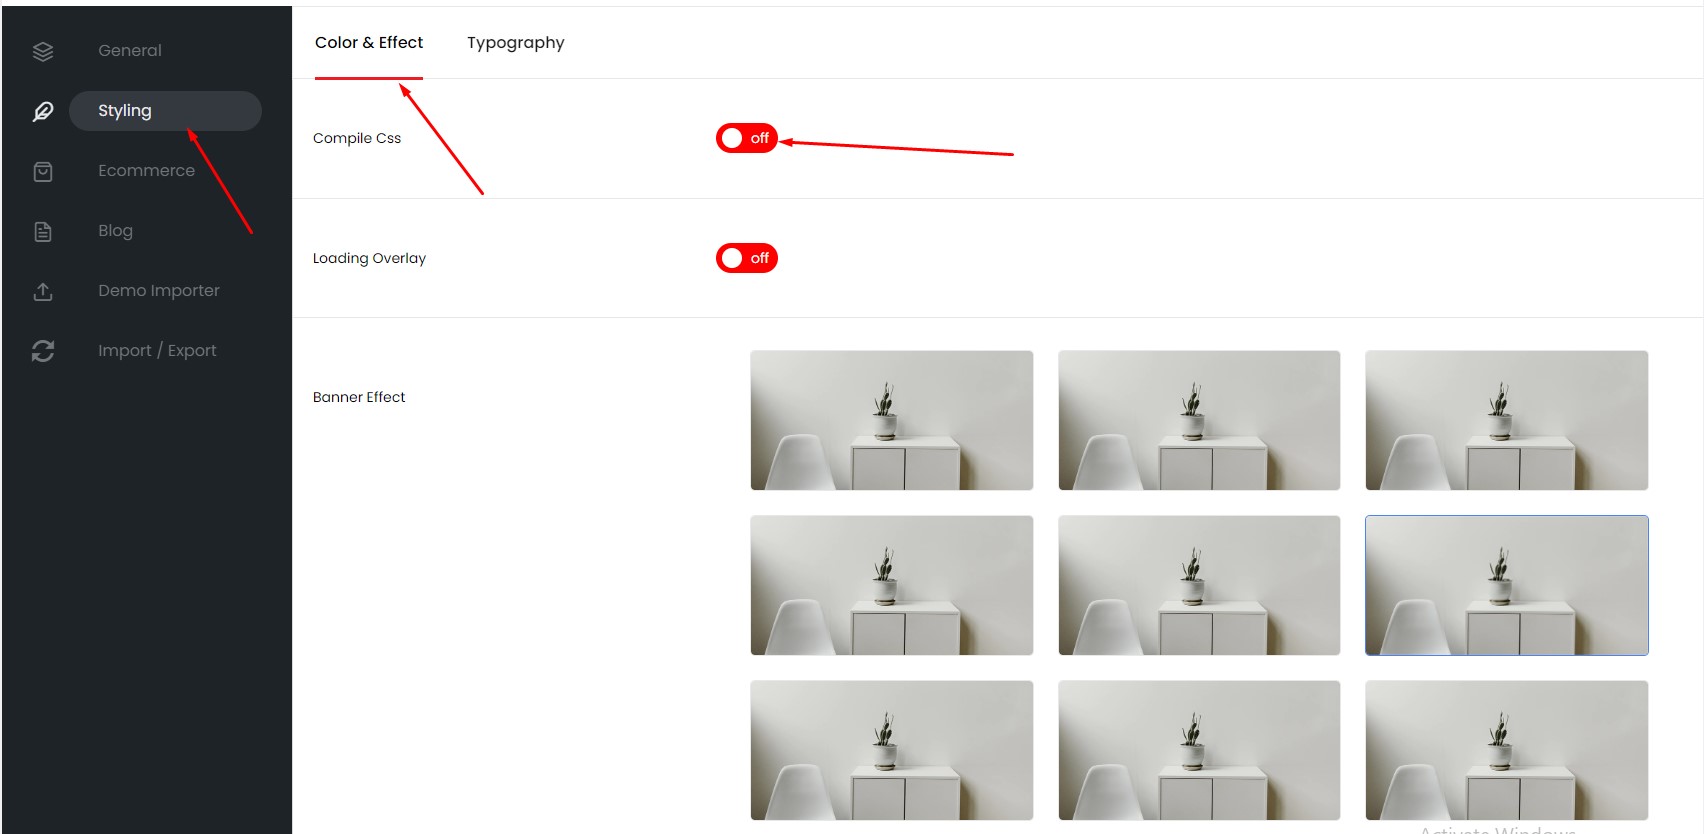
I. Color & Effect
1. Access to theme options Wpbingo>Theme Options>Styling>Color And Effect
2. Click the Compile Css
2. Choose color Main Theme Color
4. Click theSave Changes
Choose a color theme before custom css in the css directory of the theme, to avoid overwriting the file
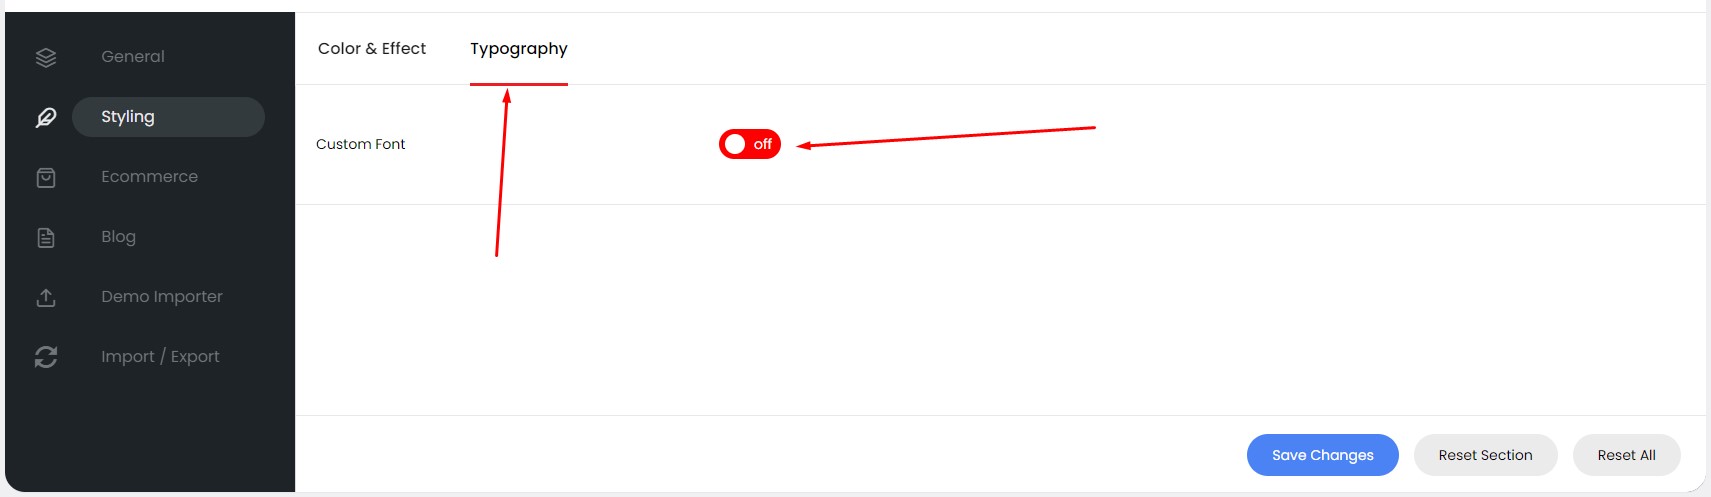
II. Typography
Go to Theme Options > Styling Click the section Typography
Ecommerce
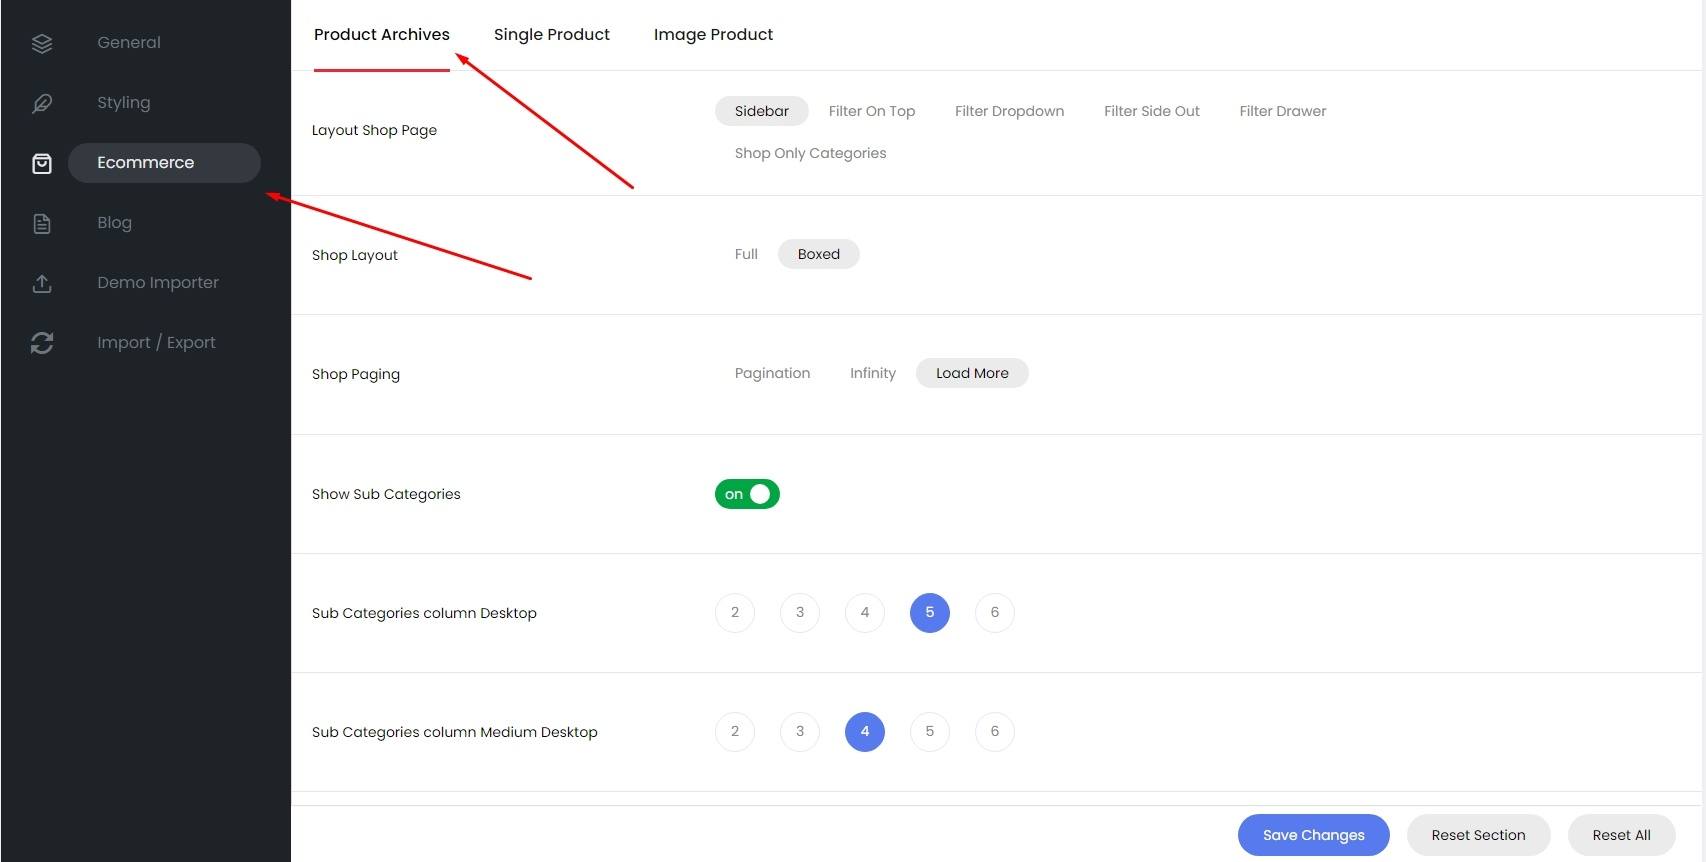
I. Product Archives
Go to Theme Options > Ecommerce Click the section Product Archives
Configuration and options of the shop page
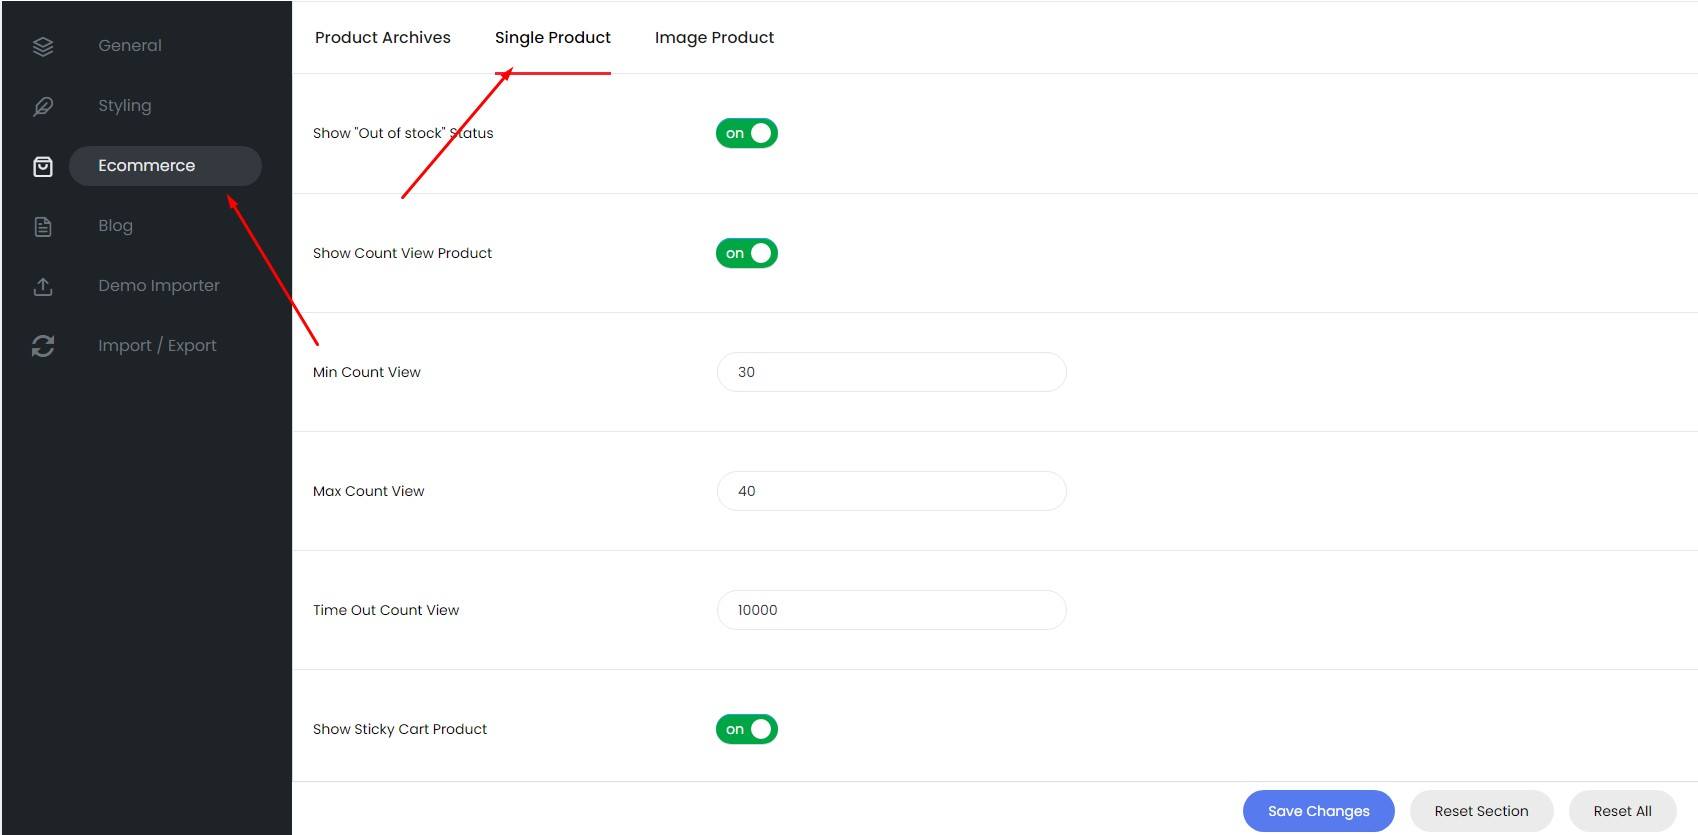
II. Single Product
Go to Theme Options > Ecommerce Click the section Single Product
Configuration and options of the Single Product
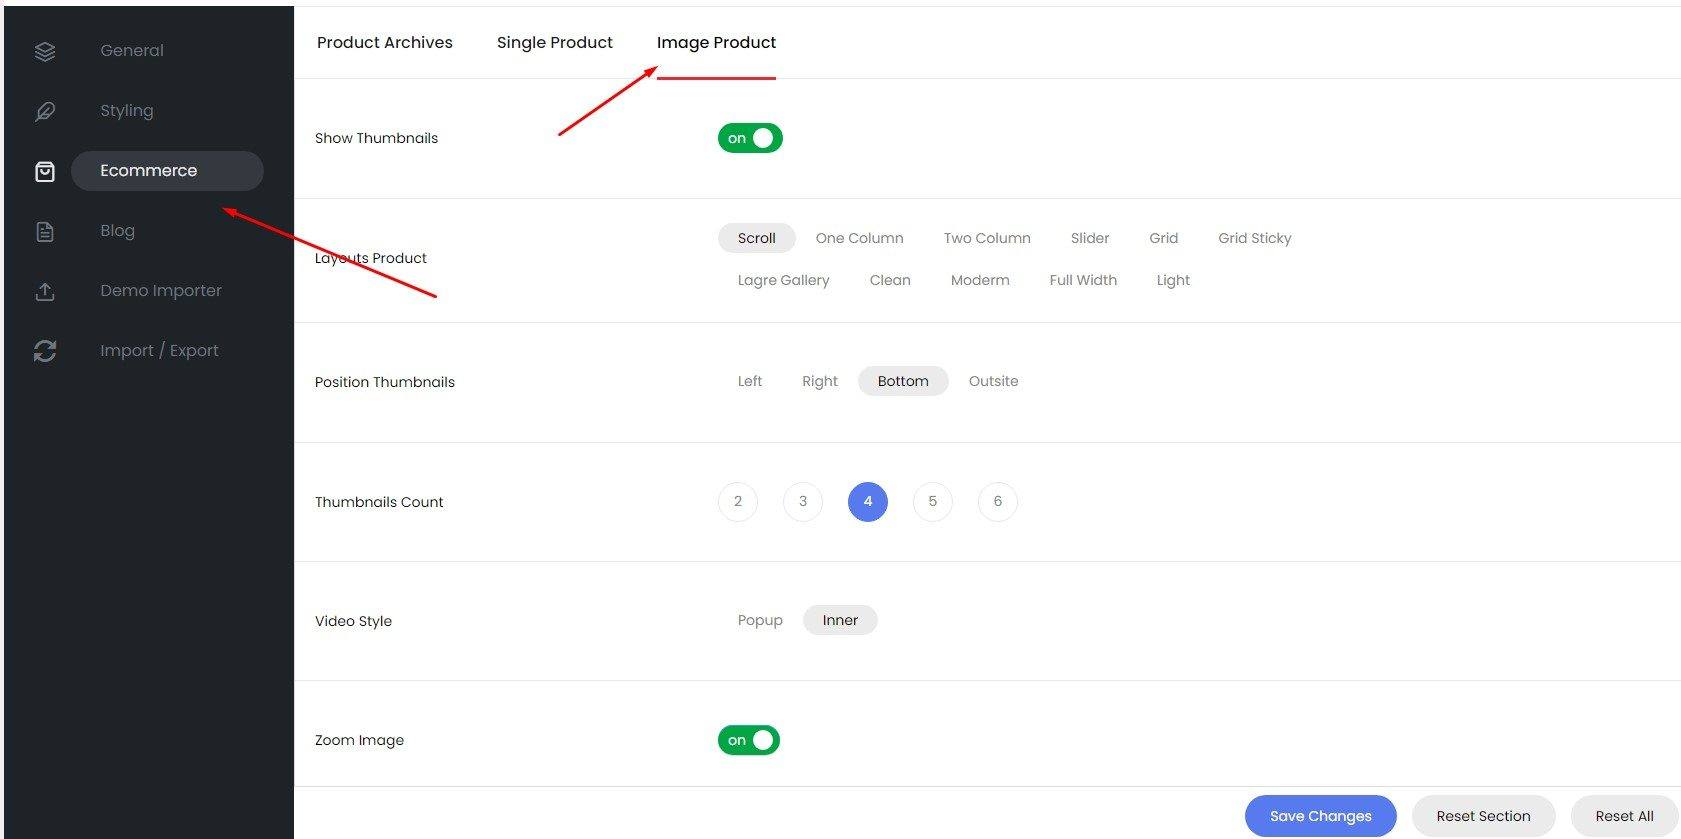
III. Image Product
Go to Theme Options > Ecommerce Click the section Image Product
Configuration and options of the Image Single Product
Blog
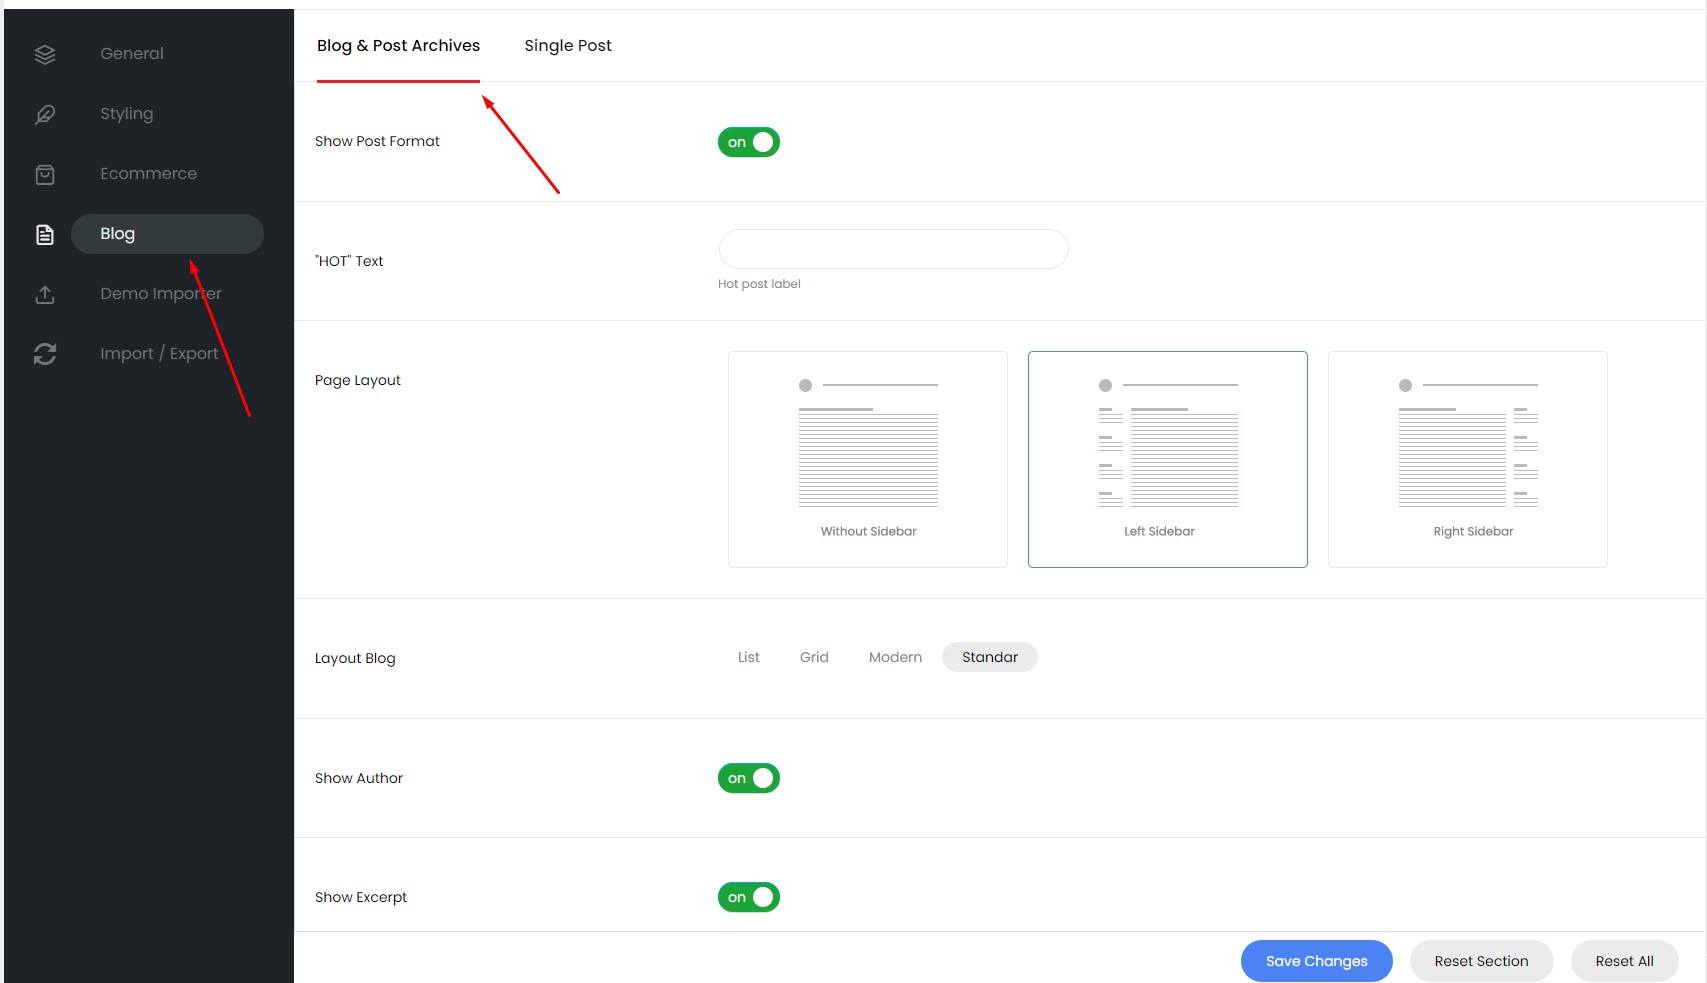
I. Blog & Post Archives
Go to Theme Options > Blog Click the section Blog & Post Archives
Configuration and options of the blog page
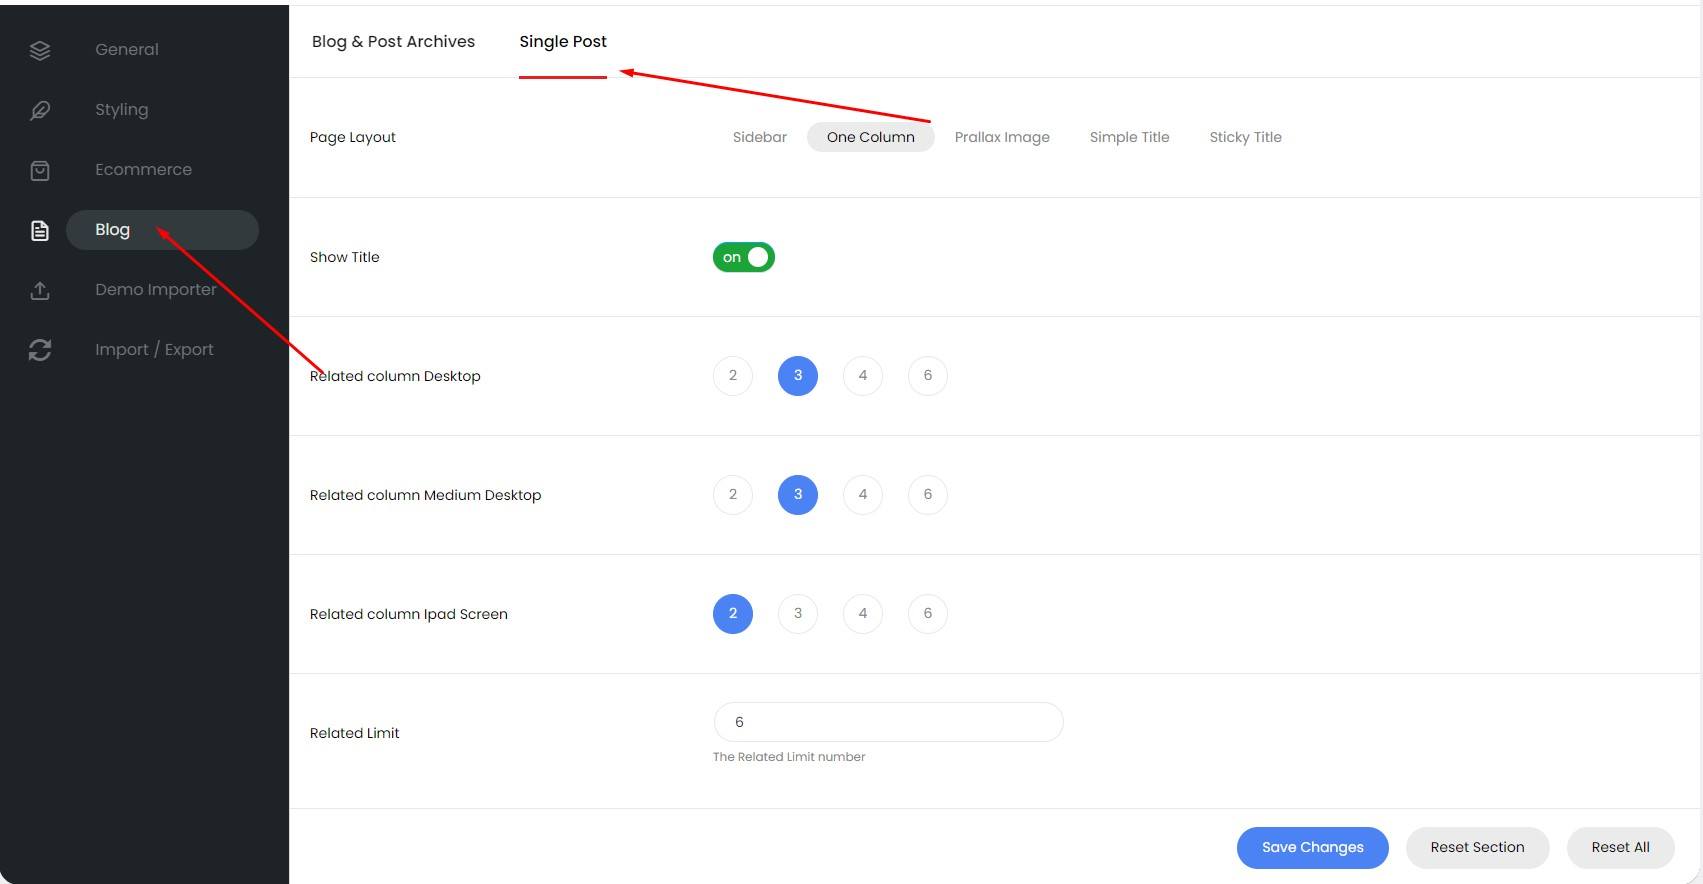
II. Single Post
Go to Theme Options > Blog Click the section Single Post
Configuration and options of the Single Post
Plugins
Install plugins
Go to Appearance > Install Plugins
You will see the plugins that need to be installed
WooCommerce
I. Shop page
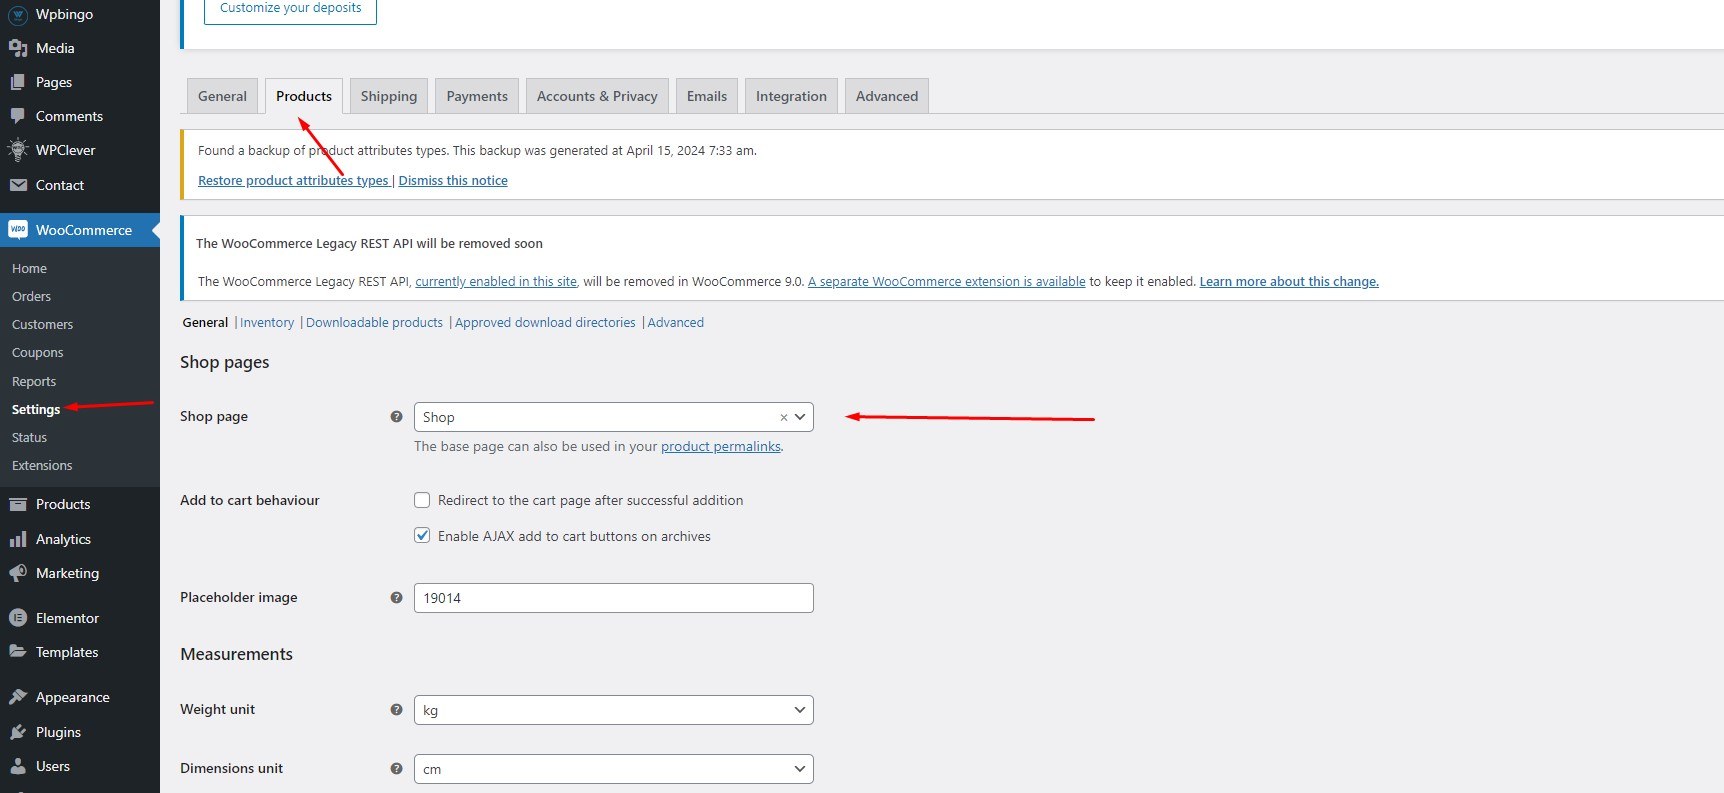
Go to WooCommerce > Settings > Products
You can select the page as the shop page for your website here
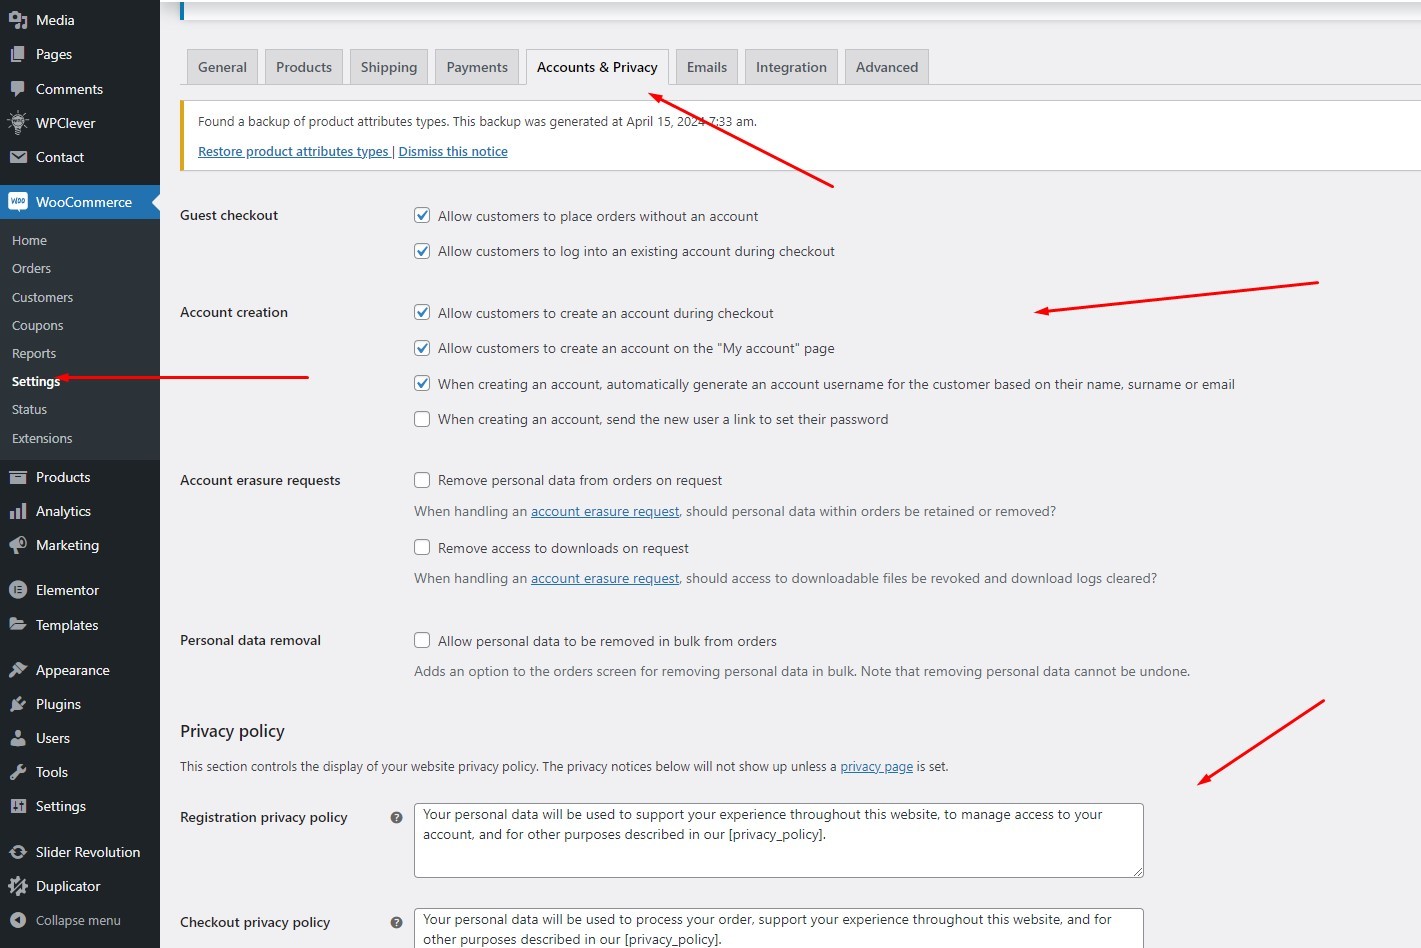
II. Accounts & Privacy
Go to WooCommerce > Settings > Accounts & Privacy
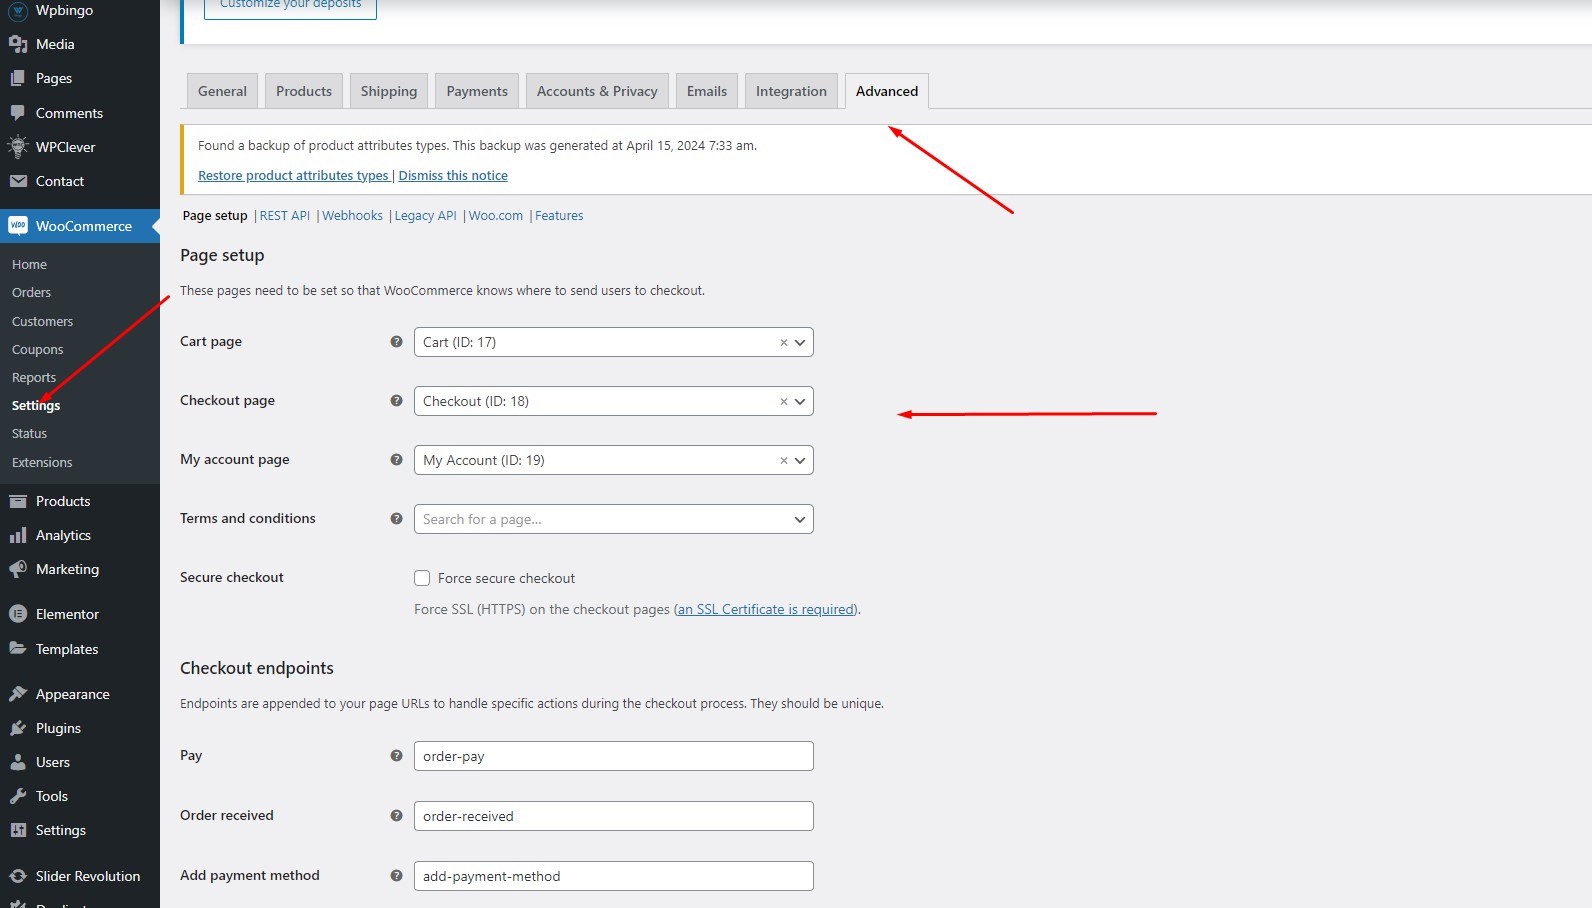
III. Advanced
Go to WooCommerce > Settings > Advanced
You can select the cart, checkout, and my account pages here
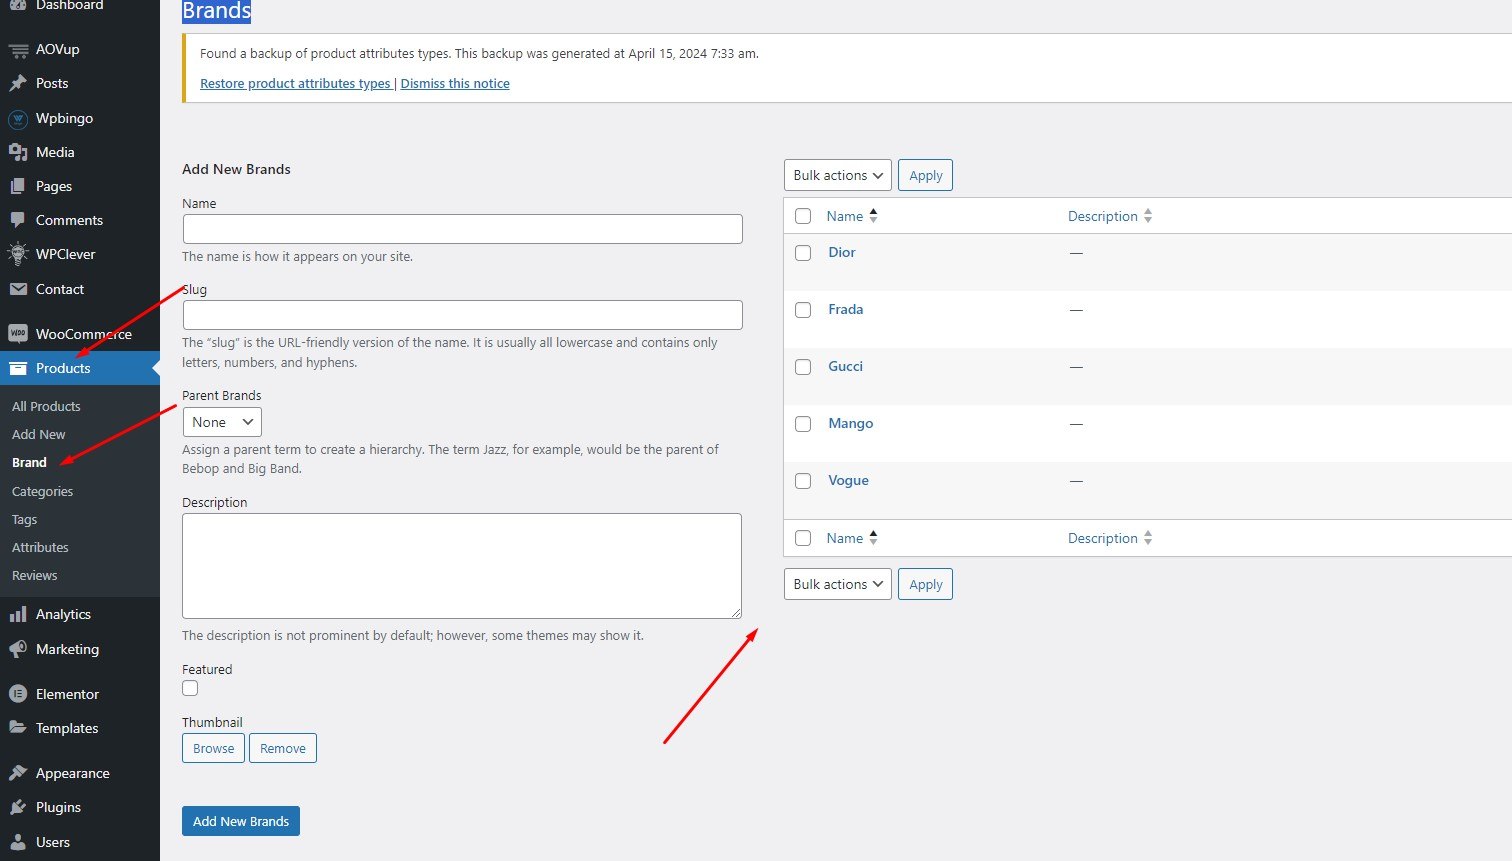
IV. Brand
Go to Products > Brands
You can create and manage brands here
V. Categories
Go to Products > Categories
You can create and manage Categories here
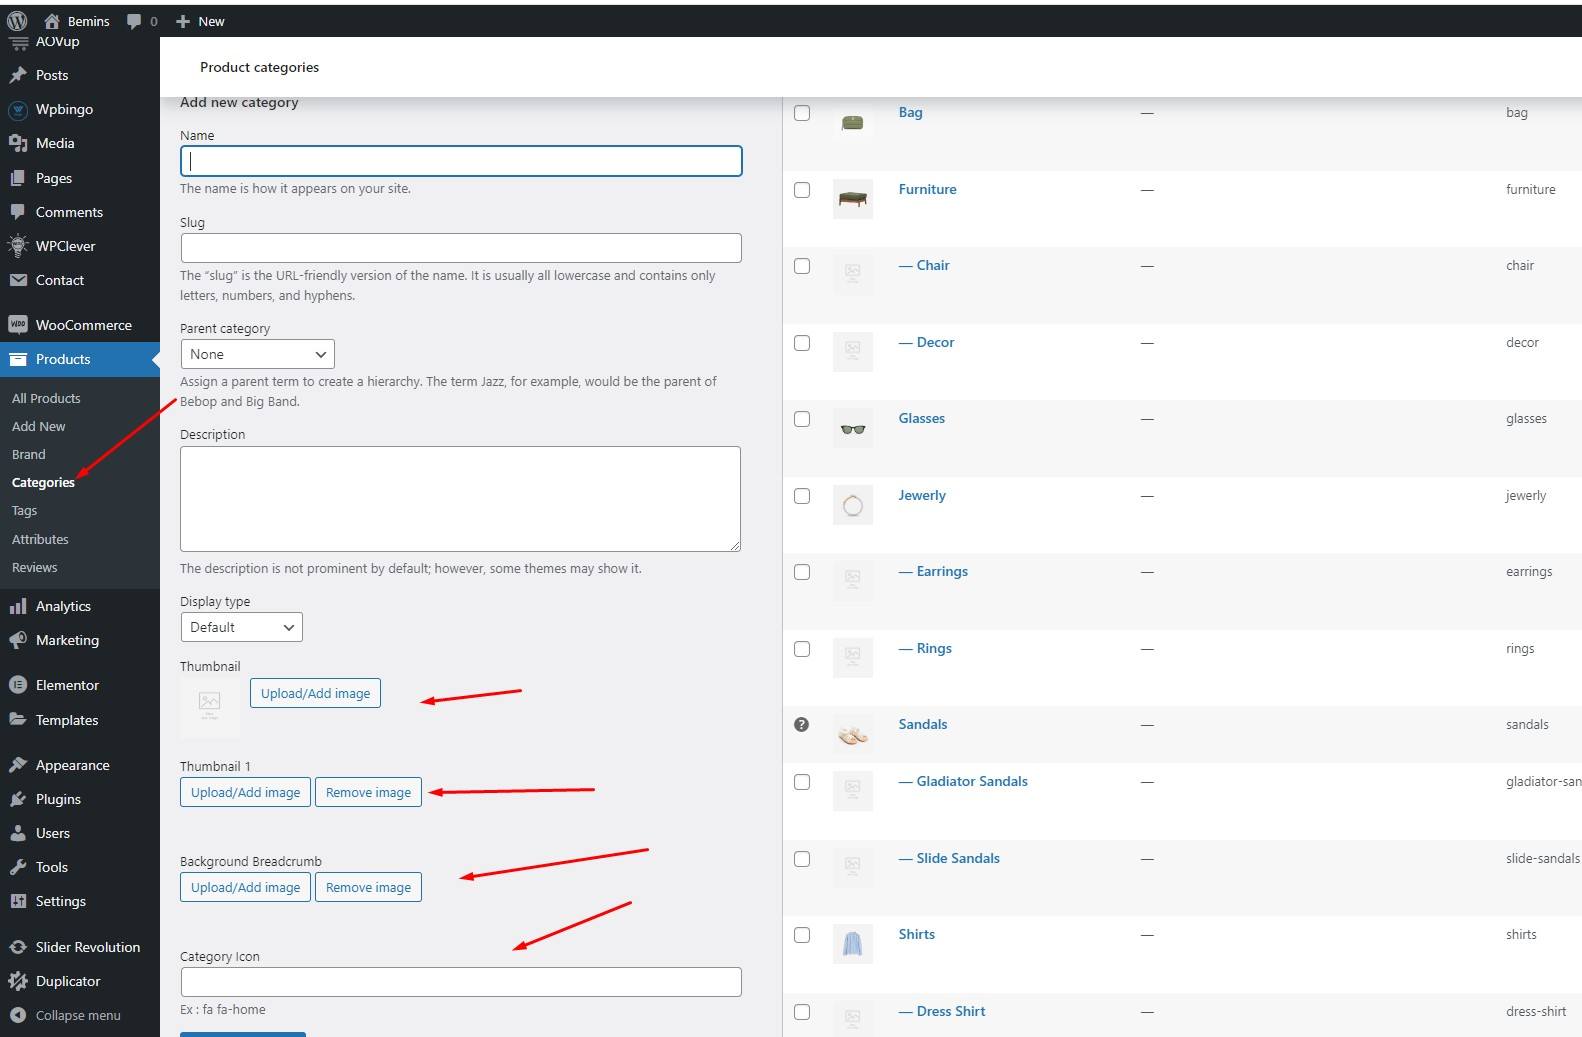
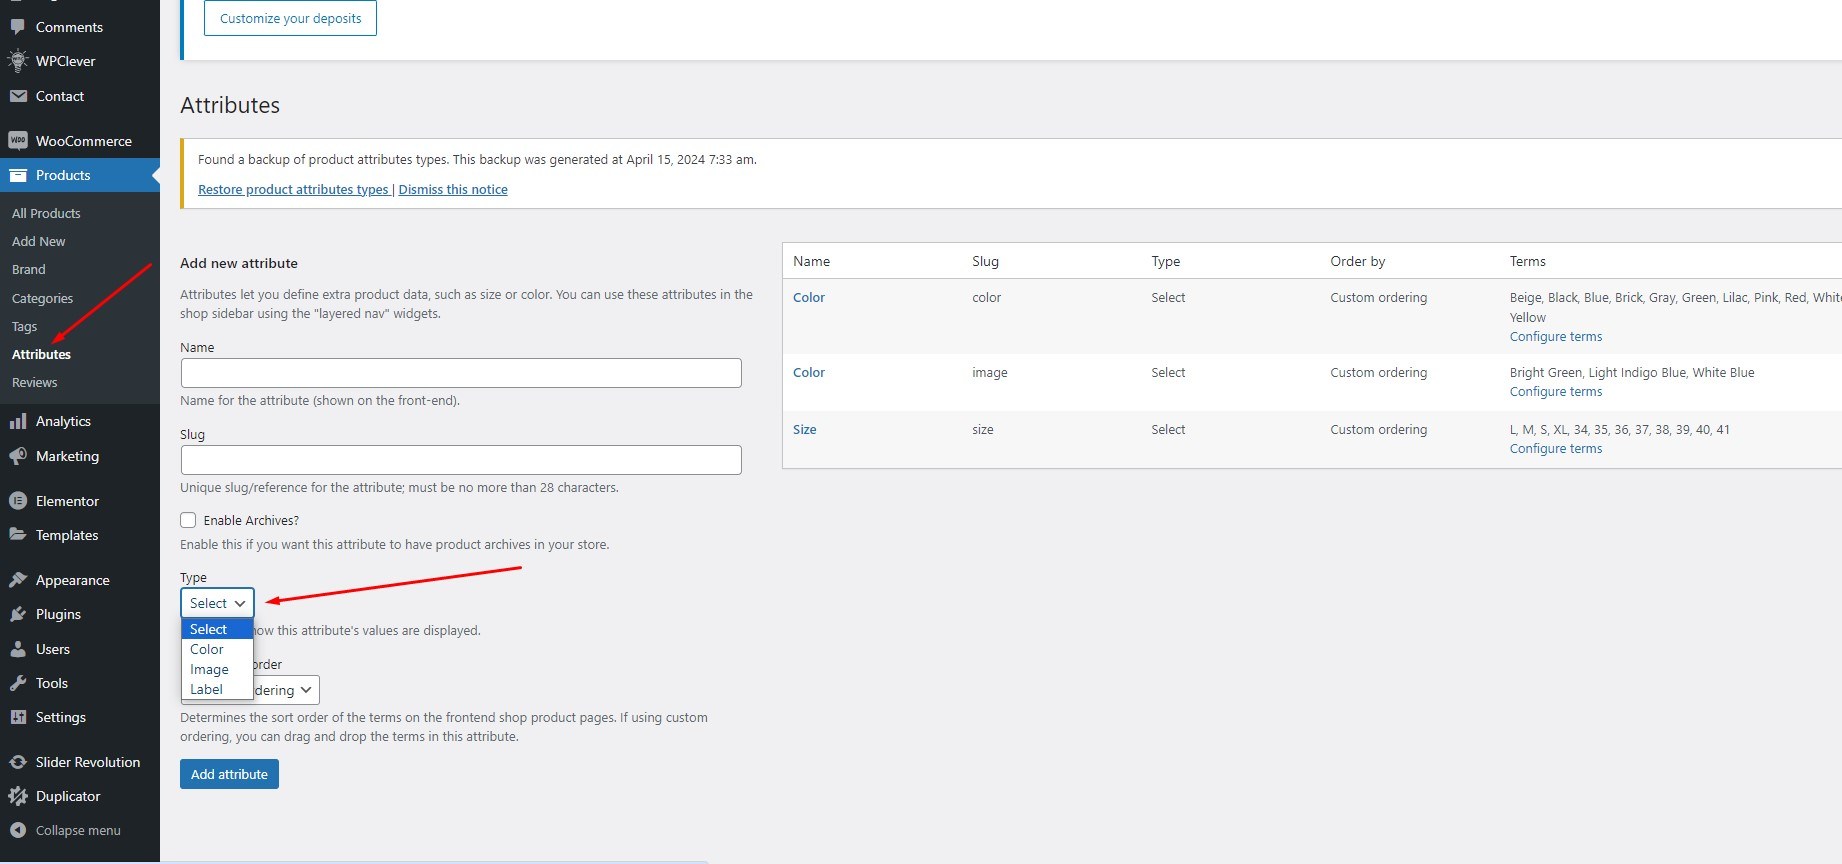
VI. Attributes
Go to Products > Attributes
You can create and manage Attributes here
VII. Product features
Go to Products > All Products
You can see the functions for our product here
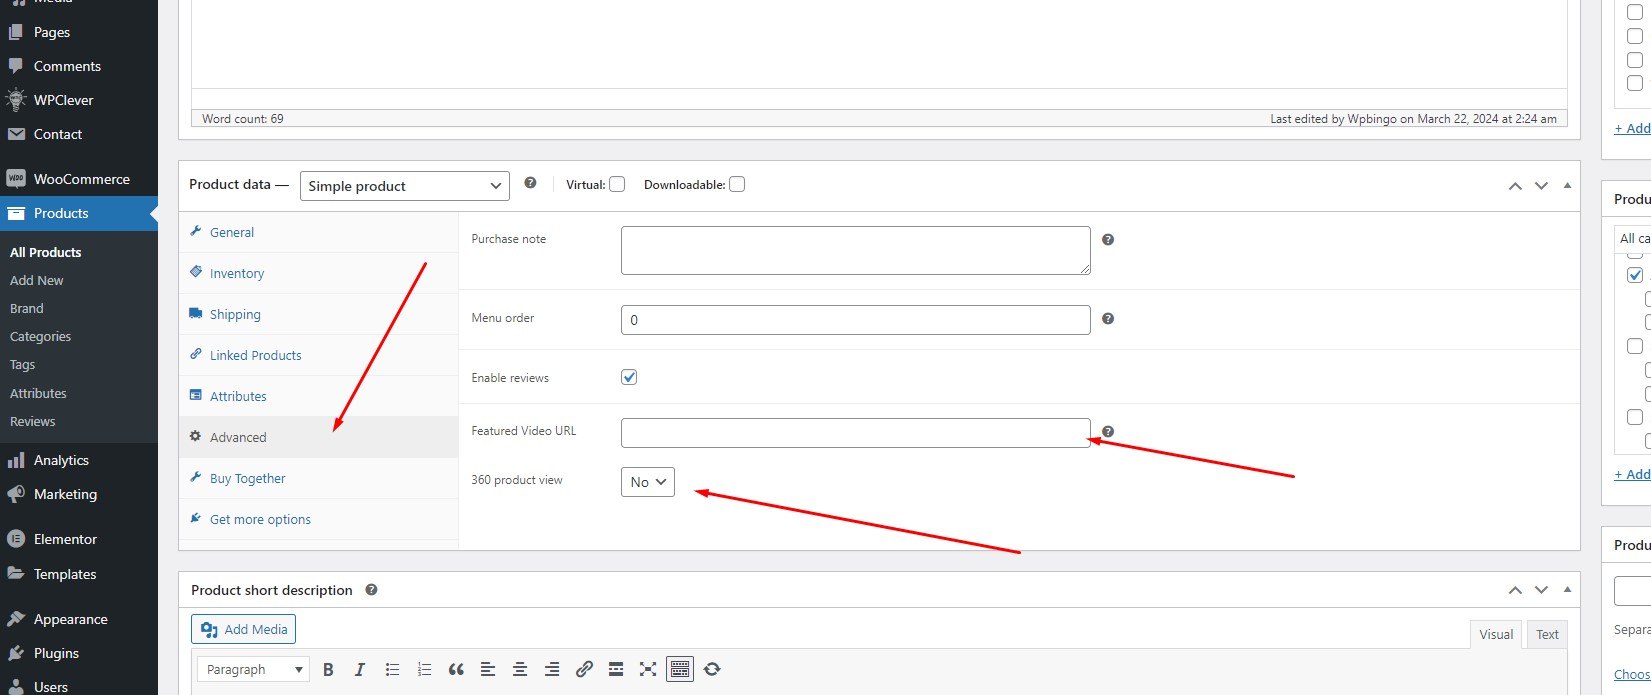
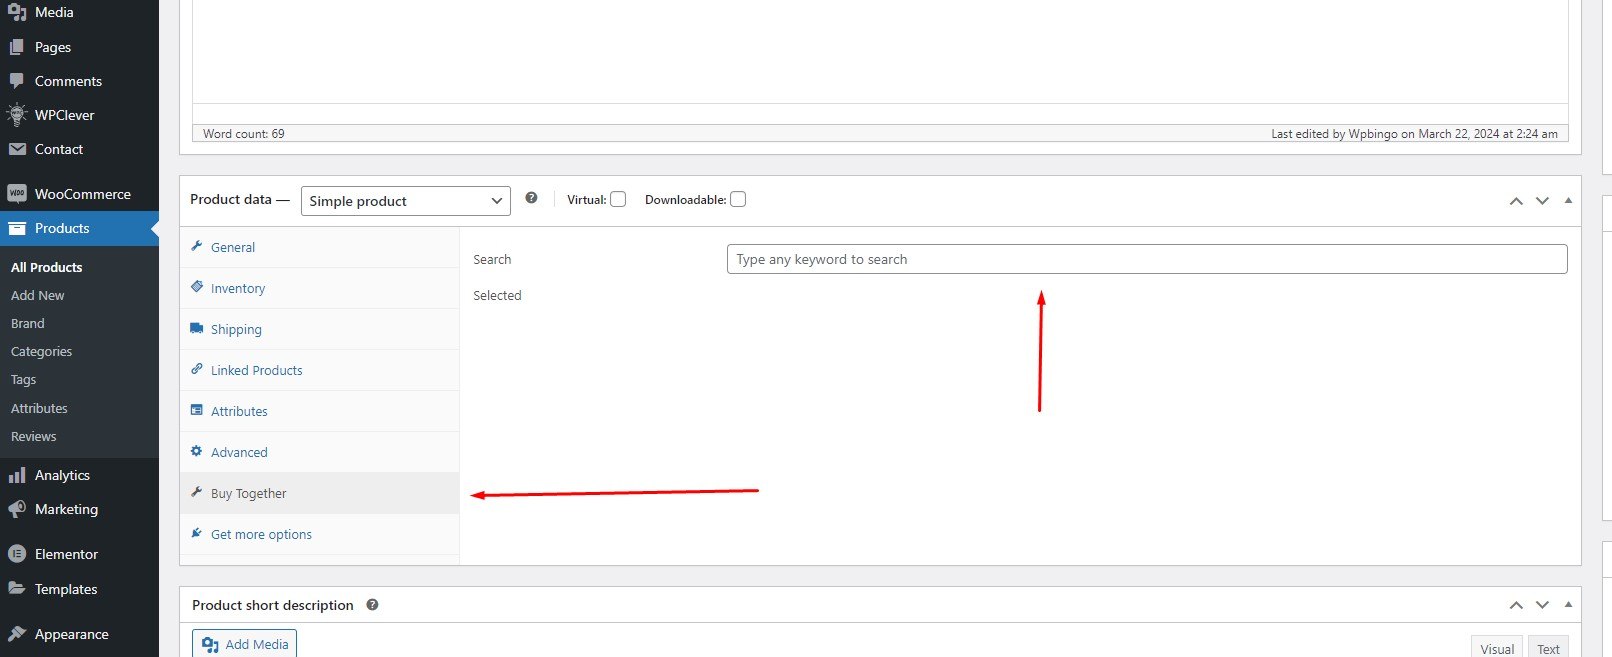
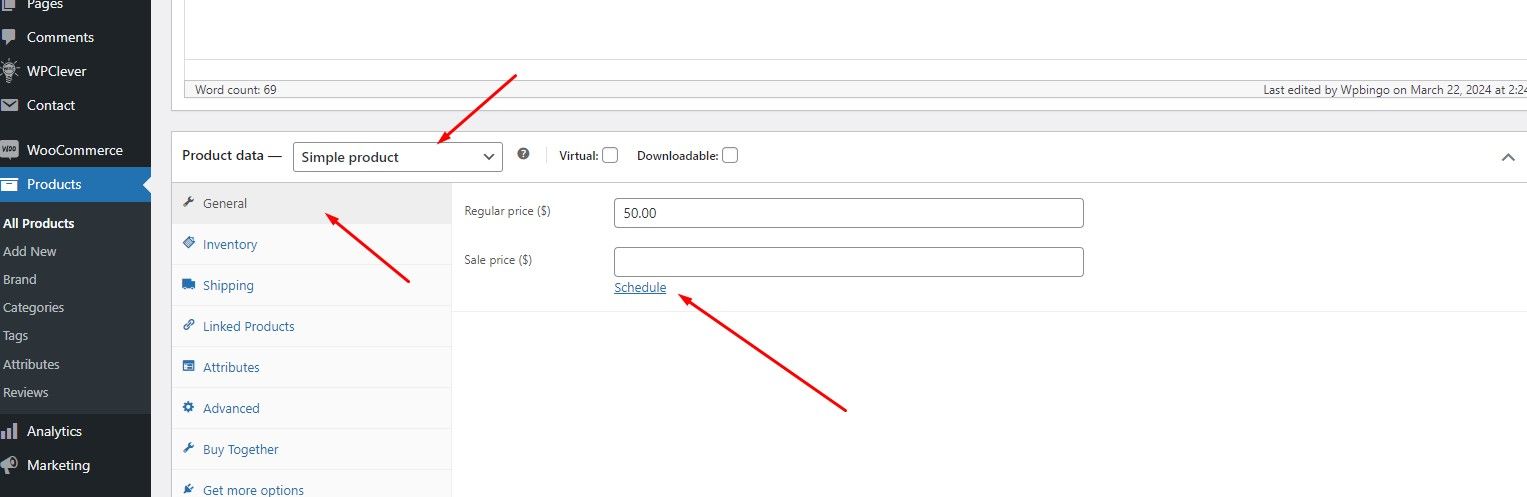
Buy Together
Enter countdown for the product
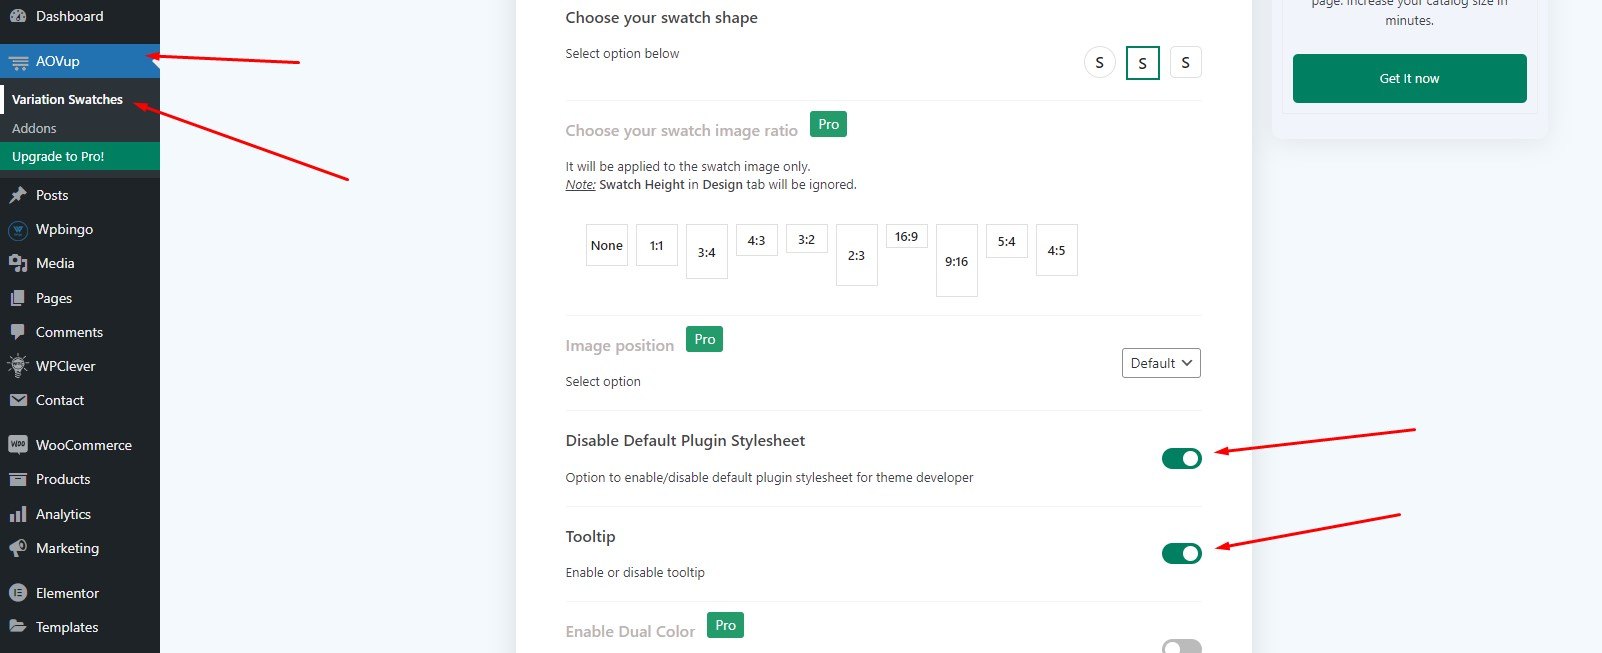
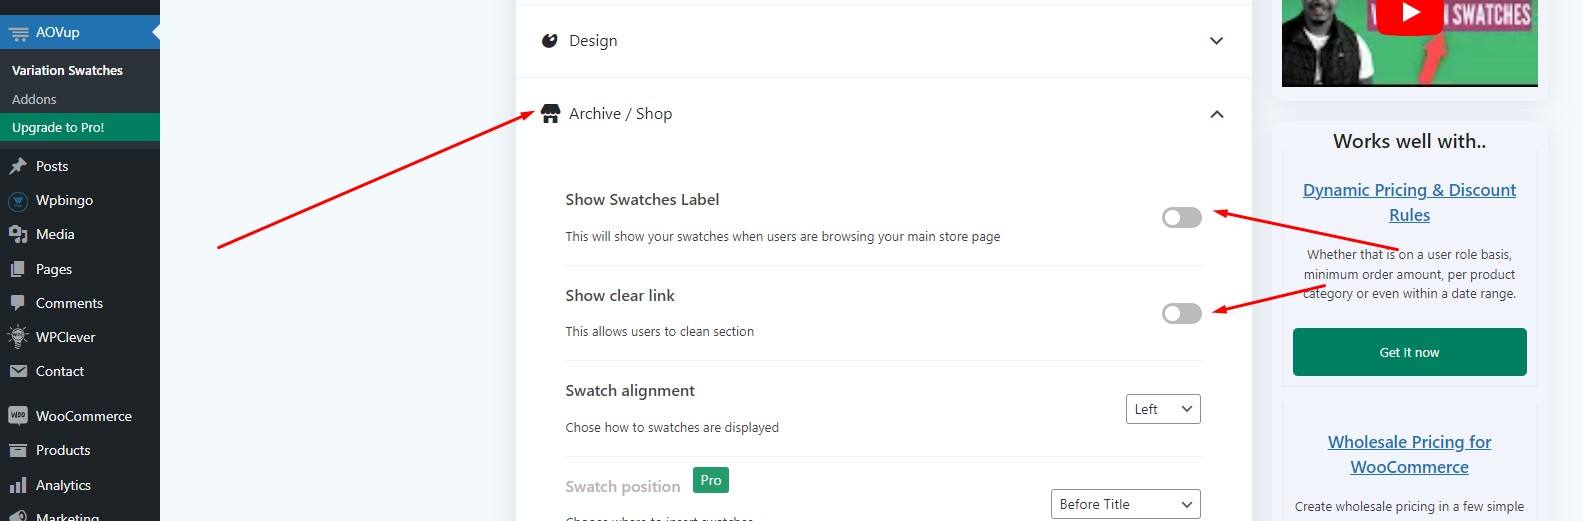
Variation Swatches for WooCommerce
Go to AOVup > Variation Swatches
Please configure the options similar to our photos so that the variations have the same design as on the demo
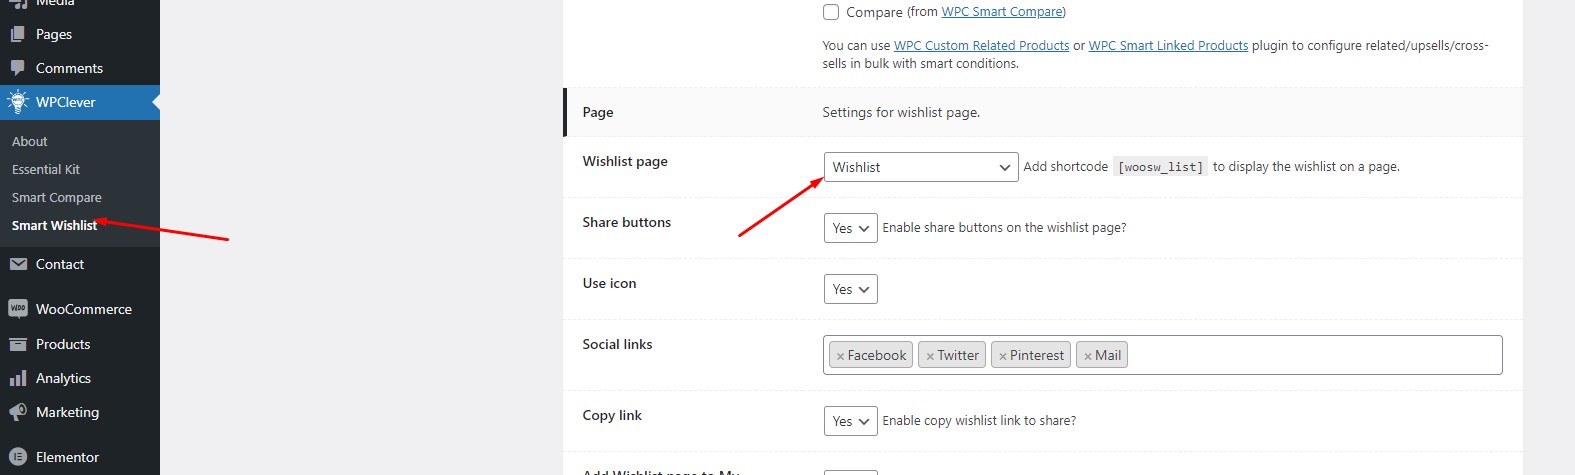
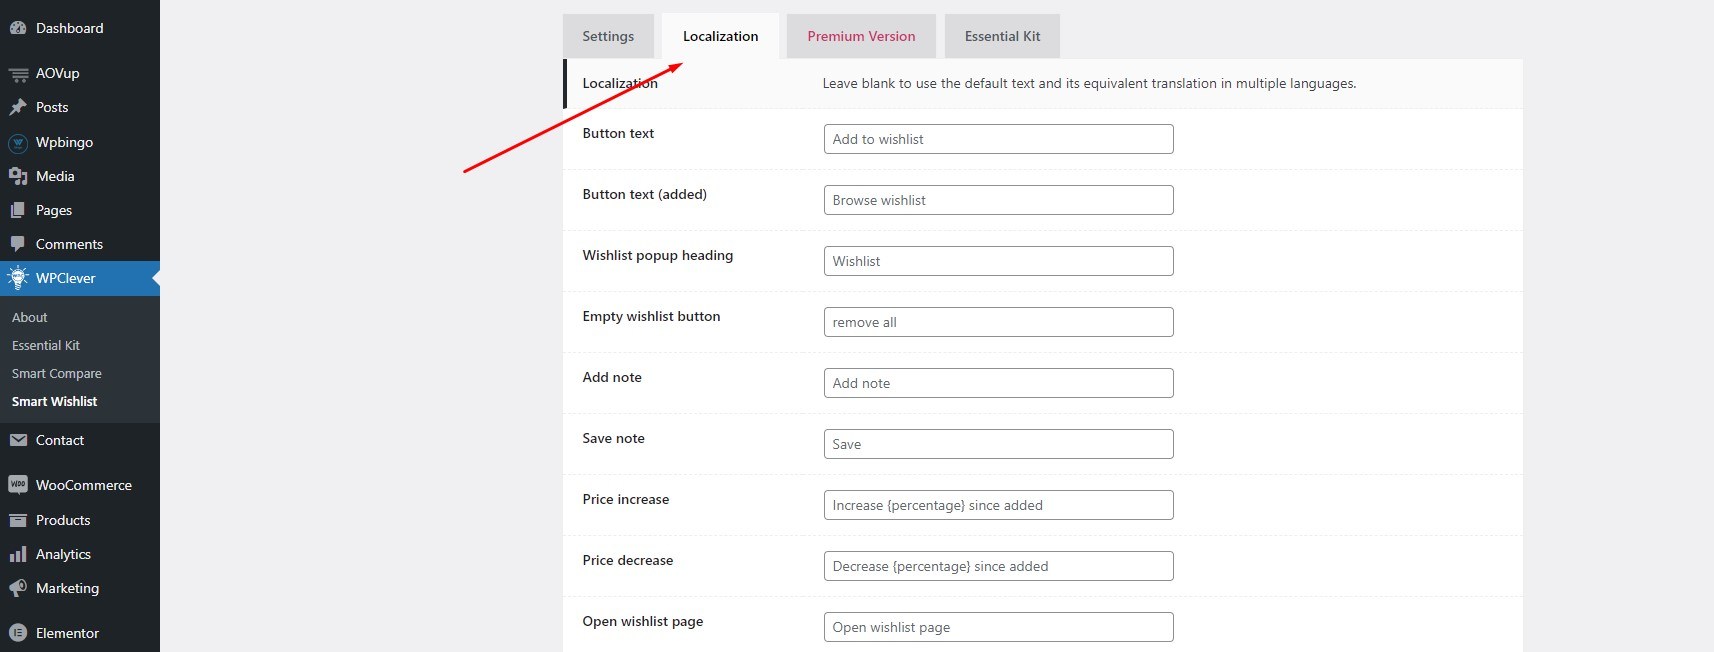
WPC Smart Wishlist for WooCommerce
Go to WPClever > Smart Wishlist
Select page wishlist
Translate wishlist
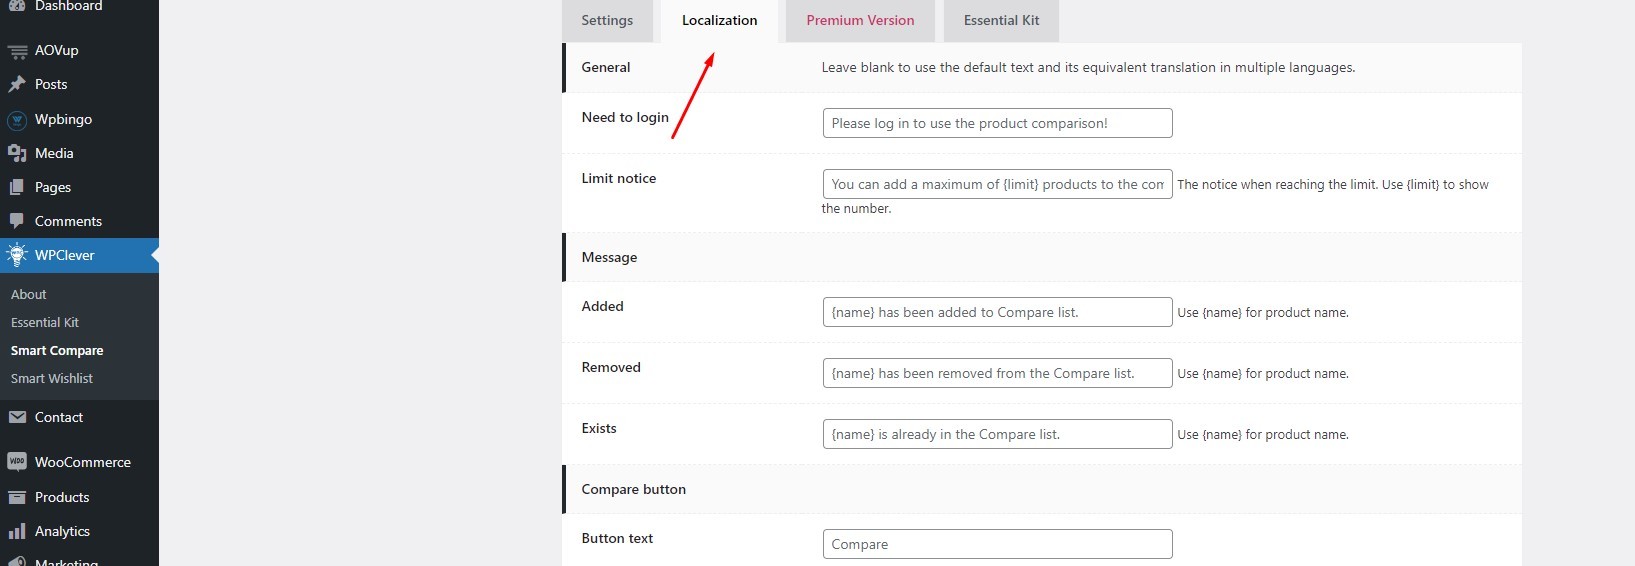
WPC Smart Compare for WooCommerce
Go to WPClever > Smart Compare
Configure compare table

Translate Compare
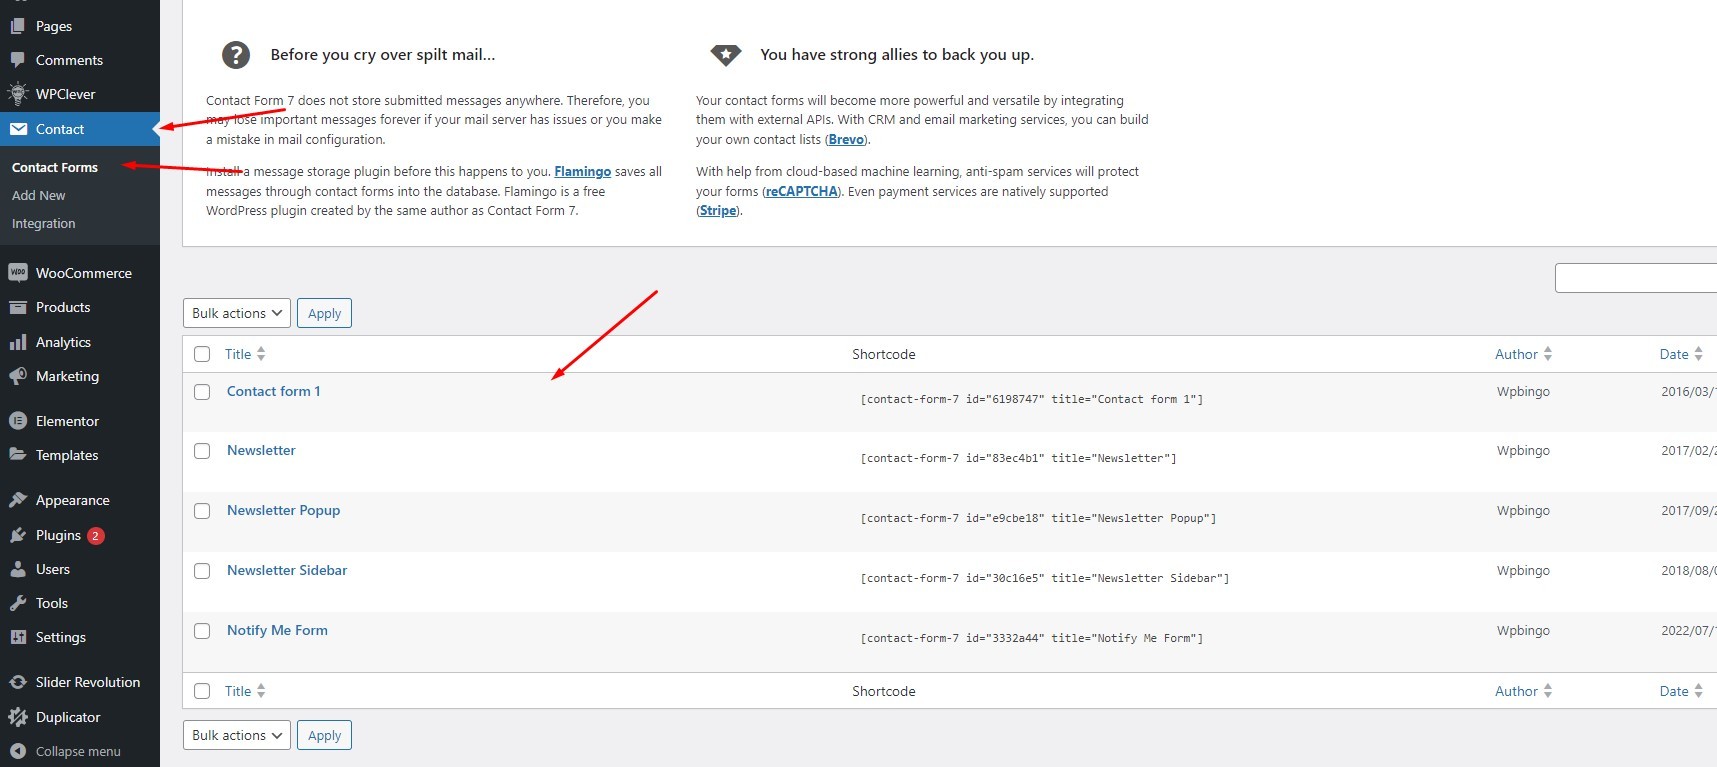
Contact Forms
Go to Contact > Contact Forms
Here you will see the forms used in the page. You can change its content here. However, you should only change the text, not the html because it will lose the style of the website
Blog & Posts
Once you’re on the Add New Post screen, you will then be able to set a title for the blog post, add the body content, and also provide all the meta information such as extra details and media. In the blog meta you can set the image for the thumbnail, and also the media type for the detail page.
You can use the Visual Composer to create the content of the item, which effectively allows you to have limitless possibilities for what you can display, and also how you can display it.For more detail, please visit: http://codex.wordpress.org/Writing_Posts
Translation
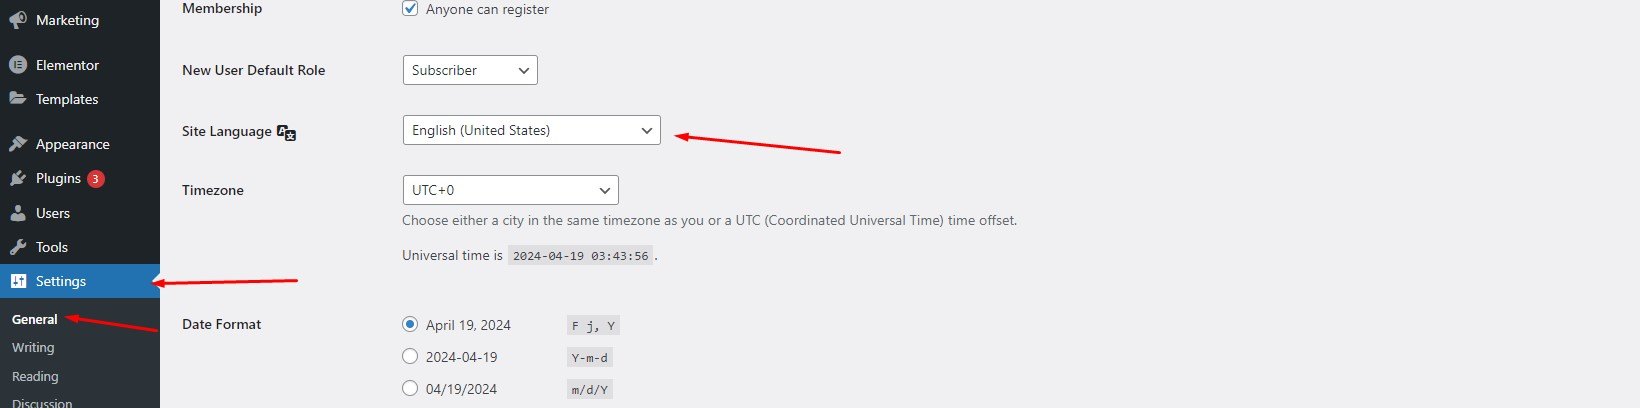
Setup Language
WordPress makes it super-easy to change the language on your website. Simply go to Settings > General in your WordPress dashboard, and scroll down to the bottom of the page. There you will see the option to select Site language.
Translate Your Website
In order to translate your website completele, there are things you need to translate:
Activated theme - In case you are using a child theme, the theme you need to translate must be the parent theme. For example, if you are using Moonte Child theme, the child theme of Moonte, you must translate Moonte.
Installed plugins - With included plugins in Moonte, you must translate them manually. With plugins from WordPress.org, you need to check if they are translated into your language or not. If they are not translated, you need to translate them manually too.
Some Options - With some options of theme, plugins, you must edit it to change the default value. For example, the plugin Mailchimp For WP will create a default form. You must edit it to change some text strings like "Email", "Name",...
I. Using Loco Translate Plugin
The easiest way to translate your theme is using the Loco Translate plugin.
Go to Plugins > Add New
Search for plugin “Loco Translate”
Install and Activate the plugin.
After Activation locate Loco Translate
Loco Translate plugin has it own a short tutorial for beginner. Please take a look at it here.
II. Using Poedit
There are a few different options for translating WordPress, as outlined in the WordPress Codex. For this tutorial, we’re going to use Poedit, an easy to use open source program available for Mac OS X, Windows and UNIX/Linux.
Information
Thank you for reading!
We hope you can create the best website with our themes.
- Email: [email protected]
- Facebook: Wpbingo