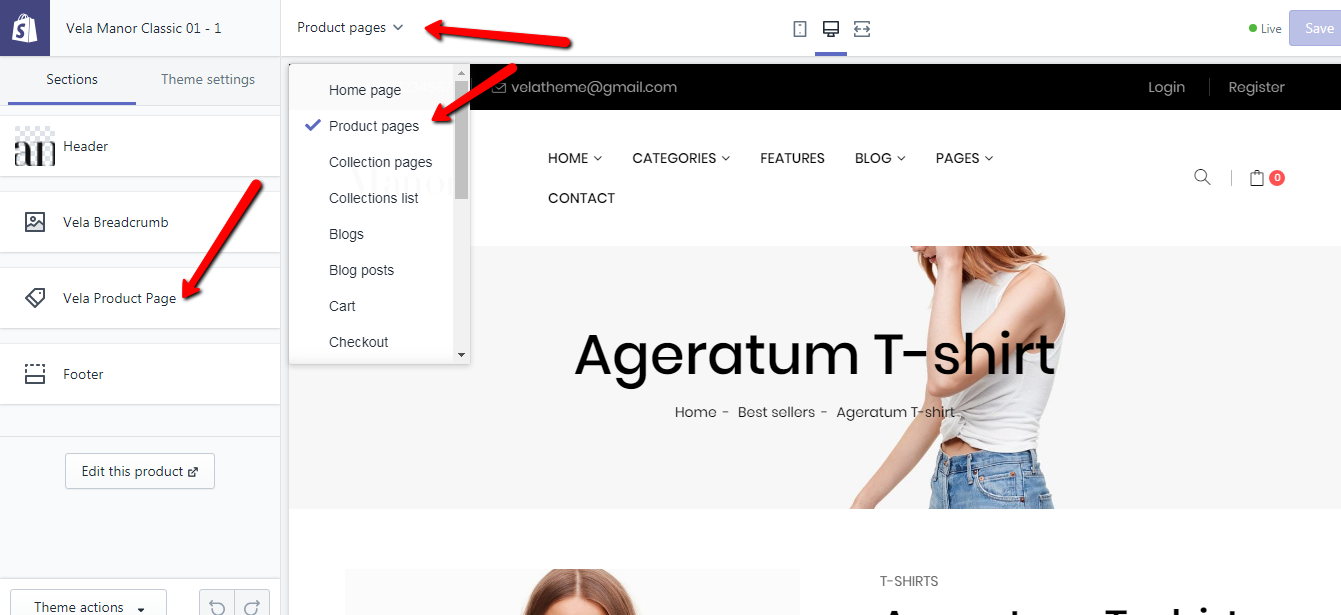
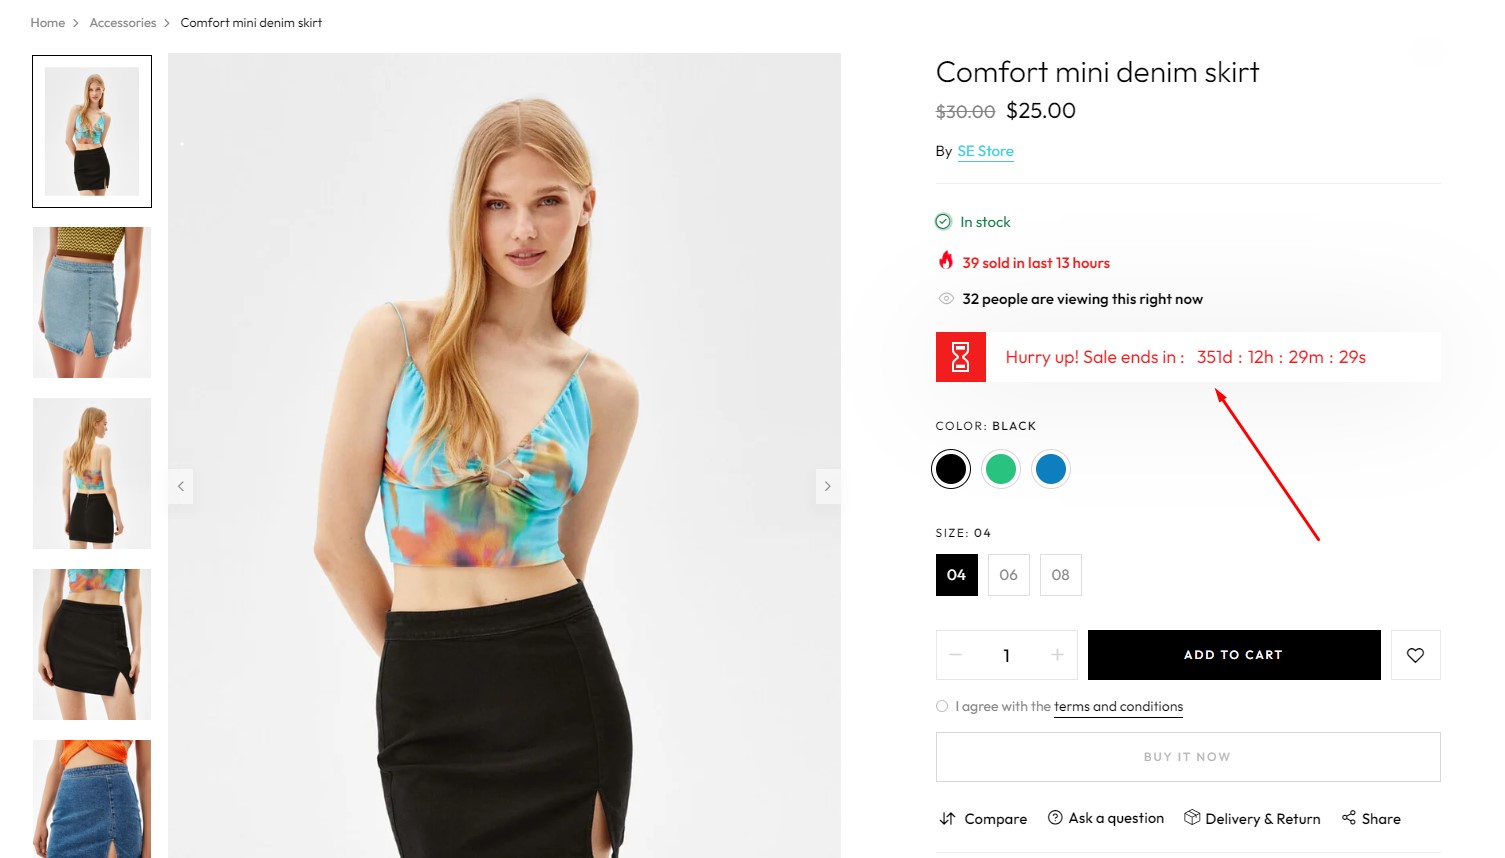
Product pages
1. From your Shopify admin, go to Online Store > Themes.
2. Find the theme that you want to edit and click Customize.
3. Go to Product page.
General settings
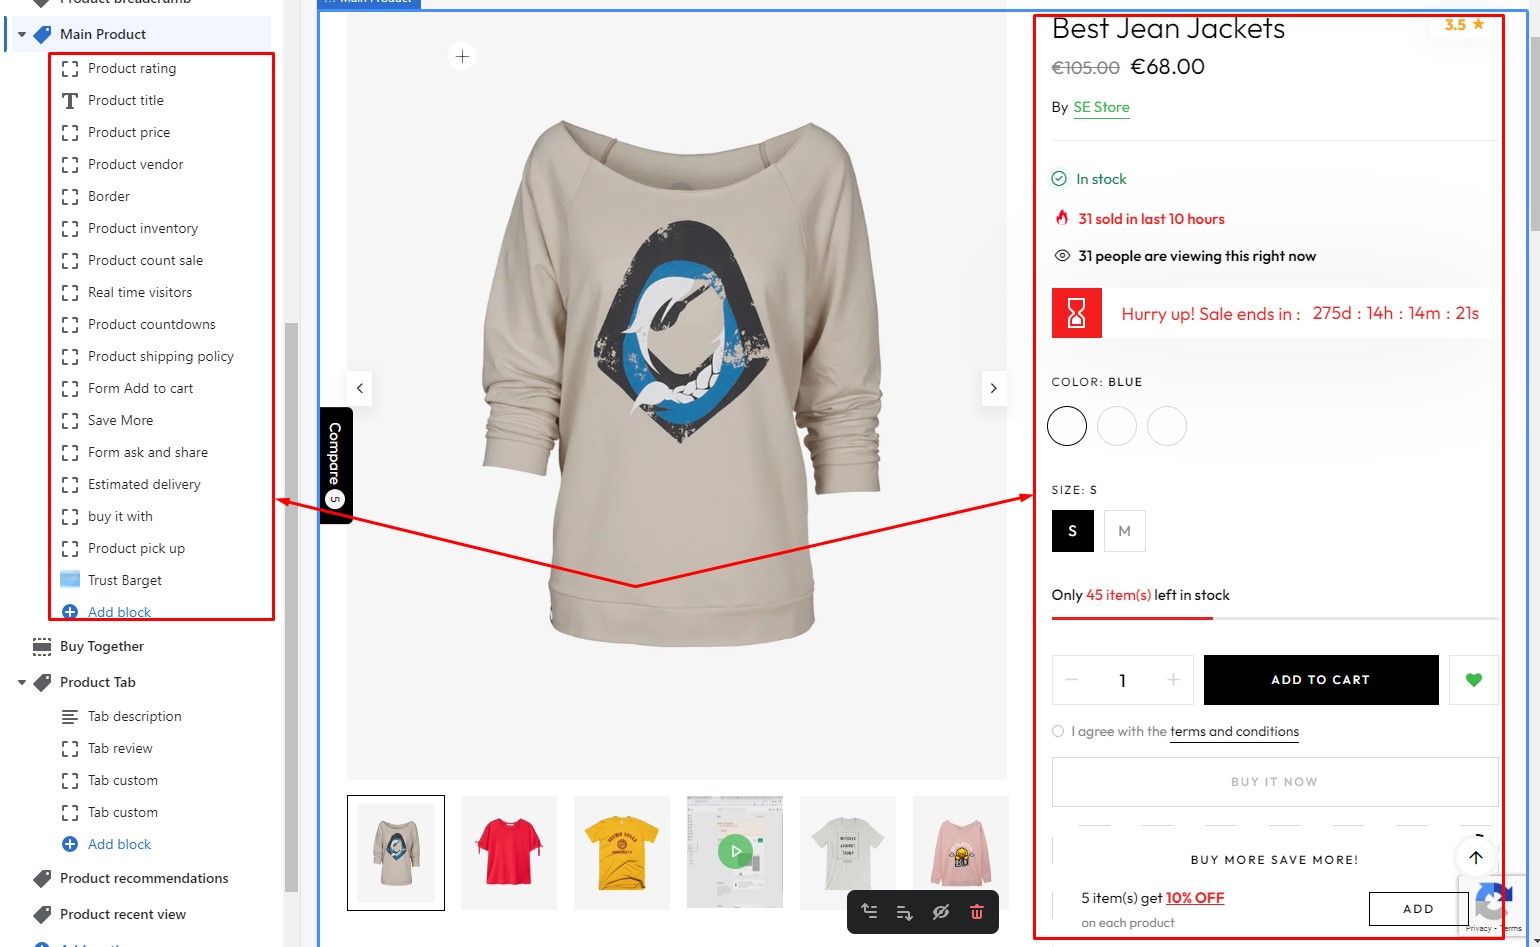
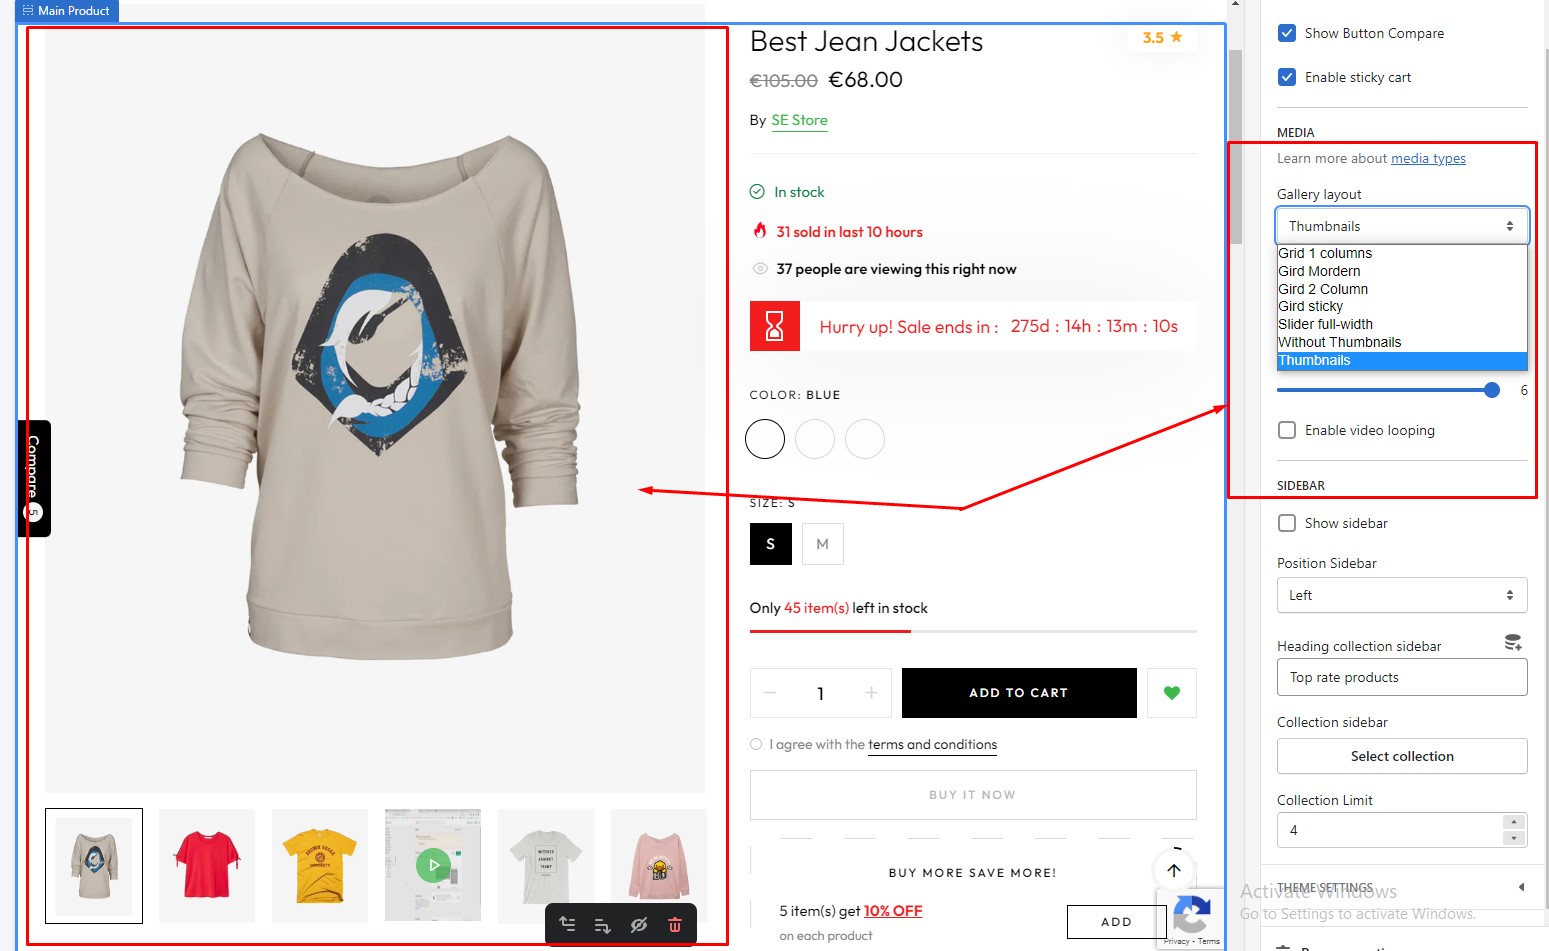
Media
OPTIONS FORM
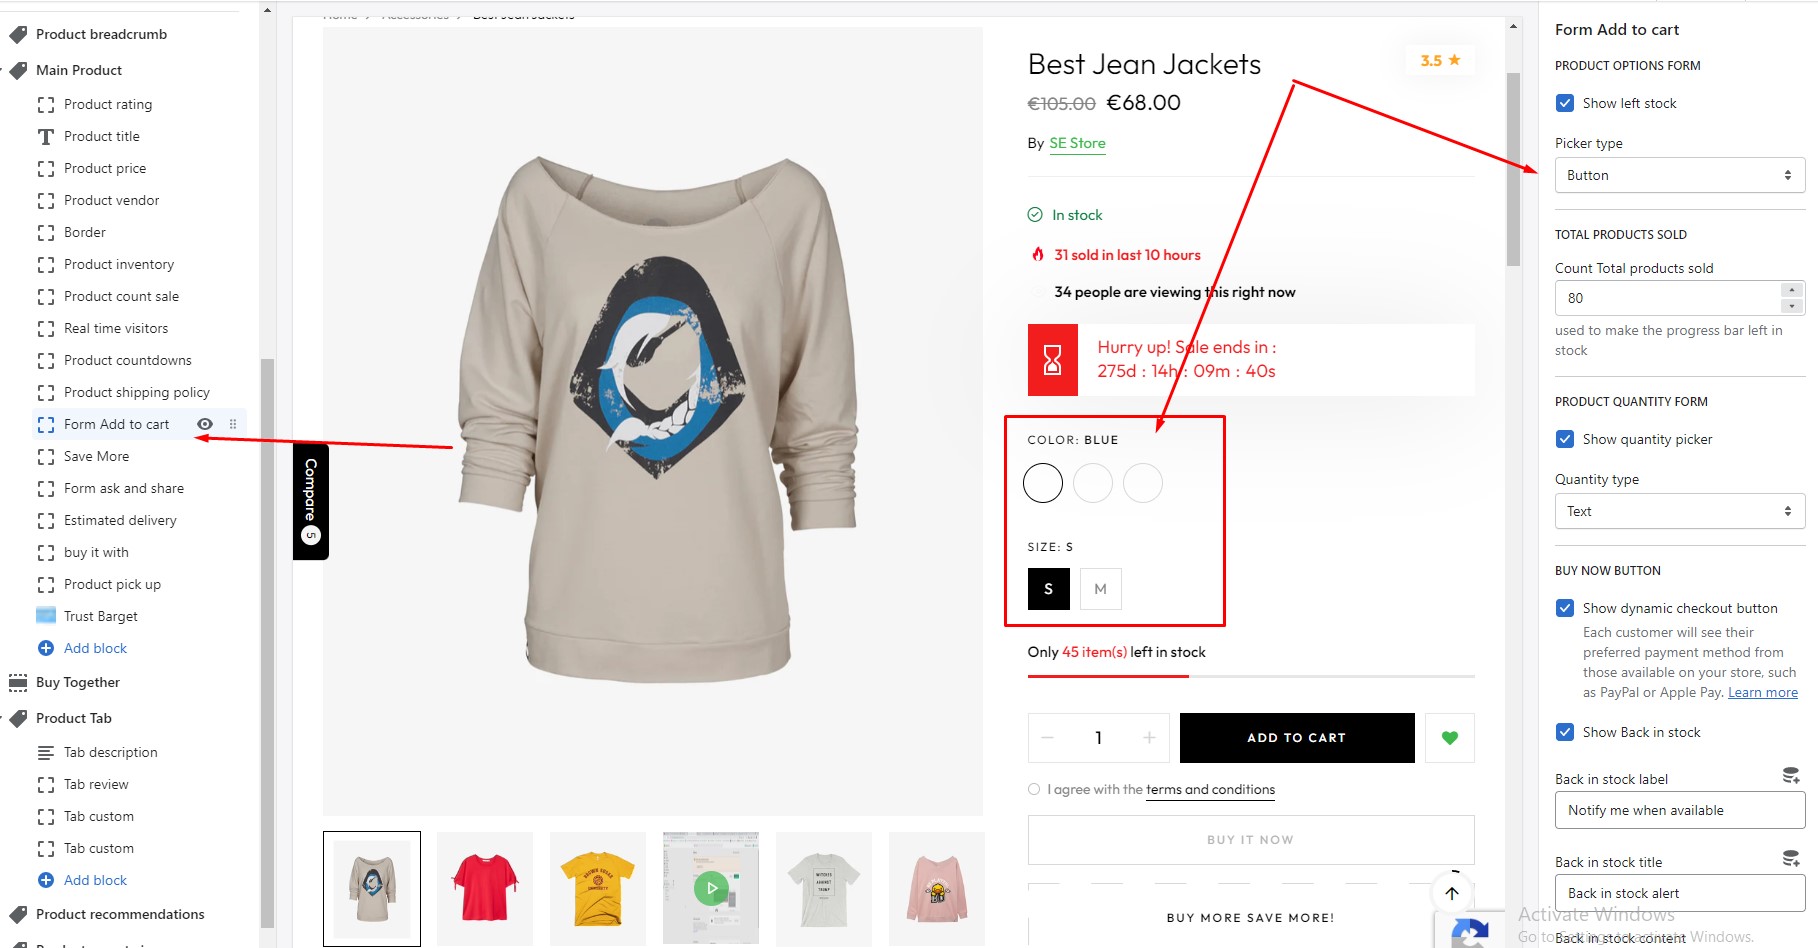
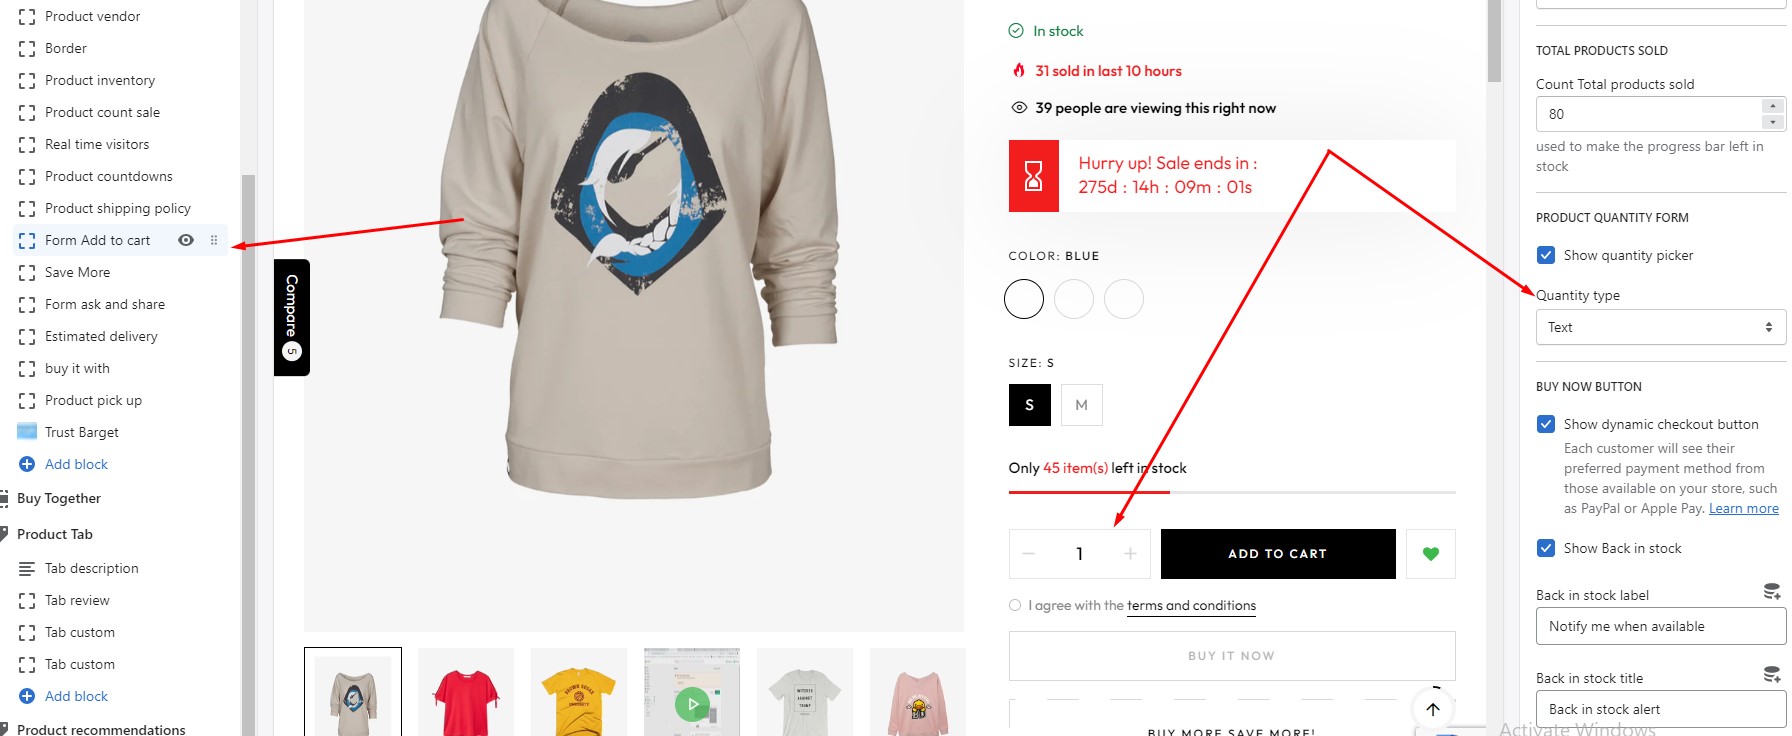
QUANTITY FORM
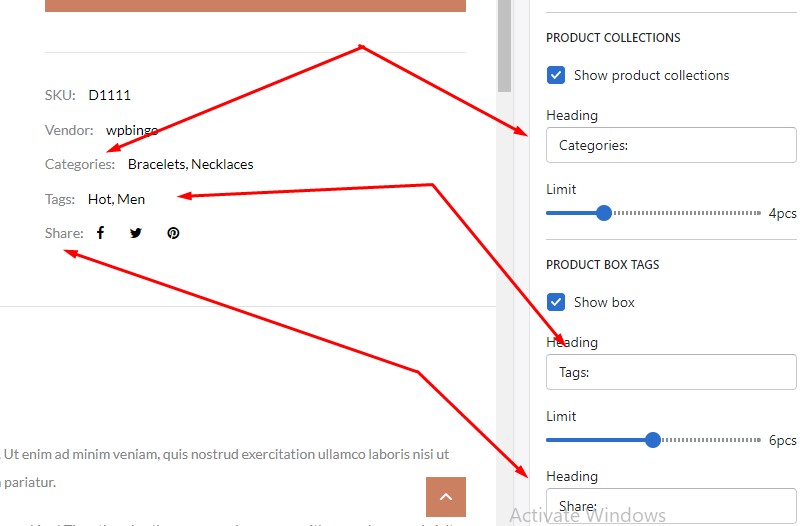
COLLECTIONS
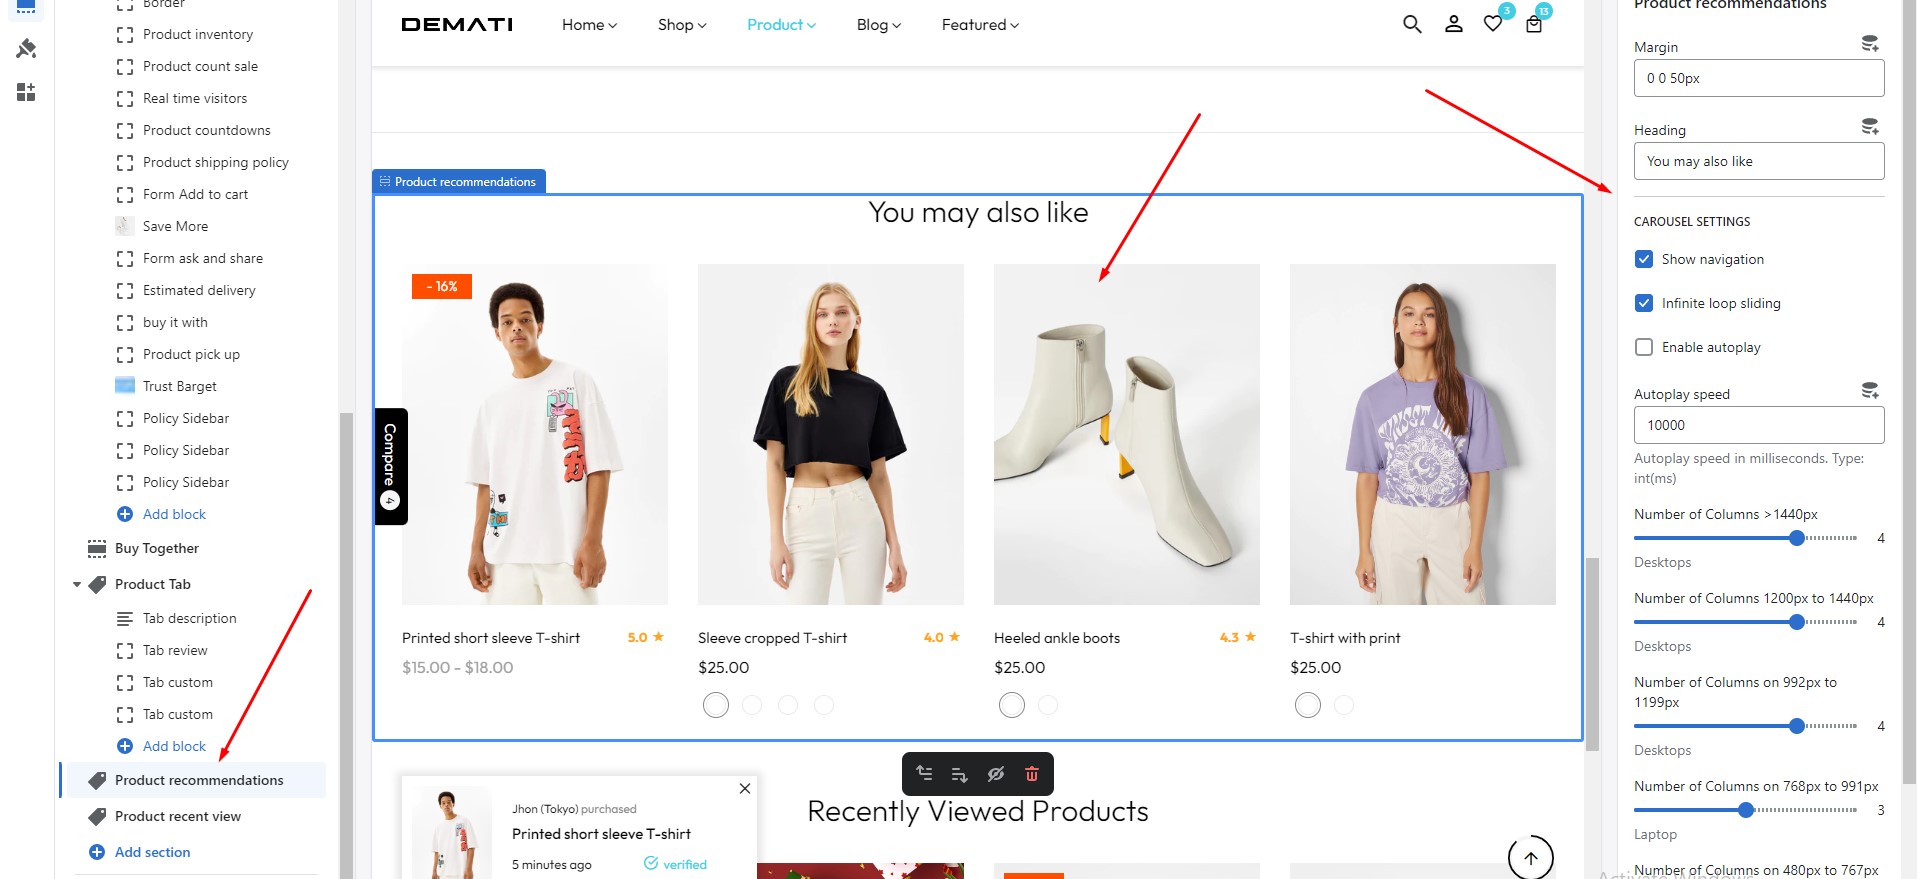
Product recommendations
You can enable, disable and configure product recommendations here
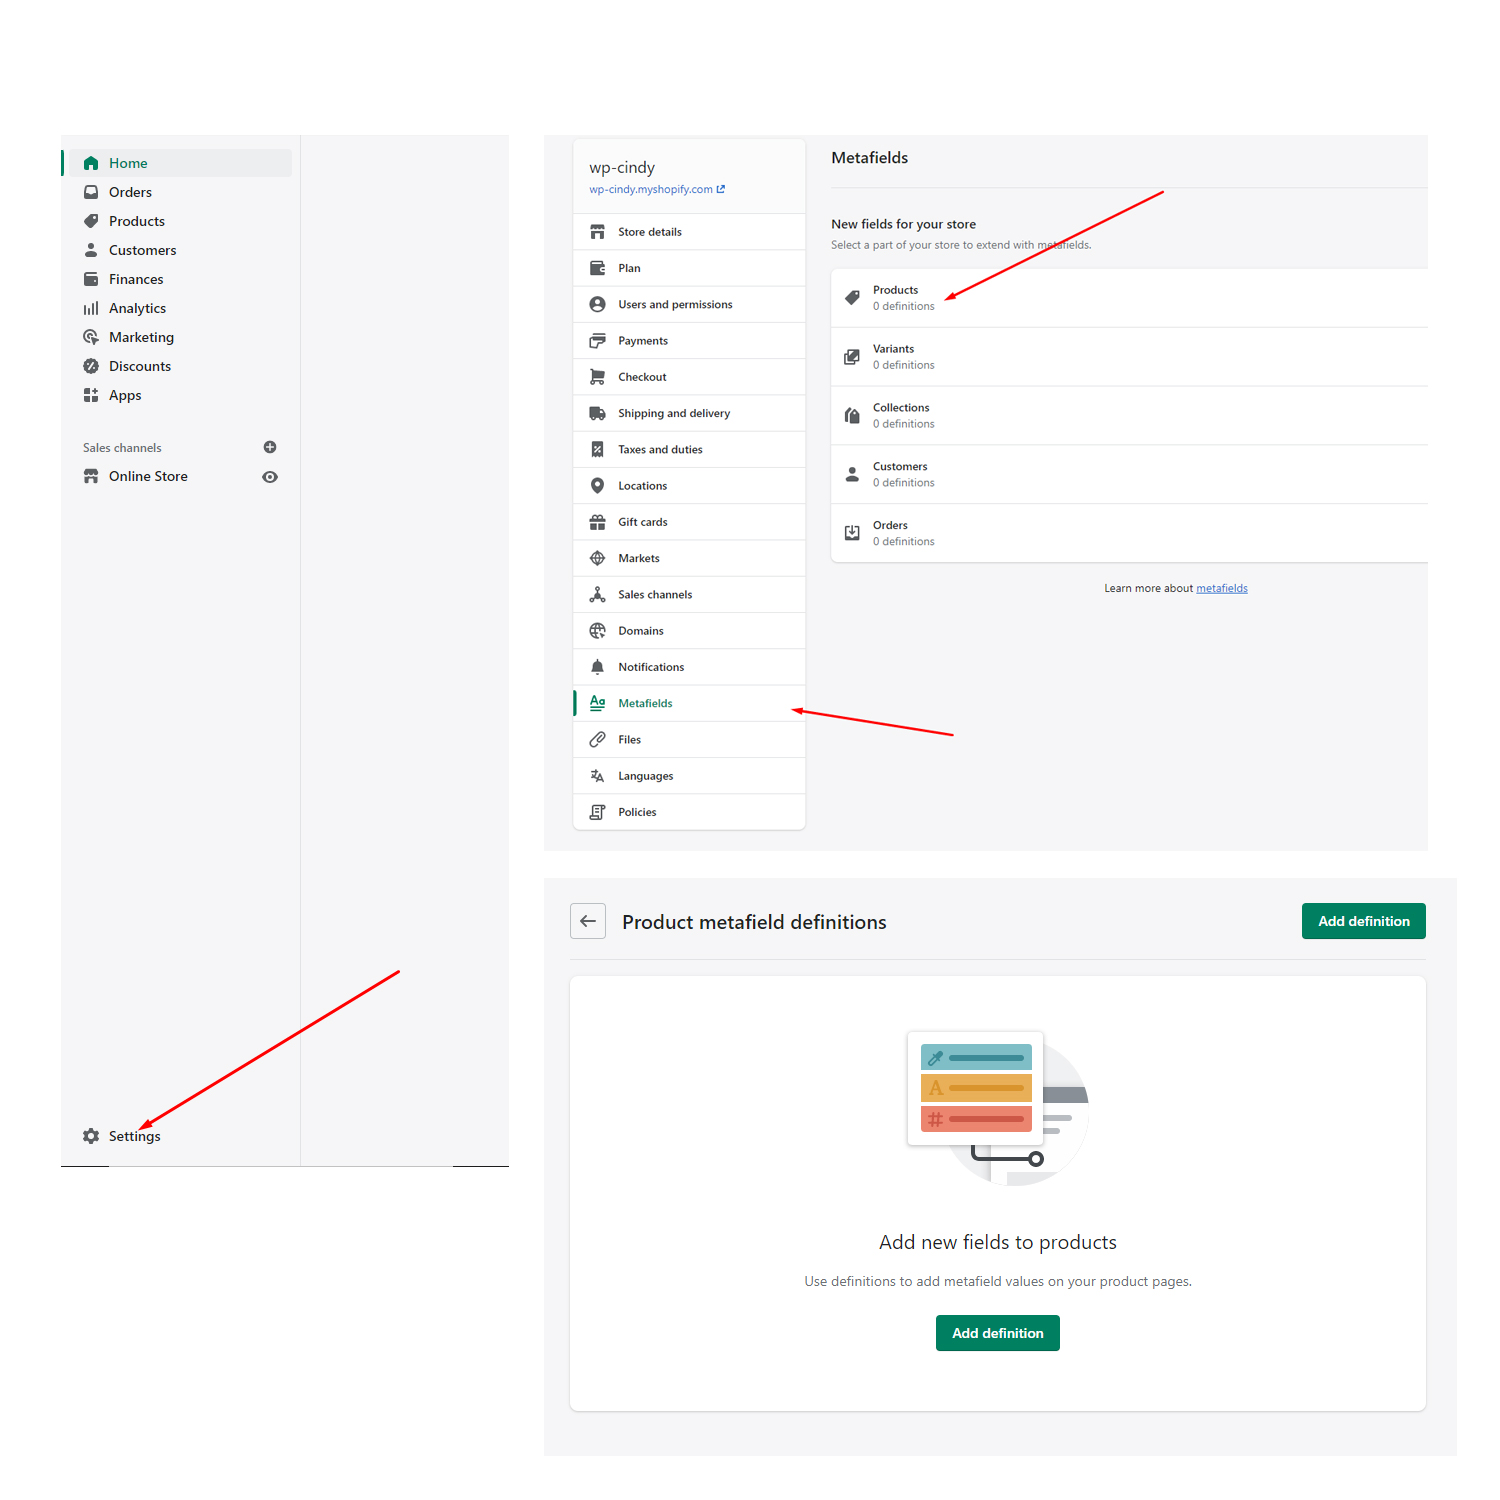
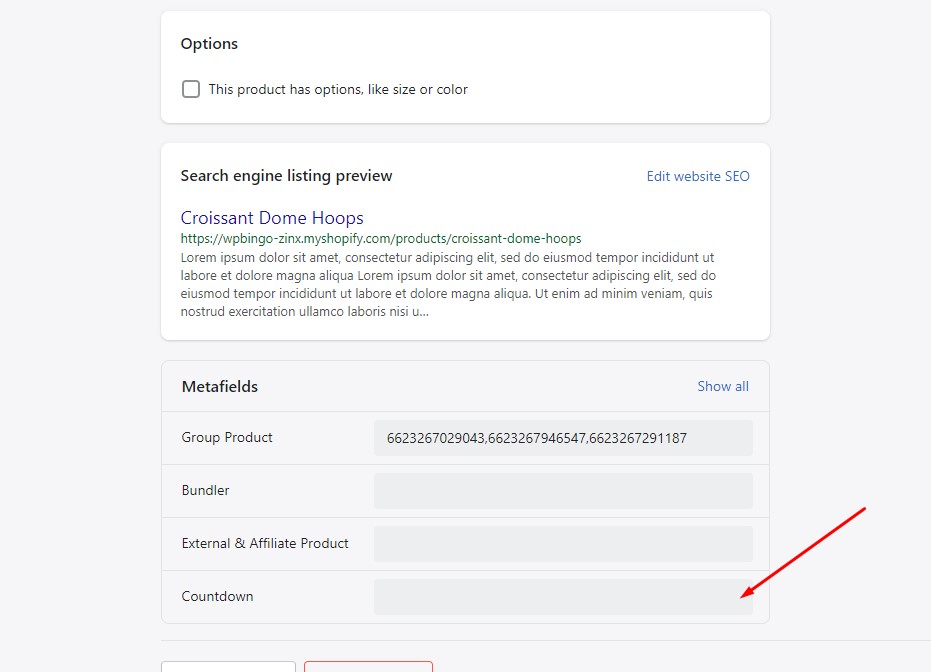
Group Product
You need to create Metafields to import Group Products1. From your Shopify admin, go to Settings > Metafields.
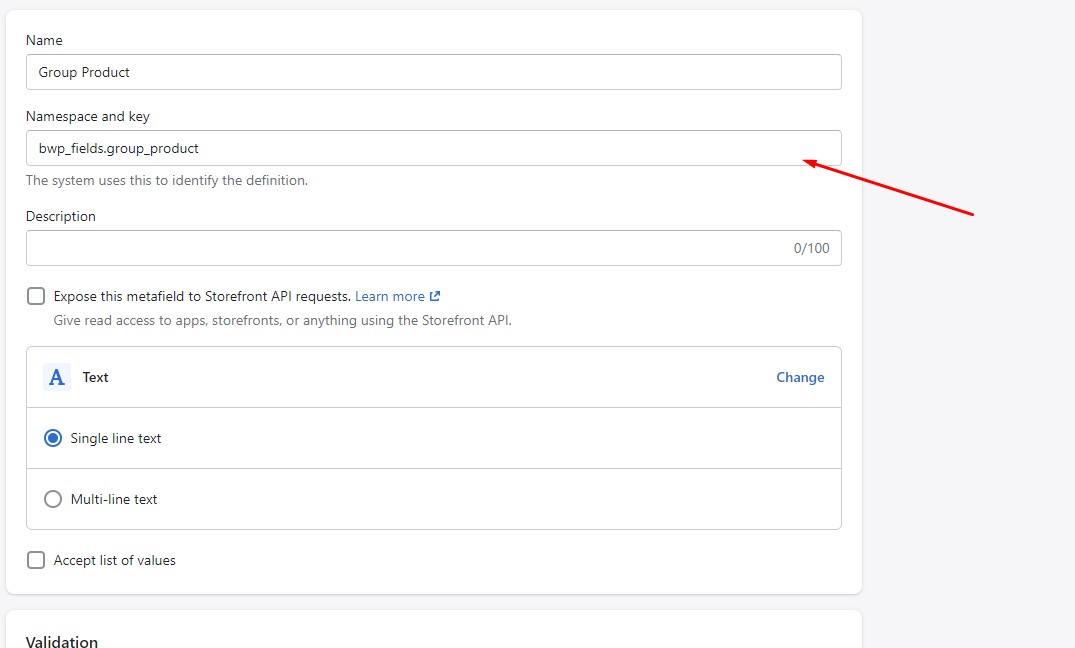
2. You need to create a meta field with the same name as we require bwp_fields.group_product
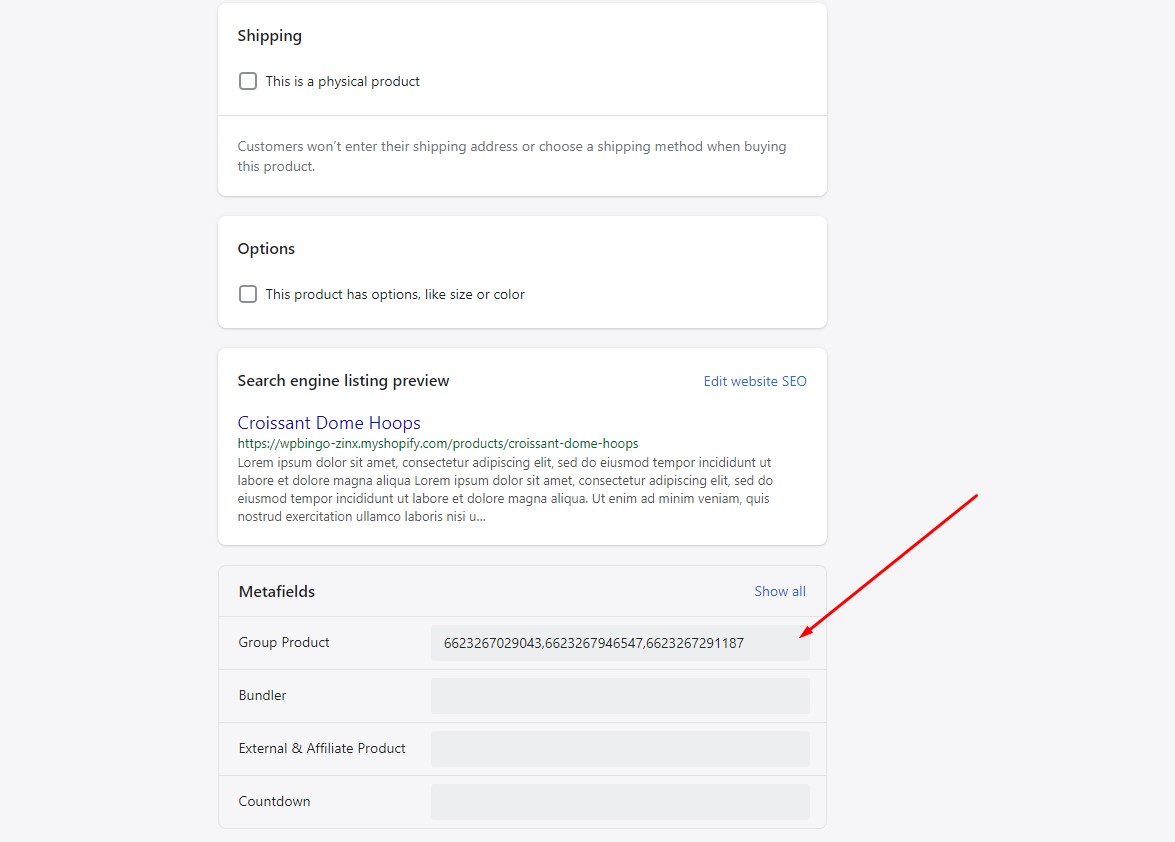
You can select the products you want to include in the group.
Front End
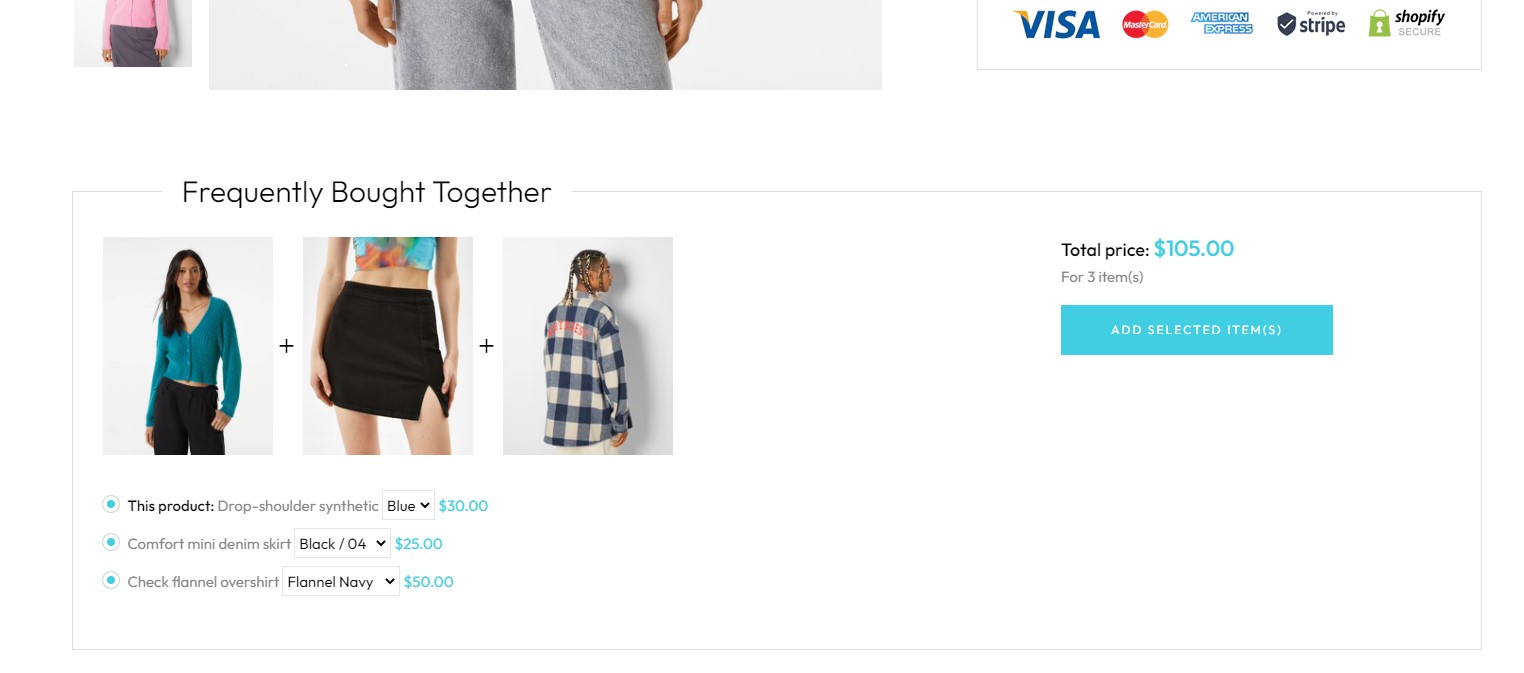
Buy Together Product
You need to create Metafields to import Buy Together Product1. From your Shopify admin, go to Settings > Metafields.
Front End
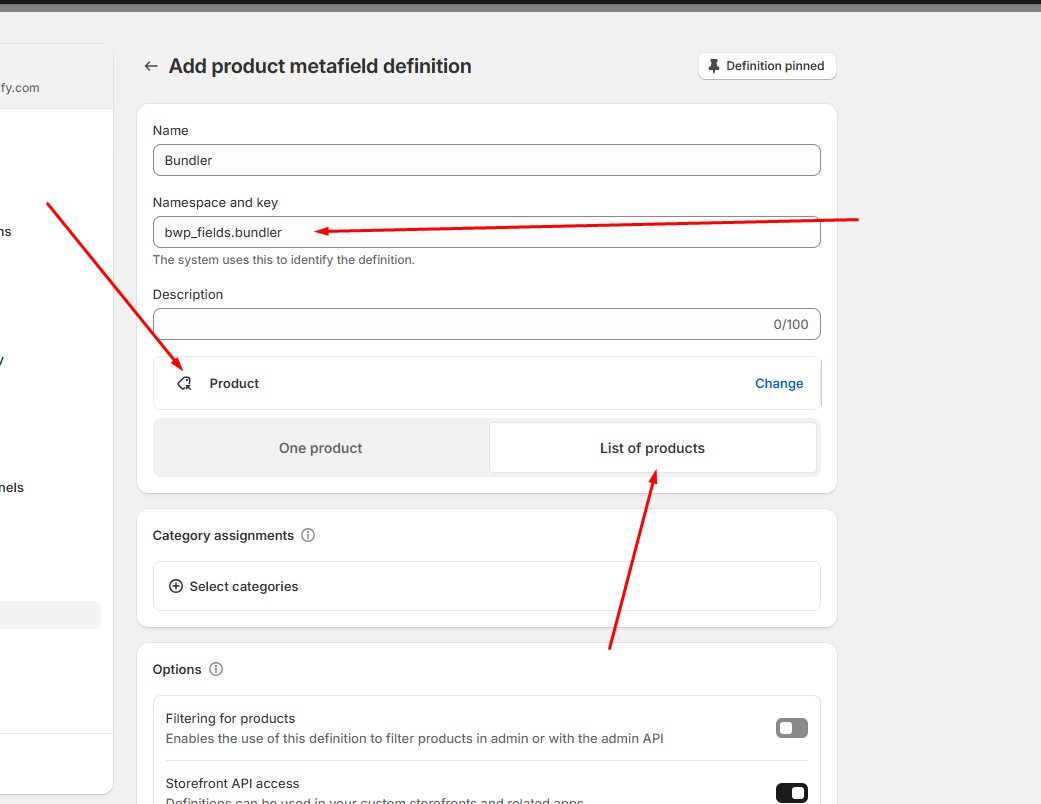
External & Affiliate Product
You need to create Metafields to import External & Affiliate Product1. From your Shopify admin, go to Settings > Metafields.
2. You need to create a meta field with the same name as we require bwp_fields.external

You can create a Buy Together product by adding the IDs you want to sell together in the External & Affiliate Product field

Front End

Countdown
You need to create Metafields to import Countdown1. From your Shopify admin, go to Settings > Metafields.
2. You need to create a meta field with the same name as we require bwp_fields.countdowns

You can enter the time for the countdown product in the countdown field
Front End
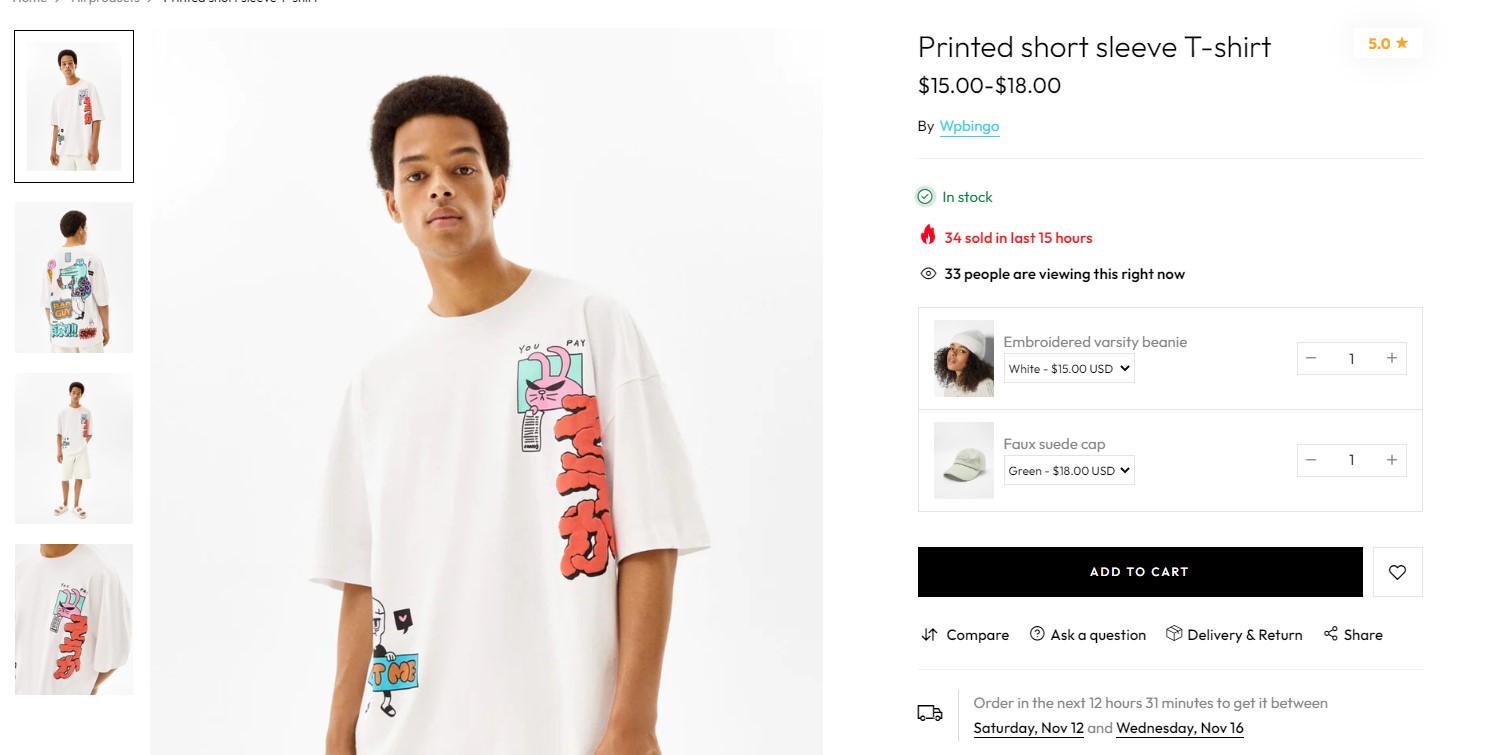
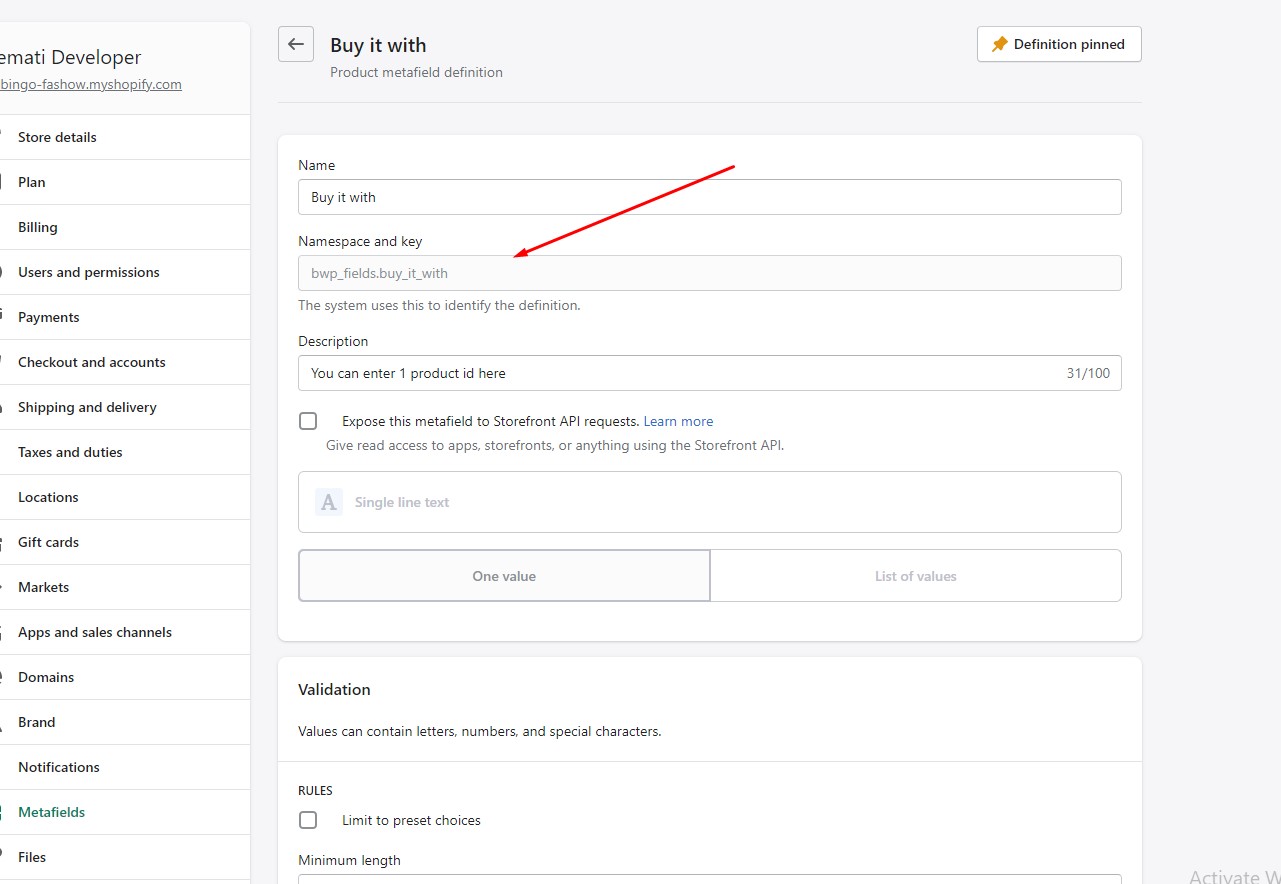
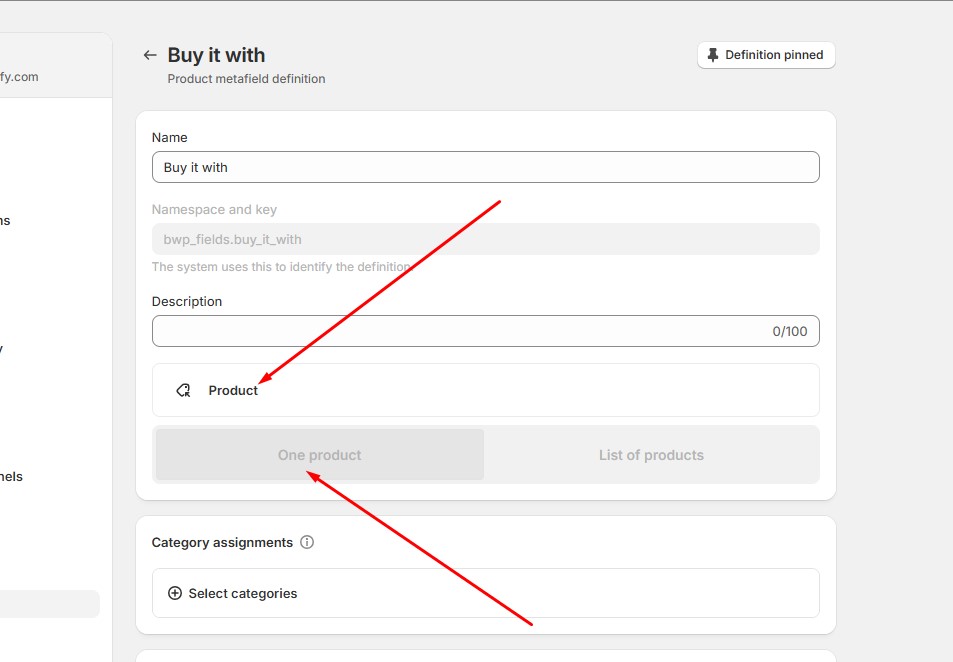
Buy it with
You need to create Metafields to import Buy it with1. From your Shopify admin, go to Settings > Metafields.
2. You need to create a meta field with the same name as we require bwp_fields.buy_it_with
2.1 Select product type if you are using theme:ARIO, SIKRA, SOZA, LEMIE
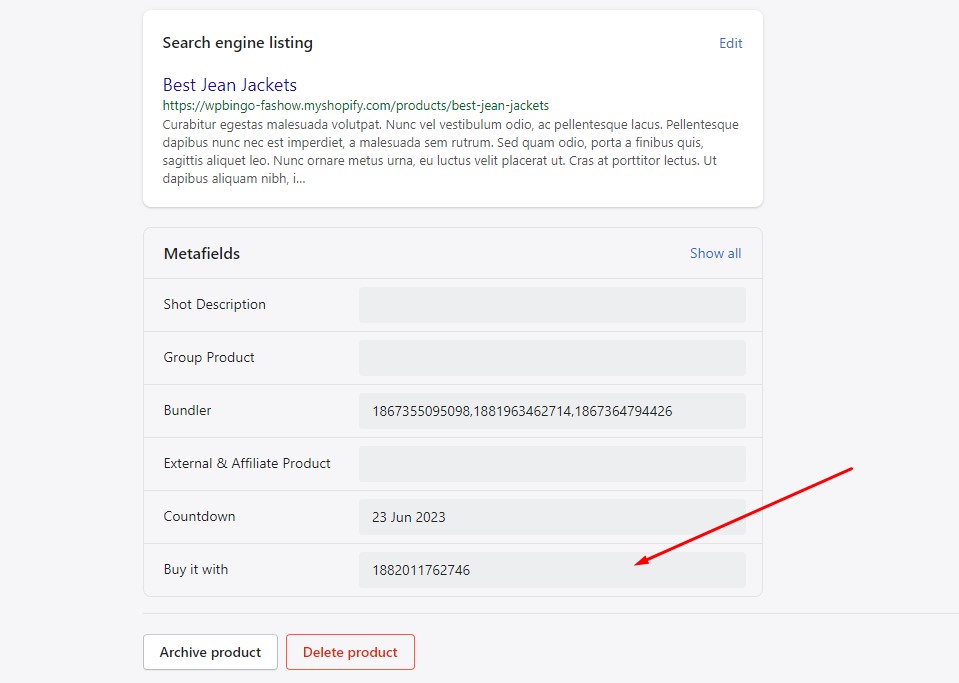
You can create a Buy it with product by adding the IDs you want to sell together in the Buy it with field
Front End

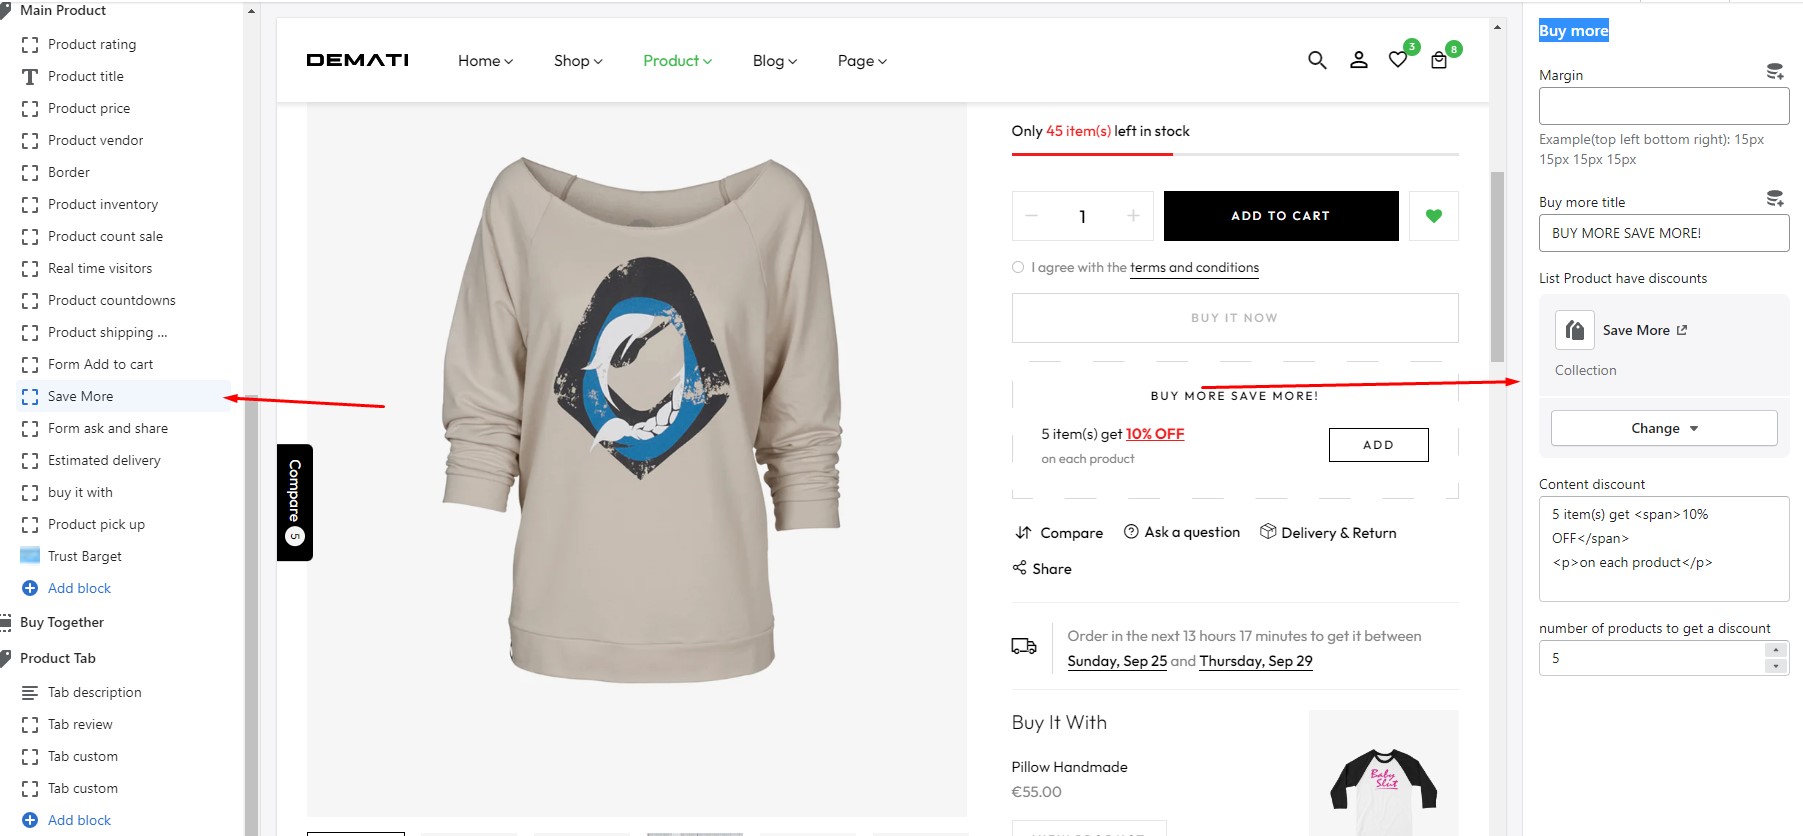
Buy more save more
You need to create Discounts here

Configure your Discounts

Select products that will receive Discounts here. Then you need to merge those products into collections

Select the collection that you have included those products here
Estimated delivery
The delivery date will be calculated from the current date plus the number of days you enter here
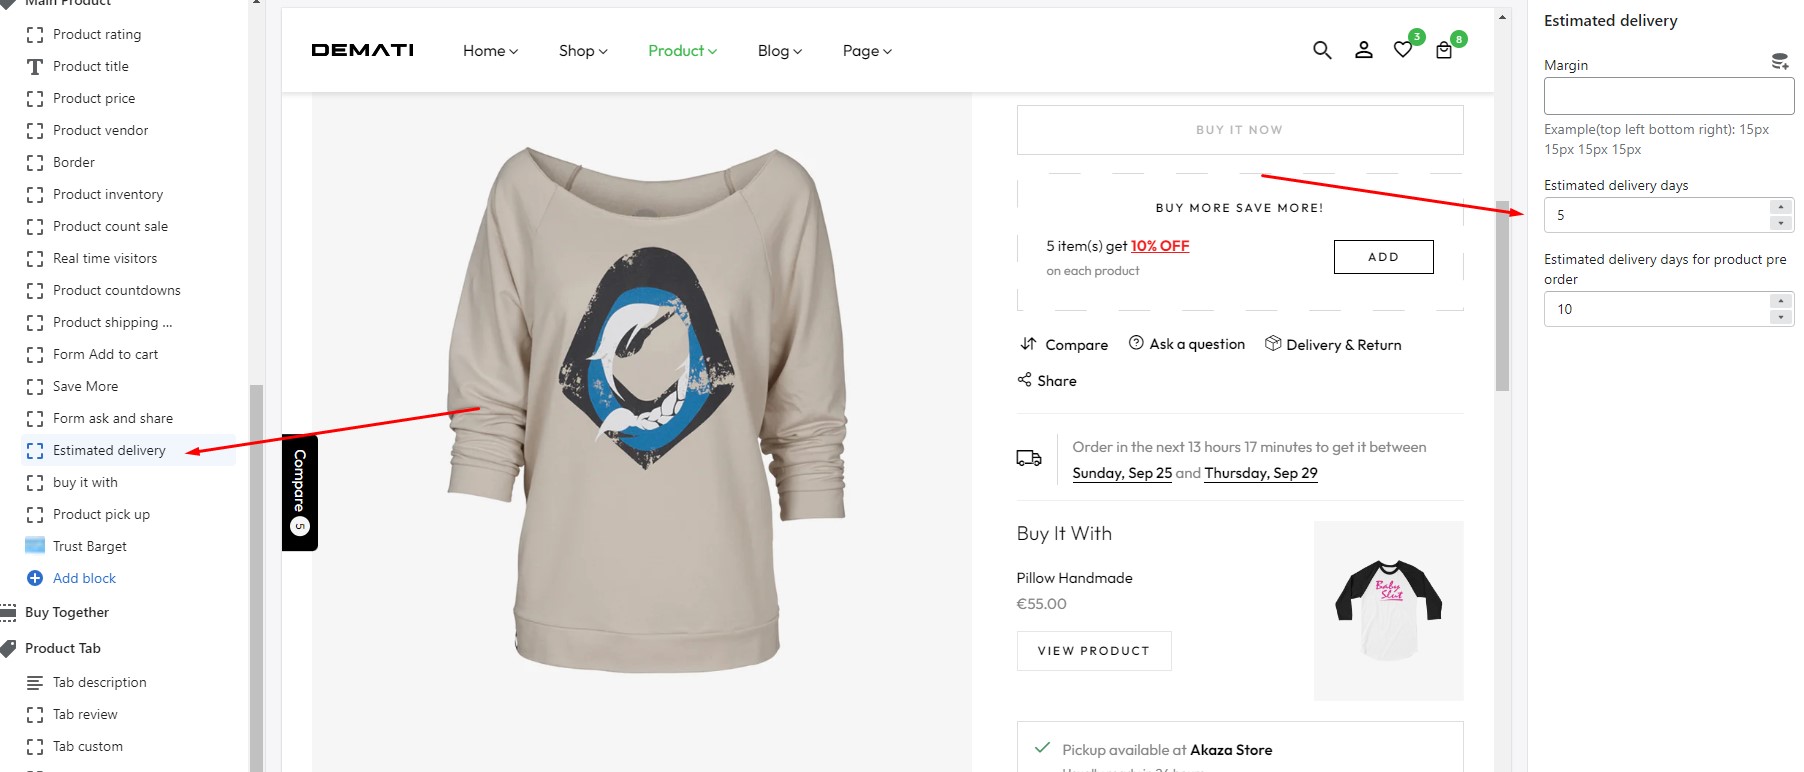
Products that are configured to Continue selling when out of stock and are no longer in stock will be counted as Pre Order products

The delivery time of the product will be calculated from the time it arrives at the warehouse
Product pick up
You need to configure the location here
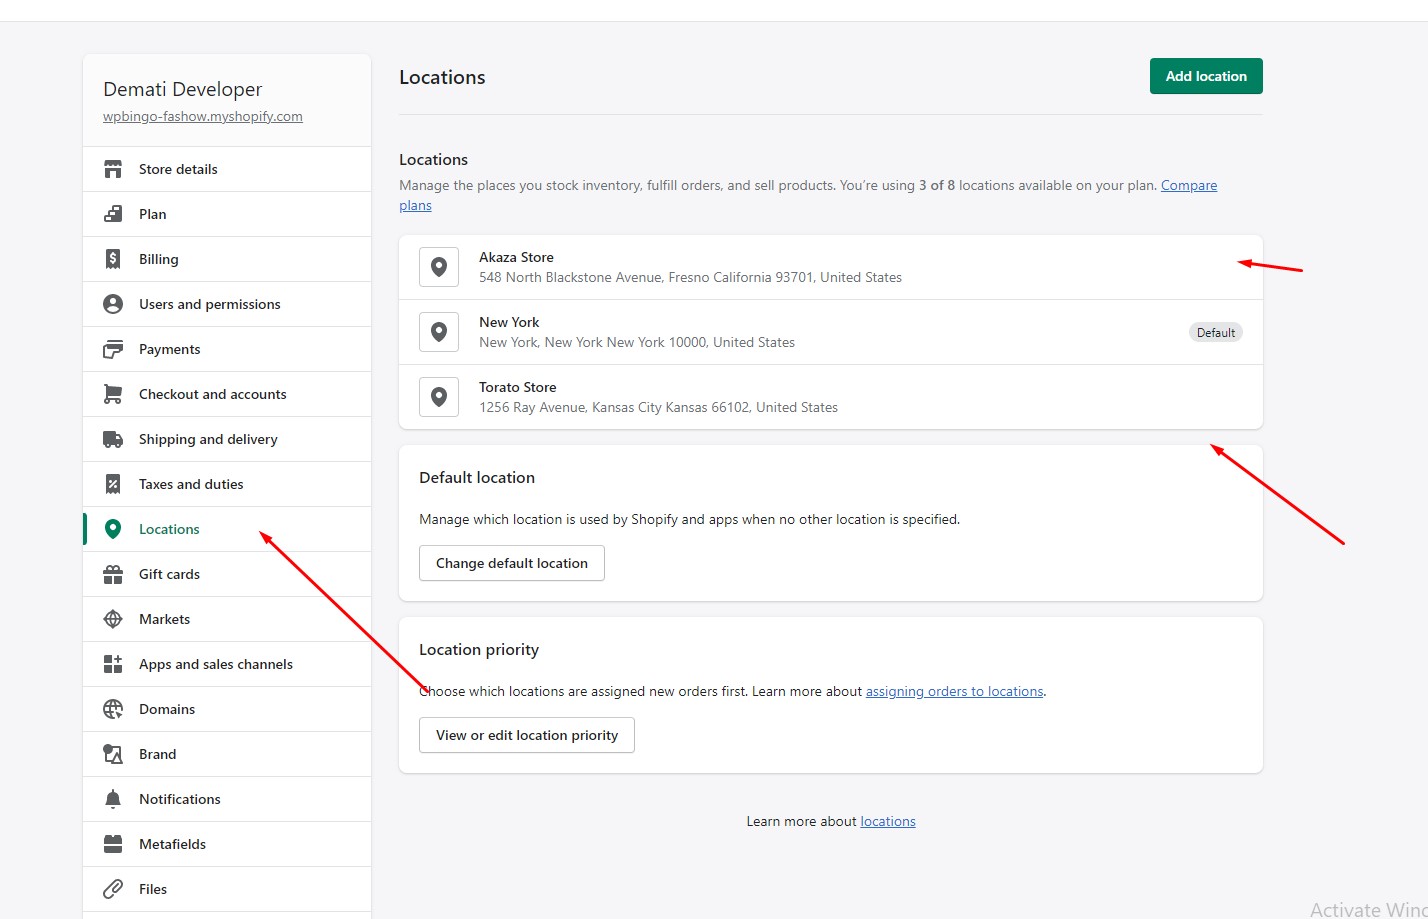
Then select Shipping and delivery
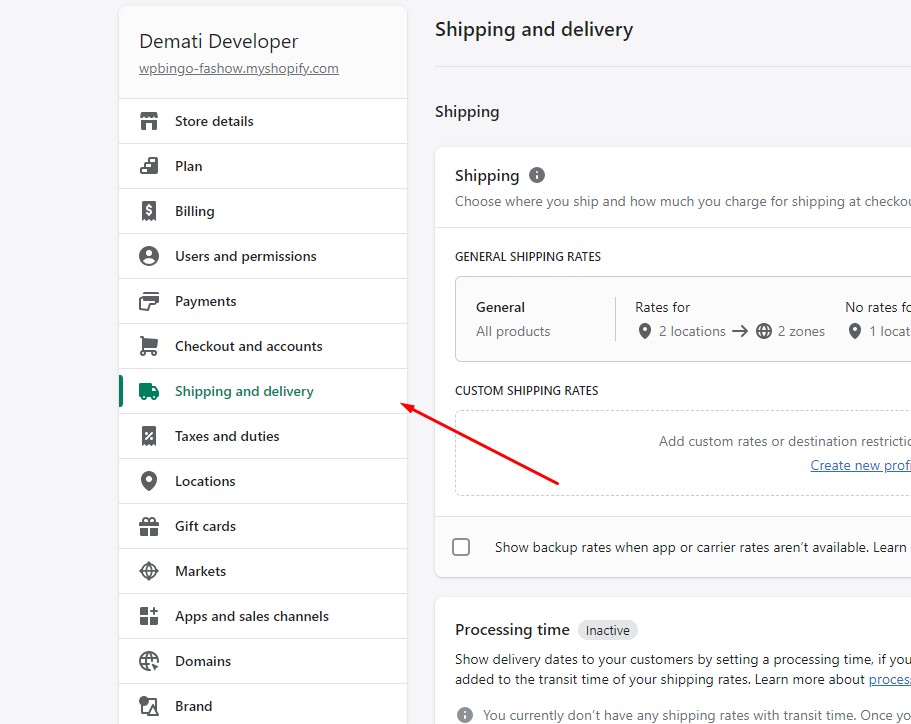
Go to Local pickup
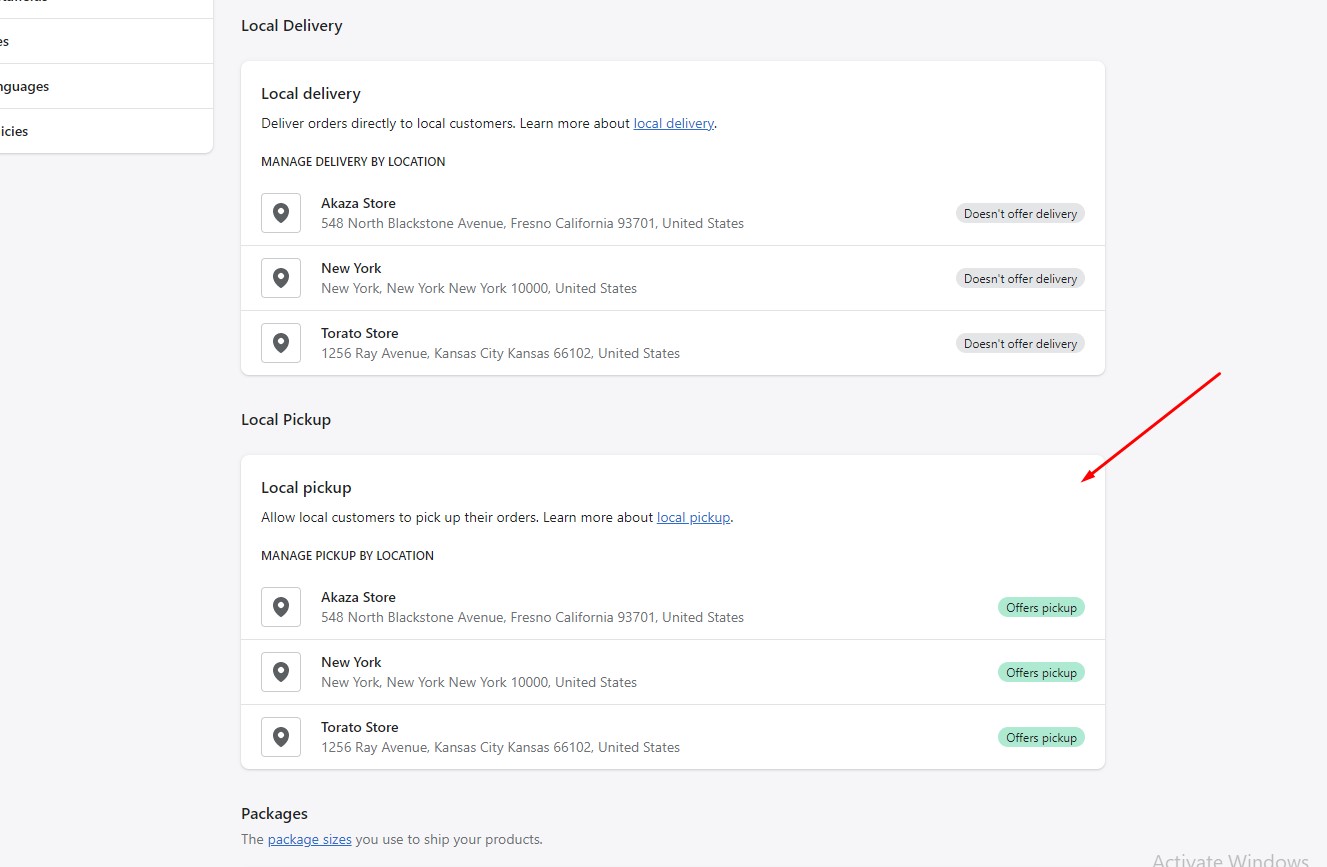
Select the locales and configure them
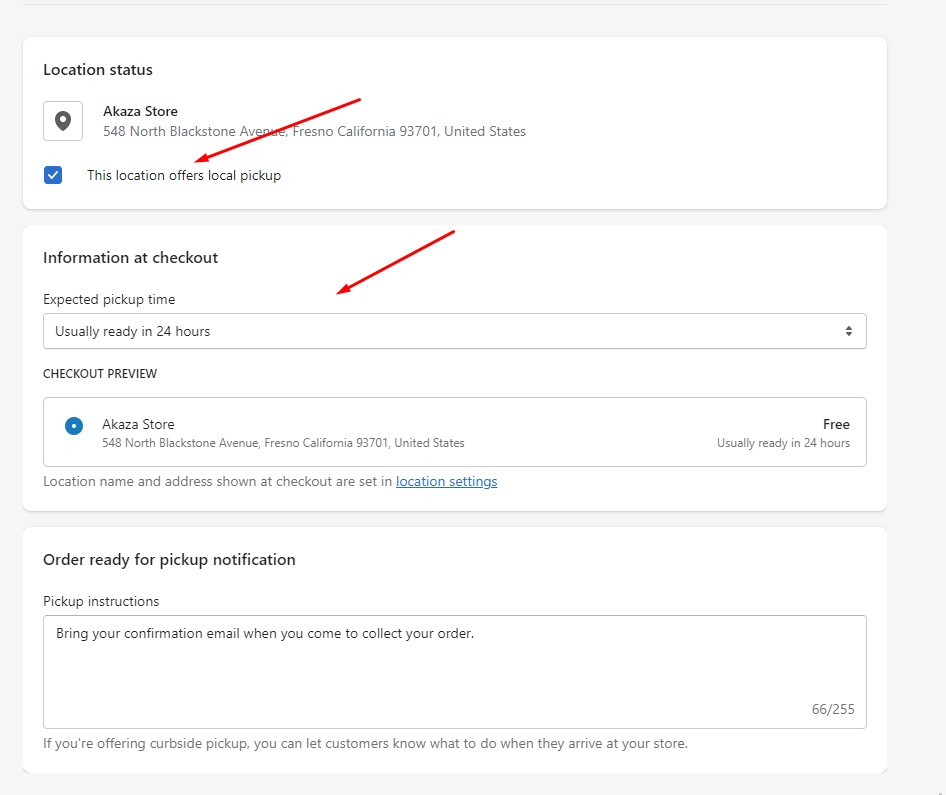
You can choose the location for the product here
It will be displayed here

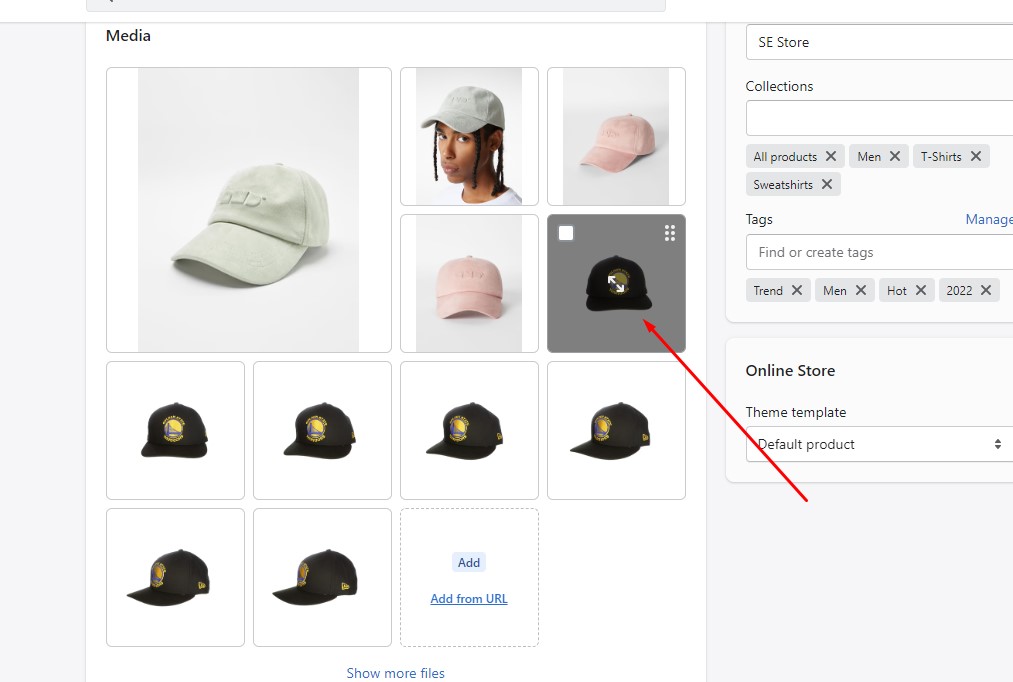
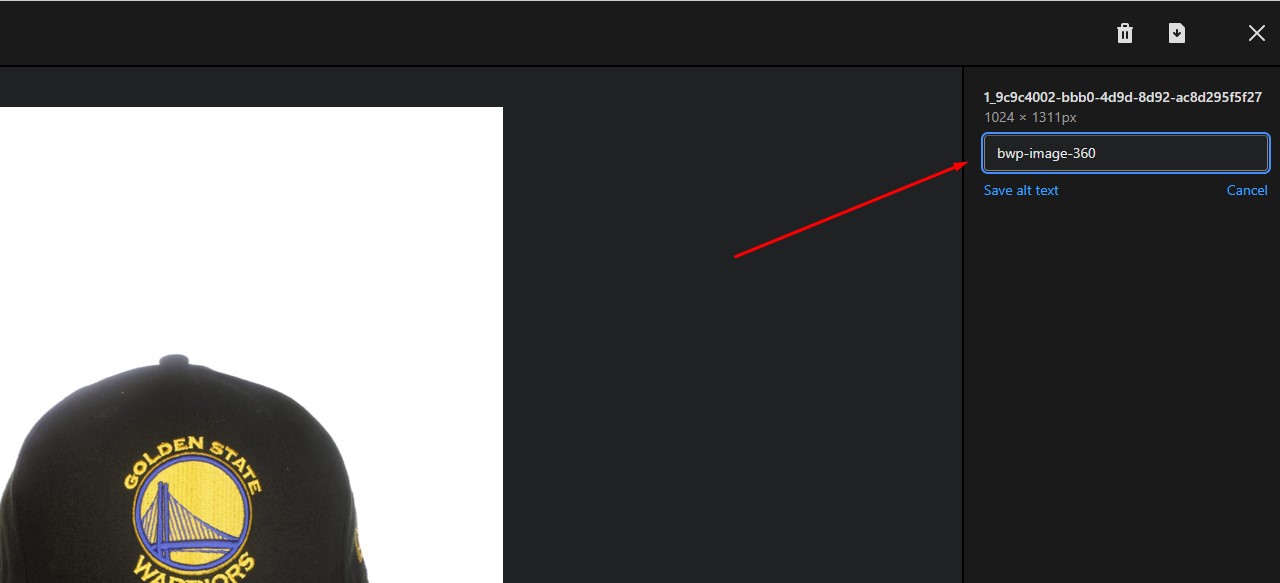
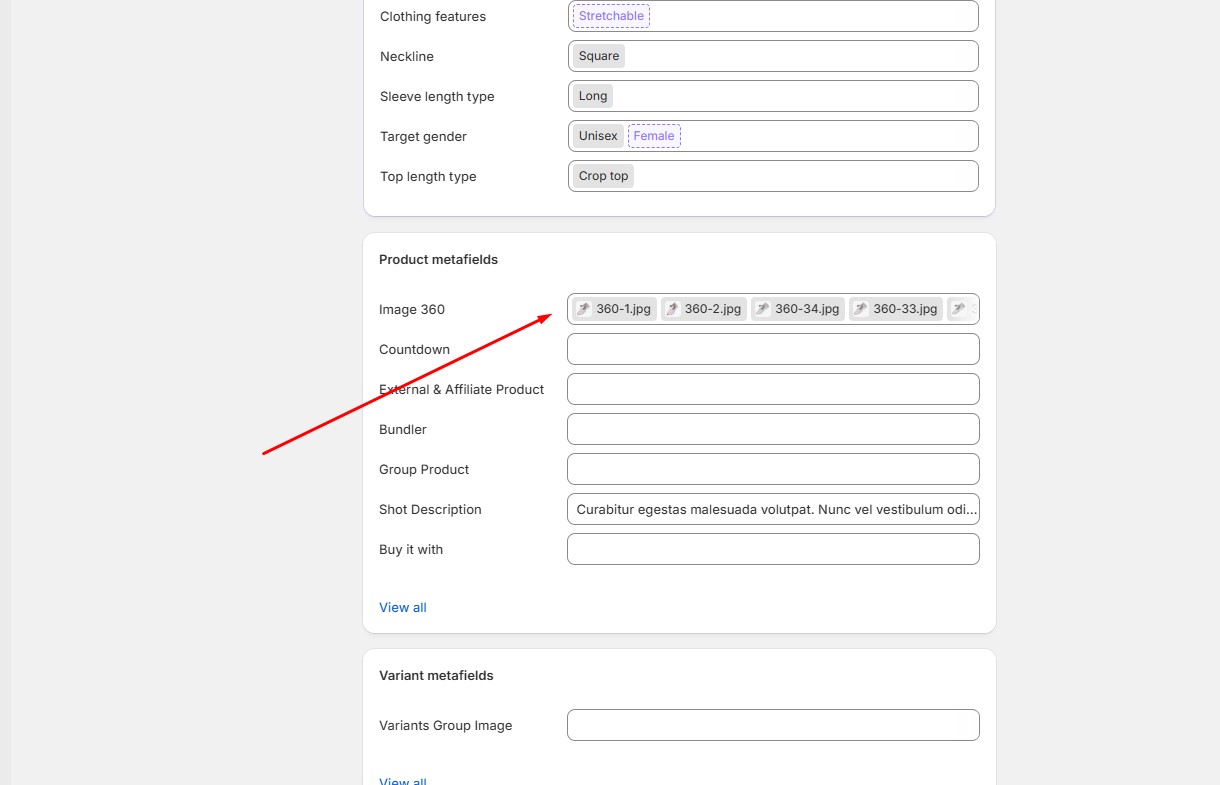
Product image 360
The images you use for image 360. You need to set the alt for that image to be ' bwp-image-360 '

I Create metafiled if you use theme:BOOSIN, LEMIE
1. create metafiled ' bwp.image_360 '
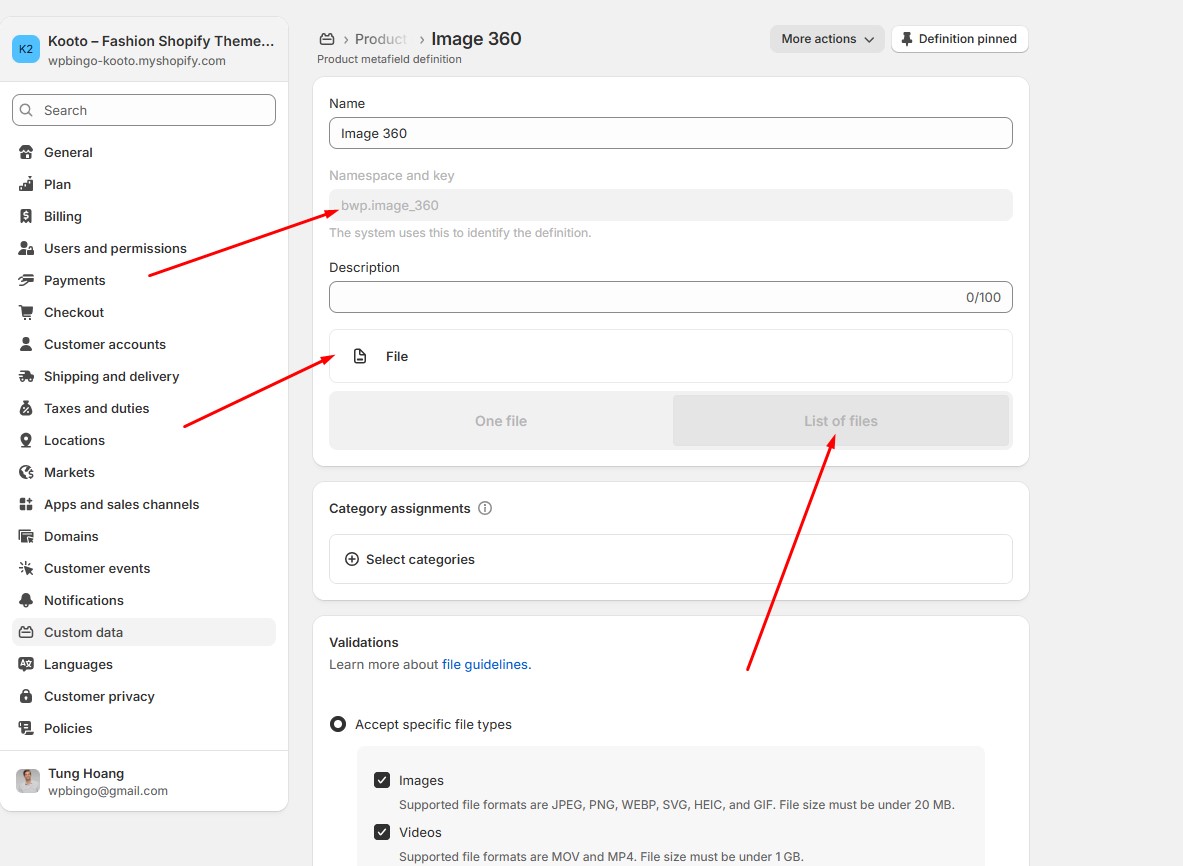
2. import your 360 photos
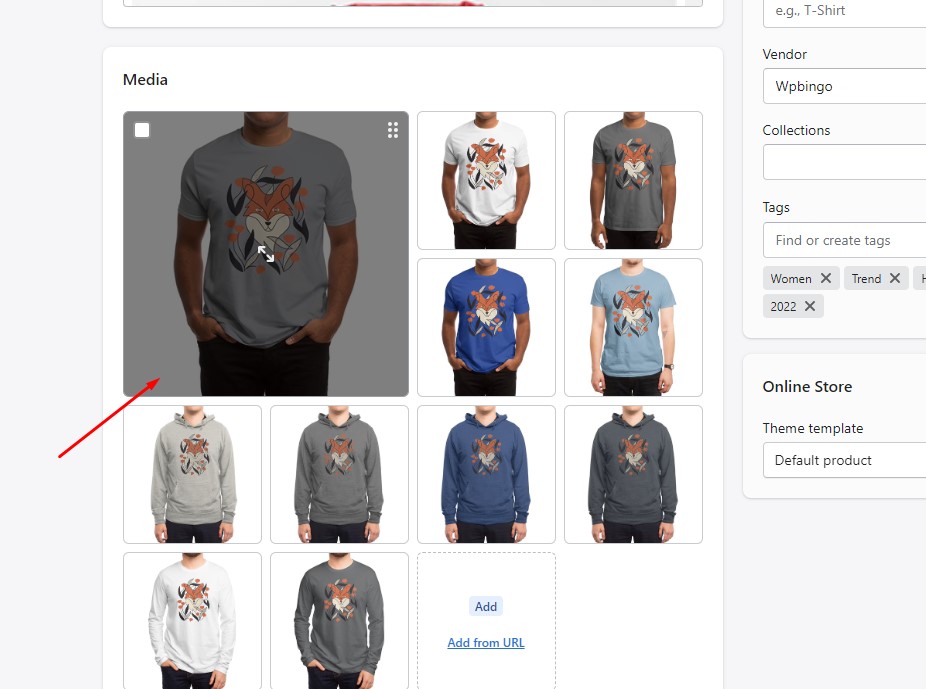
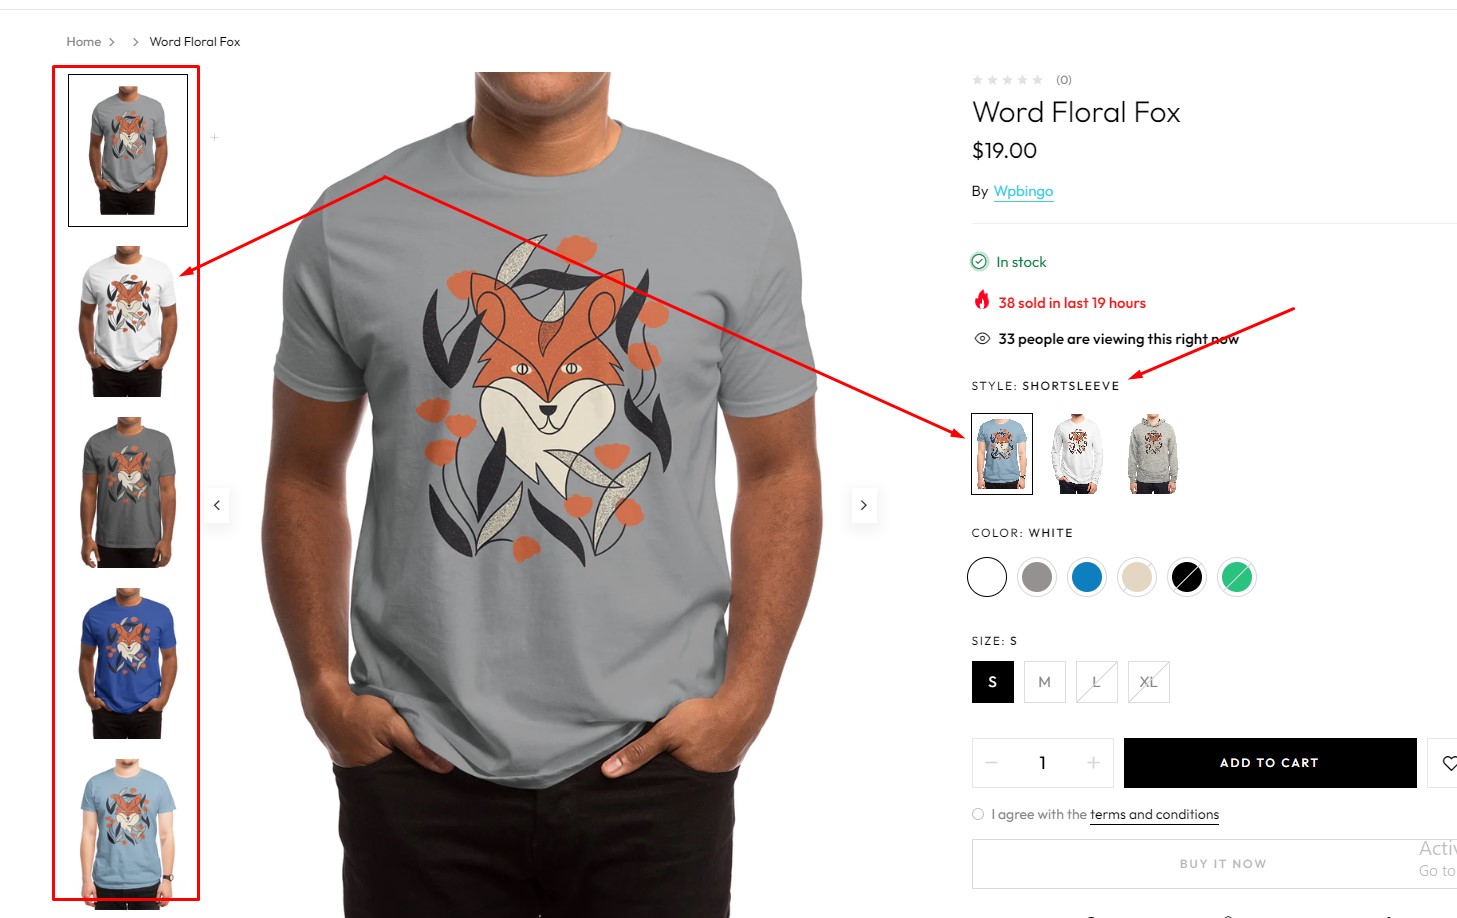
Variant Images Grouped
The images you want to group them into a variant. You need to set the alt for that image to match the variant you want
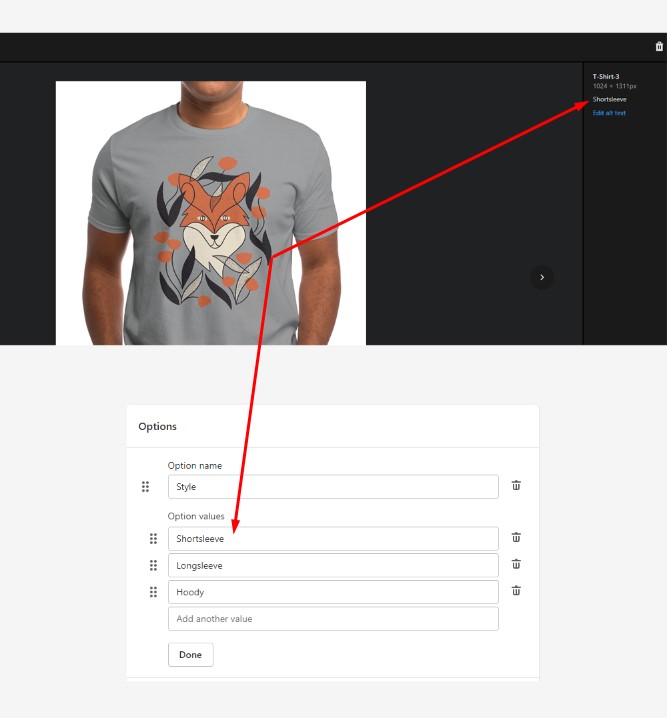
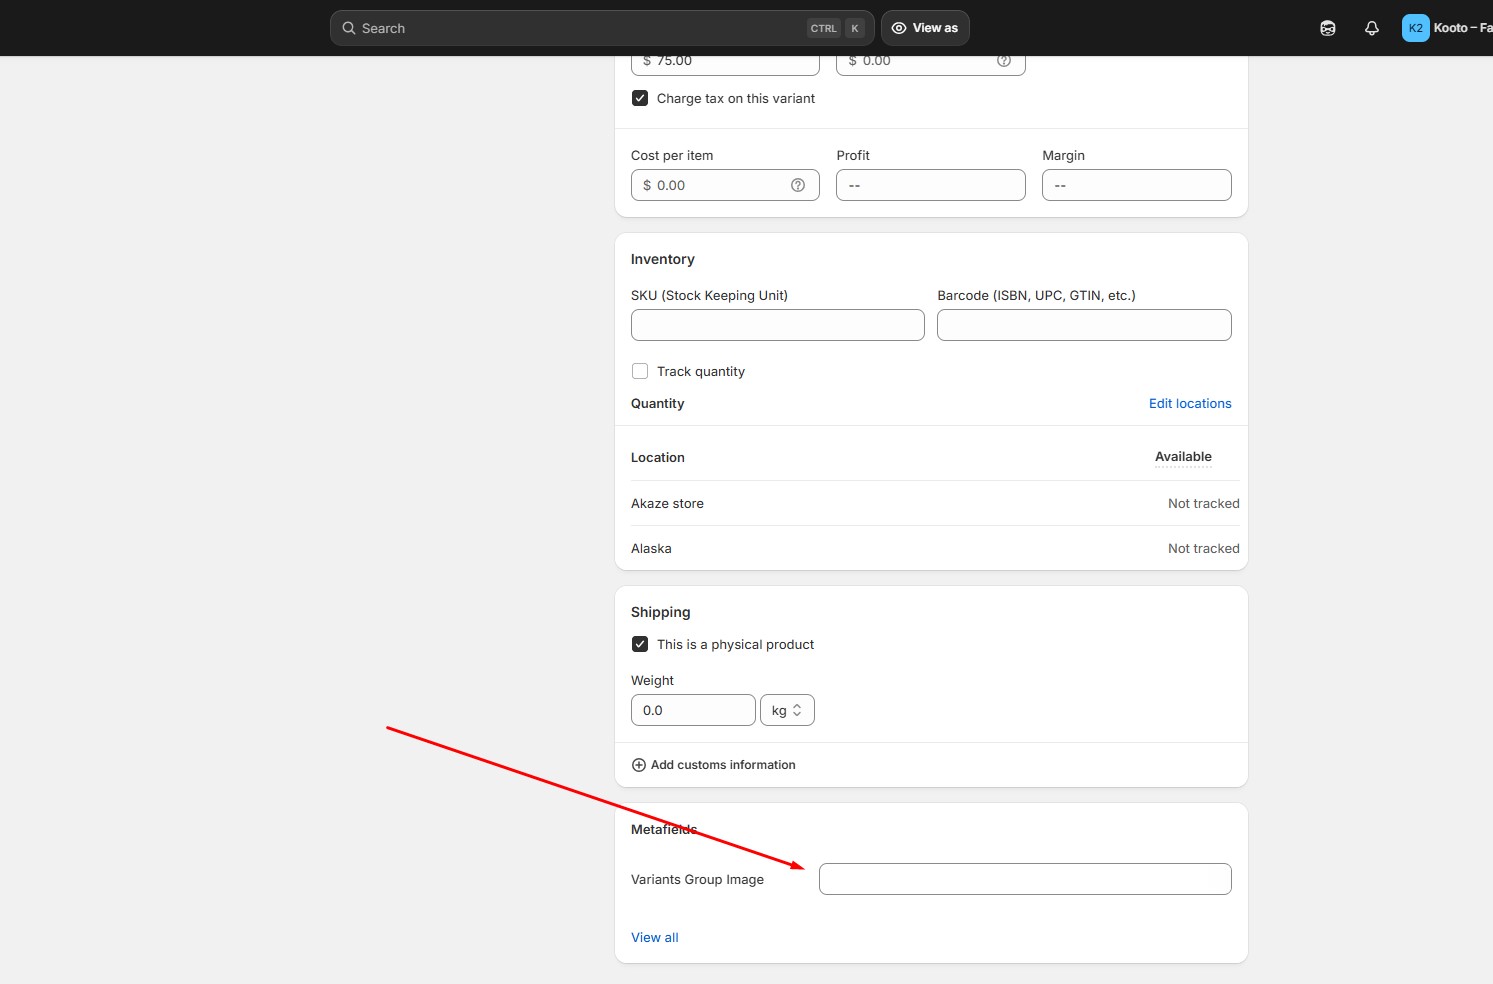
I Create metafile for variant if you use theme:BOOSIN, LEMIE
1. create metafiled ' bwp.variants_group_image '
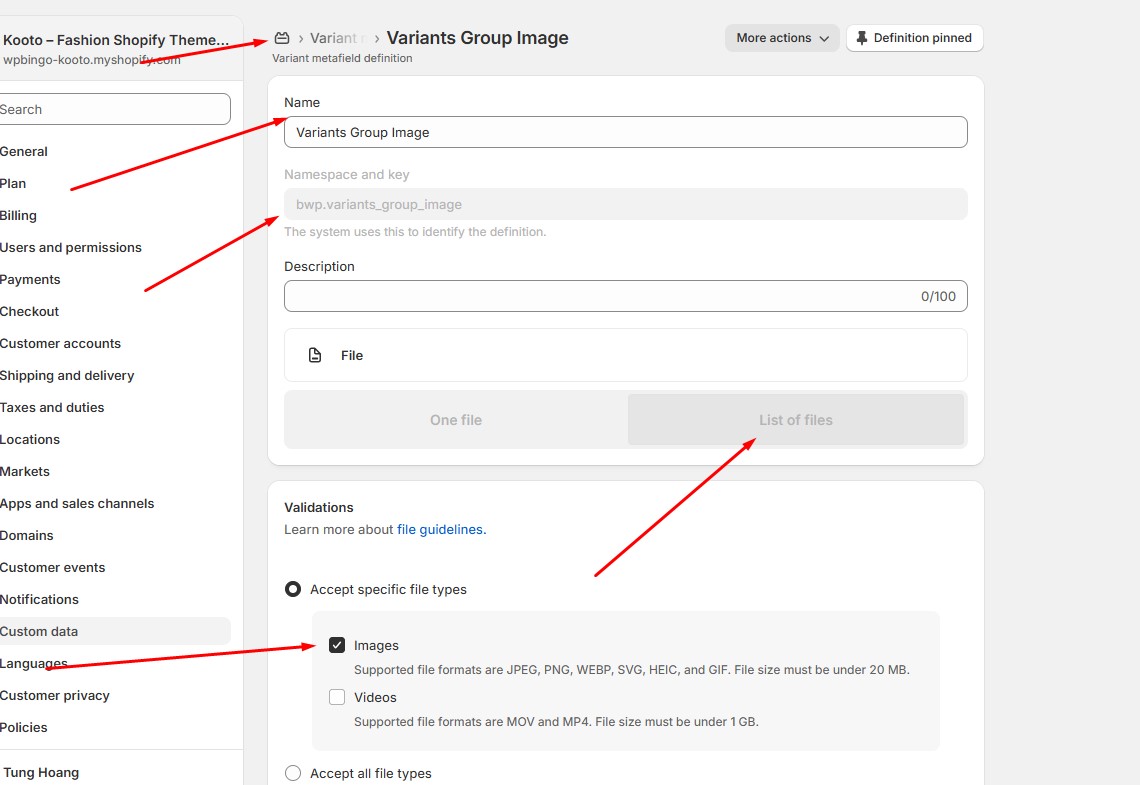
2. enter image for variations
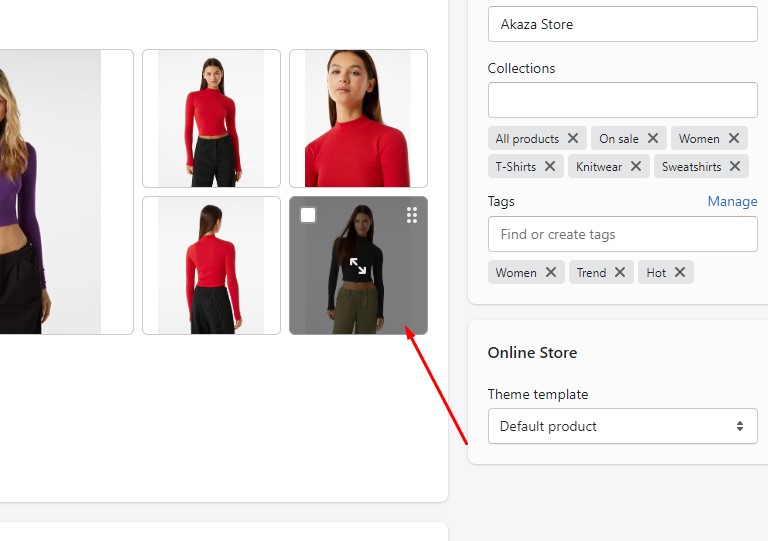
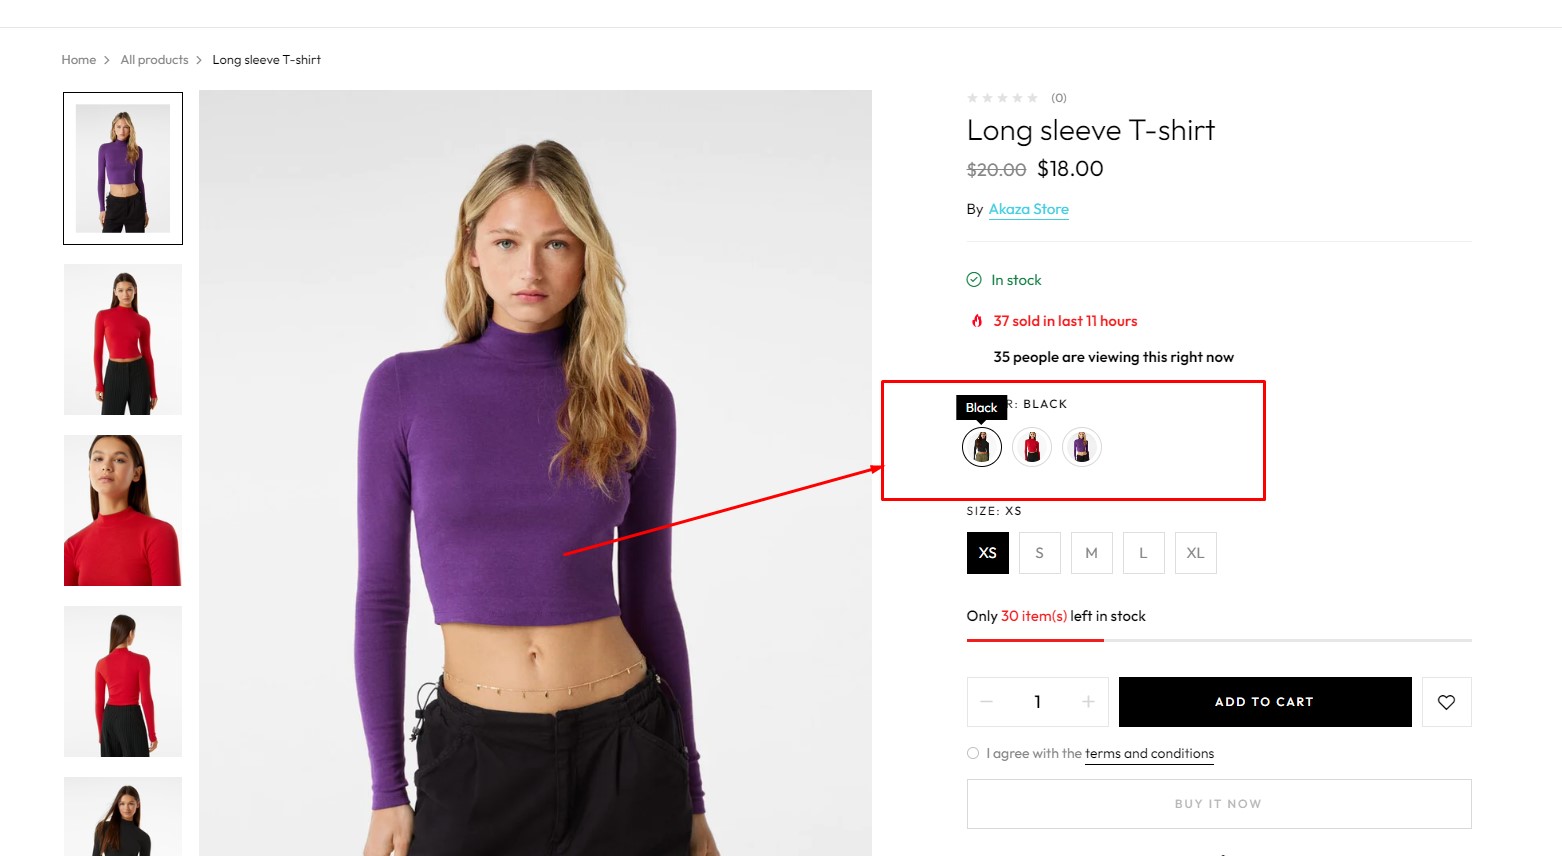
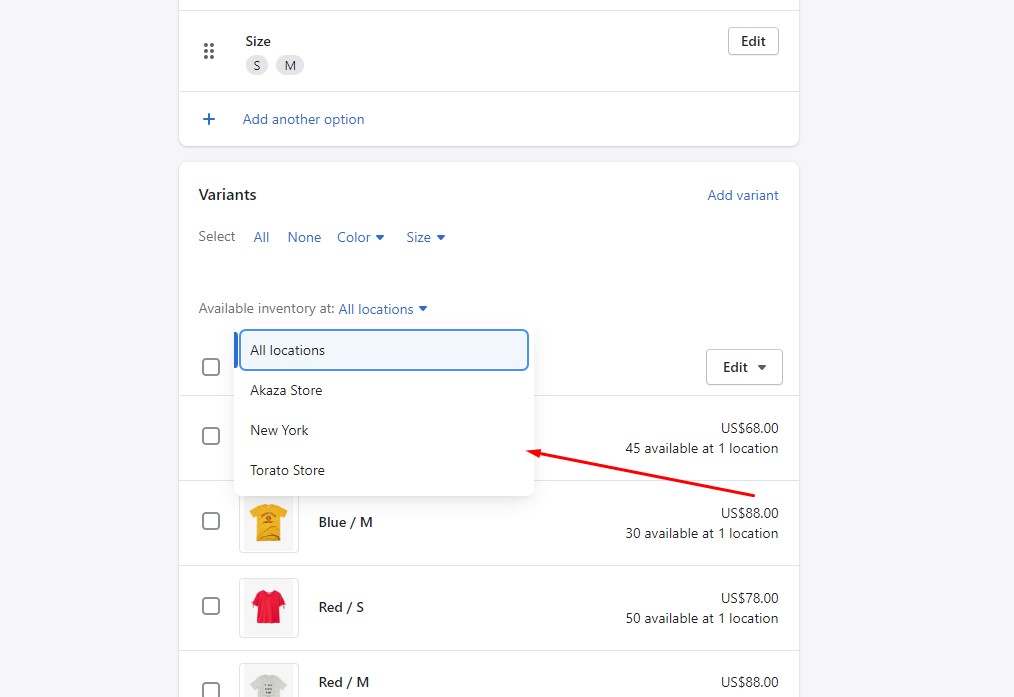
Variant Images Color
You can use product images for variants
Select the image you want to use as a variation. Then type alt for it. Alt must have the character "Color-" in front of it. Then go to the variant name you want to set as the image